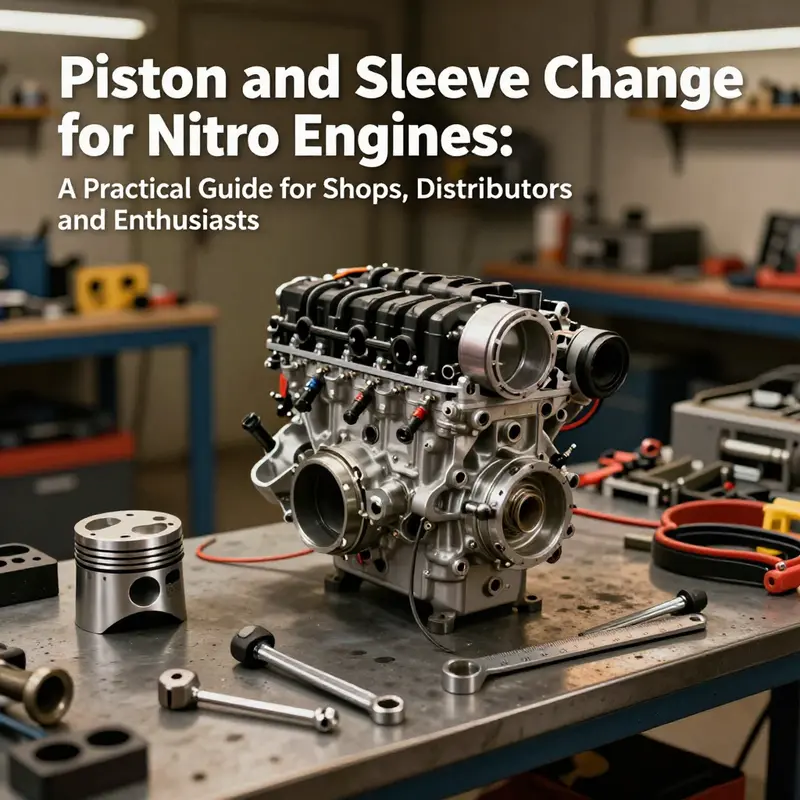
Nitro-powered engines, whether in hobby-grade motorcycles, compact autos, or service inventories, demand precise maintenance to sustain performance and reliability. Replacing the piston and sleeve (often called the cylinder liner) is a fundamental rebuild task that directly affects compression, sealing, and ring seating. When done correctly, it restores power, reduces blow-by, and extends engine life; done poorly, it can lead to accelerated wear, tuning instability, and costly downtime. This article targets motorcycle owners, auto owners, auto parts distributors and wholesalers, and auto repair shops and garages that service nitro engines or kits built around them. It lays out a four-chapter workflow that ties safety, mechanical disassembly, precise installation, and disciplined break-in into a cohesive process. Each section builds on the last: you start with a safe, clean workspace and correct tooling; you proceed to controlled disassembly and removal of old components; you then install the sleeve and piston with proper orientation, lubrication, and tolerances; and finally you execute a structured break-in plus inspection to verify seating and longevity. Practical notes on compatibility, material choices, and torque or fitment guidelines are woven throughout to help technicians, distributors, and shop crews align parts with engine specs. Throughout the guide, you’ll find actionable checklists, torque references, and verification steps designed to reduce missteps in a busy shop or showroom environment while keeping the focus squarely on the piston and sleeve change as the central task.
Calm, Controlled Prep: The Safety-First Path to Replacing a Nitro Engine’s Piston and Sleeve
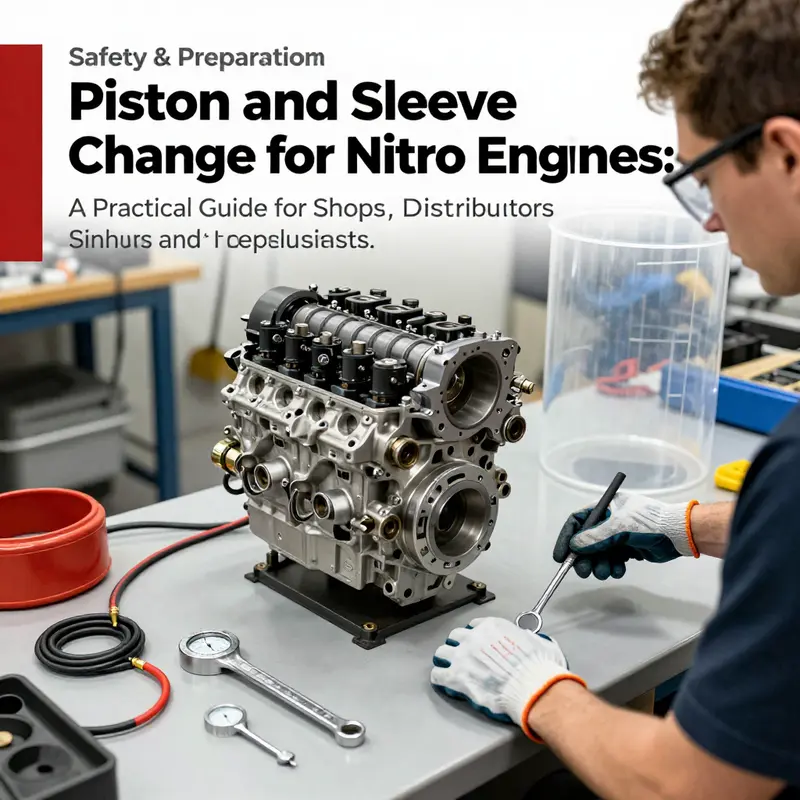
Safety and preparation are more than checklists; they are the quiet guardrails that keep a technical job from becoming a risk or a disappointment. When you work on a nitro engine, you are handling a high-performance internal combustion machine that runs hot, spins fast, and relies on flammable fuel. The goal of this chapter is to lay a steady, deliberate foundation. It explains how to set up your workspace, choose the right tools, and arrange the workflow so that every action you take is measured, deliberate, and aligned with both safety and accuracy. Start with the premise that preparation is performance, and you will approach the rebuild with confidence rather than guesswork.
The first priority is air and fire control. Nitro fuel is not a benign liquid; it is a mixture designed for combustion, and its vapors can ignite with disturbing ease when an errant spark or hot surface comes near. Work outdoors if possible, or in a workshop with a robust ventilation system and a strong exhaust setup that can move fumes away from your breathing space. An important corollary is to limit any ignition sources in the area. That means far away from open flames, hot soldering irons, or even small sparks from battery tools. The work environment should feel deliberate and calm, not chaotic. When you have to pause mid-task, you should be able to step away, reassess, and return without the urge to hurry through a risky moment.
Once you set the air for safety, you turn to personal protection. Safety glasses are not optional; they shield your eyes from fine metal shavings, solvent splashes, or the occasional misfire when removing a stubborn clip or pin. Heat-resistant gloves protect your hands from hot engine components and from spilled fuel, which, even in small amounts, can irritate skin or create a slipping hazard on a slick surface. Clothing should be snug enough to avoid catching on sharp edges and preferably made from natural fibers that don’t melt in a spark or heat. A clean bench, free of clutter, becomes part of your safety system because it minimizes the chance of dropping a fastener into the engine or chasing a tiny part across the floor. In short, you create a controlled theater in which the real work can unfold without unplanned interruptions or injuries.
Fuel handling deserves special attention because it sits at the core of a nitro engine’s identity. Before you even loosen a single fastener, drain the tank and cap the fuel line. Handling fuel with the engine still mounted carries a risk of spills that can create hot, slippery surfaces and a lingering odor that distracts from precision work. Keep an appropriate container ready to collect any drained fuel and dispose of it in accordance with local regulations. If fuel is inadvertently left sitting in lines, it can siphon or leak into passages later, complicating reassembly. The principle is straightforward: minimize exposure, control the flow, and never work near ignition sources while fuel is present. Once the fuel is drained, you can proceed with the mechanical tasks with a clearer mind and a more predictable workspace.
Cooling is another essential layer. High-performance engines push heat to the edge, especially during the break-in phase after a piston and sleeve replacement. Allow ample cool-down time between disassembly and reassembly, particularly if you’ve had to apply heat to loosen a stubborn sleeve or if the surrounding metal is still warm from earlier work. Rushing cooling can lead to thermal shock, warping, or misalignment later in the rebuild. The principle here is patience as a form of protection. A few extra minutes of cooling can save a lot of trouble when you reinstall the cylinder, the head, and the exhaust. With safety and cooling accounted for, you move on to the setup of tools and materials, which act as the bridge between safe practice and precise execution.
The toolkit you assemble is more than a collection of items; it is a small, dedicated system designed to deliver accuracy while staying within safety margins. You will need a piston puller to extract the piston from the bore without scoring the surfaces, a sleeve installer or press, a torque wrench for precise fastening, feeler gauges for initial clearances, degreaser or solvent for cleaning, new gaskets, and a correct replacement piston and sleeve kit that matches the engine’s specifications, typically described in terms of displacement and cylinder configuration. Include a soft mallet and a heat-resistant brush, but avoid metal-on-metal prying tools that could gouge the bore. A high-quality assembly lube or sleeve installation grease keeps parts moving where metal would otherwise seize, especially during the initial phase when the rings are seating. Having the right parts on hand is not a luxury; it is a prerequisite for maintaining tolerances and avoiding the common pitfall of trying to improvise with incompatible components.
As you lay out the parts, take a moment to confirm the compatibility and the orientation. Piston rings are not identical; the top ring usually carries a marking indicating the side that should face up. Misorienting rings will quickly degrade compression and will complicate break-in. Sleeve fit is equally sensitive. The new sleeve must slide into the bore with minimal resistance, and the outer surface should be evenly lubricated to avoid galling as it enters the cylinder block. If heat is used to ease the sleeve into position, apply it cautiously and evenly, watching for any signs of warping or unusual resistance. If the bore shows scoring, cracks, or abnormal wear, the decision to proceed should be re-evaluated. A damaged bore can negate the benefits of a sleeve replacement and may require professional machining or a different block altogether. It is the moment when patient assessment saves both time and future headaches.
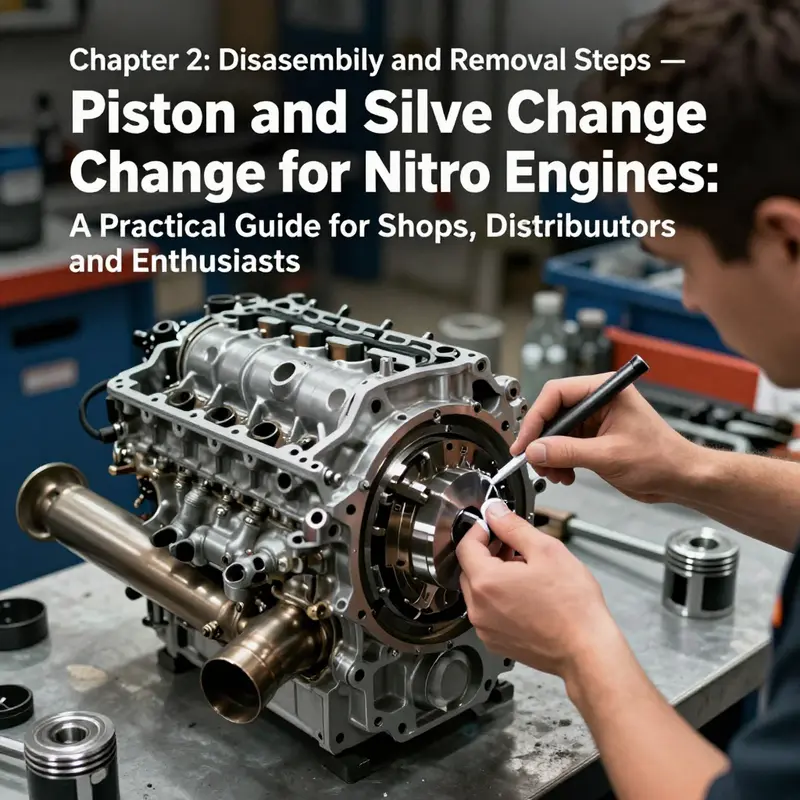
With the parts verified and the workspace primed, you move toward the disassembly phase. If the engine is still mounted, carefully detach the power system and the cooling system to reduce the risk of accidental contact with hot surfaces. The carburetor and fuel lines should be capped and set aside in a way that prevents any drainage into the intake tract during reassembly. The exhaust and muffler come off next, followed by the flywheel, which is often secured by a central nut and may require a flywheel puller if it resists stubbornly. The crankshaft end becomes accessible only after the flywheel is removed, so you proceed with caution, ensuring you support the shaft to avoid bending or misalignment. When you reach the piston and sleeve, the old components can be removed using the piston puller and, if necessary, a sleeve puller. The sleeve, in particular, may be resistant to removal if it has bonded to the bore. Gentle heat around the cylinder can aid loosening, but avoid overheating because that can warp the block or damage adjacent components. In this moment, the value of the safety-first mindset becomes clear: a hurried approach can turn a straightforward swap into a misalignment, a scuff, or a crack that undermines the rebuild’s integrity.
Inspecting the cylinder bore after removal is a critical checkpoint. A careful eye detects micro-scratches, scoring, and any signs of fatigue that may have accumulated over time. If the bore shows heavy scoring, the block may be compromised beyond a simple sleeve replacement. In such cases, the decision to align everything with new sleeves and pistons should be weighed against the engine’s overall health and the intended use. A clean, well-lit work surface helps you examine the bore from multiple angles, confirming the absence of hidden imperfections. The cleanliness of the block is not a cosmetic concern; it is a practical prerequisite for achieving a snug sleeve fit and a reliable seal between the head, gasket, and exhaust system later. Degreasing the surfaces and wiping away solvent residues ensures that no film remains that might interfere with sealing or seating tolerances.
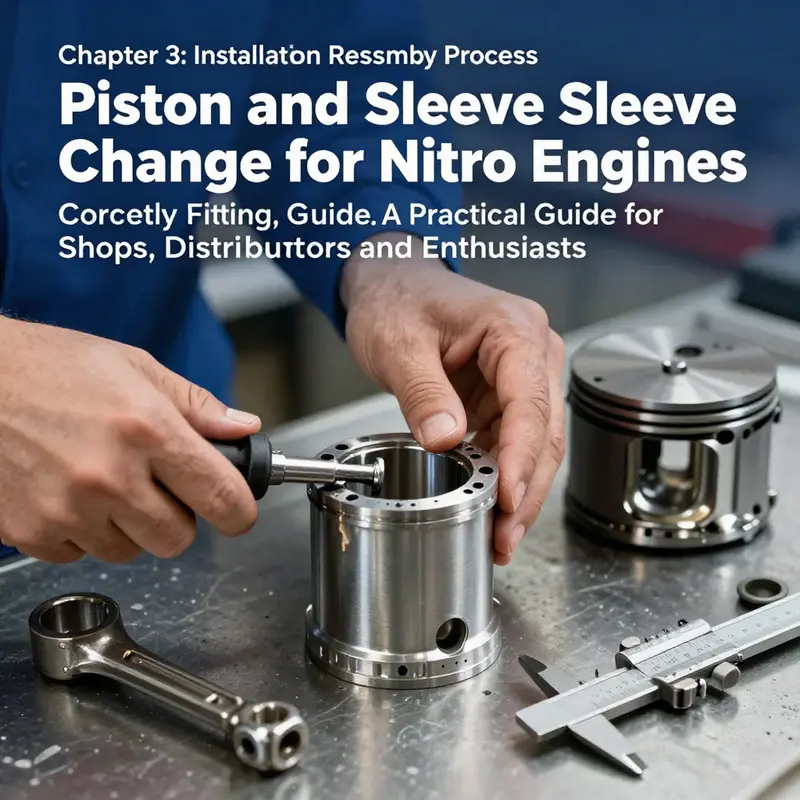
Now you are ready to install the new sleeve, which marks the transition from preparation to active assembly. A thin, even layer of high-temperature engine oil or sleeve installation grease is applied to the outer diameter of the new sleeve. This lubrication makes insertion smoother and helps prevent scoring as the sleeve settles into place. The sleeve should slide into the bore with a controlled, deliberate pressure, using the installer tool or a soft mallet if needed. The goal is a precise, interference-free fit that does not introduce misalignment or binding. If resistance is encountered, pause to reassess alignment and lubrication. Forcing a sleeve is a sure way to create an oval bore or nick the edge of the block. Once the sleeve seats properly, you recheck the bore’s smoothness and measure the sled of alignment. A quick spin by hand, feeling the resistance, reassures you that the sleeve is now stable and ready for the piston.
Installing the new piston follows a similar rhythm of careful preparation and gentle action. A light film of engine oil goes on the piston skirt and rings, reducing friction as the piston moves within the sleeve during the early stages of rotation. The piston is then guided into the bore, with attention paid to ring orientation so that the top ring’s marking clearly indicates the side facing upward. The wrist pin is inserted through the piston and connecting rod, with snap rings seated securely in their grooves. The integrity of the wrist pin is essential for reliable engine operation and safe vertical alignment of the piston as it travels through the stroke. Any wobble here will translate into vibration, accelerated wear, and a loss of compression. As you press forward with the installation, you keep the assembly aligned with the crankshaft and other components, mindful of keeping tolerances within the manufacturer’s recommendations.
Reassembly of the engine then becomes a test of your meticulousness. The crankshaft is reinstalled with careful attention to end play and smooth rotation. The flywheel is reattached with an appropriate torque specification, followed by reassembly of the carburetor, air filter, and exhaust. Fuel lines are reconnected, and the tank is refilled with the appropriate fuel mixture. At this stage, the engine’s internal surfaces and external seals should be clean and free of tools or debris that could compromise the seal or intake flow. A final sweep of the fasteners ensures nothing has been left loose. This is not merely about finishing a job; it is about restoring confidence in the engine’s reliability after a substantial internal change.
Before you start the engine, you perform a series of final checks that reflect the chapter’s safety-first ethos. Ensure there are no tools or rags tucked into the exhaust path or around moving parts. Confirm that the timing is correct and that the fuel mixture, fueled by the tank’s input, matches the engine’s specifications for break-in. A careful leak test can be performed by applying a light soap-and-water solution around joints to detect any pressure loss. If no leaks appear and the engine rotates smoothly by hand, the system is ready for a cautious initial run. The break-in procedure is intentionally conservative, often involving running the engine at partial throttle for a period to allow rings to seat properly and to ensure the piston and sleeve adapt to each other under load. The process is slow but essential, as a well-executed break-in can dramatically extend the life of the rebuilt assembly and improve performance over the long term.
The broader lesson of safety and preparation is not only about following a sequence. It is about cultivating a mindset that respects the engine’s physics and the tools you use. When you understand the heat, the pressure, and the precision required to maintain tolerance, you approach the rebuild with patience and care. You also become attuned to the signs of trouble: unusual resistance, a change in the feel of manual rotation, or a tendency for the piston to bind. Each of these signals deserves attention rather than dismissal. The chapter you are reading enshrines this approach as a continuous practice rather than a single event. In the end, the work is not just about swapping parts; it is about preserving a system that depends on exacting standards and deliberate action.
For readers who want to deepen their understanding of the constructive parts involved in engine sleeves and related components, a quick primer can be found in resources that describe what sleeves are and how they function in different engine architectures. What are engine sleeves? This background helps with decisions about sleeve material and fit, particularly when choosing aftermarket versus original equipment pieces. While the specifics of each model vary, the safe approach—careful measurement, proper lubrication, correct orientation, and deliberate assembly—remains consistent across engines and brands. That consistency is what allows hobbyists to pursue reliable performance gains without sacrificing safety or long-term reliability.
Finally, while this chapter emphasizes the safety and preparatory steps, it also points toward the broader technical framework that supports every rebuild. For a deeper dive into the standards and engineering considerations behind pistons and sleeves, consult reputable technical references and manufacturer documentation. External resources provide a broader perspective on materials, tolerances, and integration within the overall engine design. For a detailed, standards-based overview of piston kits and engineering practices, see MAHLE’s official site. MAHLE piston kits and engineering standards.
null
null
Precision Inside the Ring: A Cohesive Guide to Replacing the Piston and Sleeve in a Nitro RC Engine
Replacing the piston and sleeve in a nitro RC engine is more than a routine maintenance task. It is a careful choreography of precision, cleanliness, and respect for tolerances that keep an engine spinning smoothly rather than grinding to a halt. When done correctly, the process restores compression, minimizes oil consumption, and refreshes the engine’s performance envelope. When rushed or sloppy, tiny burrs, misalignment, or dry starts can set up a cycle of wear that shortens the engine’s life. The following narrative treats the work as a singular, continuous effort, weaving safety, preparation, measurement, installation, and break‑in into a single, flowing practice rather than a checklist that stops at the moment you drop in a new sleeve. The goal is not just to swap parts but to restore integration between piston, rings, cylinder bore, and the crankcase so that the engine breathes evenly again and seals reliably at operating temps.
Begin with the understanding that the process hinges on two moving parts working in concert: the piston itself and the sleeve, or cylinder liner, that forms the bore. The sleeve provides a nearly uniform inner surface for the piston rings to ride against. The fit between the piston and bore—often described as the clearance—determines how well the engine creates compression, how much oil is burned, and how the rings seat during the first hours of operation. Any mishandling at this stage reverberates through the entire engine. With that in mind, the first act is safety and organization. The engine should be completely cool, and the work area must be clean, well lit, and free of dust that could lodge in niches when parts are in motion. Gather the right tools: a piston wrench, a ring compressor sized for your engine, appropriate feeler gauges and micrometers, cleaning solvent, lint-free rags, and a lubricant suitable for high‑temperature, high‑ RPM operation. Using genuine or high‑quality replacement parts is nonnegotiable. The exact kit you select should match your model’s displacement and design class, which in nitro engines typically means a kit designed for your engine’s bore and stroke. The emphasis is on compatibility and fit rather than brute force.
Disassembly begins with removing the engine from the chassis so you can work on a stable bench. Once free, the pathway to the critical components opens up: the exhaust, carburetor, and air intake must be removed to reveal the cylinder head and crankcase. The cylinder head bears the brunt of heat and pressure during operation, so a careful inspection here is worthwhile. Warping or damage to the head surface will prevent a reliable seal with the head gasket, so cleaning the mating surfaces thoroughly and examining them for flatness is prudent. If you see signs of distortion, it may be a sign that the block or head has experienced overheating or improper torque in a previous service. In that case, further machining or replacement may be required rather than a simple sleeve swap.
With the head removed, the next stage is to access the piston and sleeve assembly. A piston wrench becomes your scalpel here, enabling you to extract the old piston from the bore without marring the cylinder wall or the ring grooves. The ring grooves hold the piston rings, and those rings are the primary seal against the bore, controlling compression and oil control. Inspect the old piston and its rings for scoring, cracking, or stiction in the rings. A worn or damaged piston skirt or rings can migrate into the bore and create scuff marks or loss of compression that reappears even after a sleeve change. The sleeve itself may be seized or worn beyond a simple swap. In such cases, a sleeve puller helps coax the old liner free, but gentle heat applied to the cylinder block around the sleeve can ease the process. Do not rush with heat. The goal is to soften the fit enough for removal without warping the metal. The bore should reveal any deep scoring, lines, or cracks that might necessitate more extensive work beyond a straightforward sleeve replacement. If the bore shows wear beyond a technician’s tolerance, recourse to honing or professional machining may be warranted, or the block may need replacement.
The moment of measurement is where precision begins to define success. The inside diameter of the cylinder bore—measured at several points along the length using a micrometer—must be known with accuracy. This bore size guides the selection of the new sleeve so that when the piston enters the bore, the clearance lies within the manufacturer’s specified tolerance. This tolerance is not arbitrary; it is a balance between enabling the rings to seal effectively and preventing excessive wear or seizure under heat and pressure. The calculation is straightforward but unforgiving: you subtract the piston diameter from the bore diameter to determine radial clearance. In many hobbyist contexts, a typical permissible range for this clearance might be on the order of a few hundredths of a millimeter, often around 0.02 to 0.04 mm. If the clearance is larger than recommended, oil blow-by will increase and compression will fall; if it is too tight, the piston can seize as the metal expands with heat. The new piston must be measured with the same micrometer used on the bore to ensure a true match. The steps here are not merely ceremonial; they form the bedrock upon which the engine will live or die under load and heat.
Installing the new sleeve is a task that combines careful preparation with mechanical persuasion. Begin by thoroughly cleaning the cylinder bore with solvent to remove oil residue and any particulate matter. A clean bore is essential because any dirt can nick the new sleeve during insertion, creating micro‑scratches that ruin sealing and promote uneven wear. Apply a thin, even layer of a high‑quality lubricant to the outer diameter of the new sleeve. This lubrication reduces friction as the sleeve is pressed into place and helps prevent galling, a sticky, rough mating surface that can ruin the bore finish. The sleeve should be inserted using a sleeve installer tool or a precisely aligned press that keeps the sleeve perfectly perpendicular to the bore axis. A snug but not forced fit is the target. If there is resistance, recheck alignment and lubrication; forcing a sleeve can deform the liner or the cylinder block. The goal is a precise, coaxial seating that leaves no tilt or misalignment, because any offset invites uneven ring wear or compression loss.
Following sleeve installation, the piston goes back into the game. Lubricate the piston skirt and the inner walls of the bore lightly with a high‑quality engine oil or a dedicated assembly grease designed for RC engines. The rings must then be installed using a ring compressor sized for your piston. Pay close attention to ring orientation; the top ring often has a marked direction, such as TOP or UP, and the second ring is typically offset to accommodate ring gaps. The assembly should slide into the sleeve with a light, steady pressure rather than a shove that skews the rings or lifts a portion of the sleeve. A smooth, consistent insertion is the sign of proper alignment; if the piston binds, stop and recheck the sleeve’s seating and the ring gaps. Any binding indicates an interference issue that will become a failure point at start-up.
With the piston seated, the next phase is reassembly of the engine. This includes reinstalling the crankshaft and checking that it rotates freely. The flywheel, clutch hub, carburetor, and exhaust system must be returned to their places, and all fasteners torqued to the manufacturer’s specifications. The reason torque matters here goes beyond merely holding parts together. Overtightening can warp the cylinder head or strip threads in the crankcase, while under-tightening can allow vibration and micro-movements that degrade sealing and ring seating. Take care to clean mating surfaces again before reassembly, ensuring that no debris sneaks between the head gasket or the crankcase seams. Reconnect the fuel line and refill the tank only after the mechanical side is confirmed to be secure. A cautious approach at this stage pays dividends when you fire up the engine for the first time after service.
The final stage is the break‑in, a short but crucial period that cements the new piston rings against the bore walls. The break‑in procedure is not a ritual; it is a controlled conditioning of the dynamic seal. Run the engine at partial throttle for a prescribed period—often something like 10 to 15 minutes—so the rings can seat evenly against the cylinder walls. This period should be conducted at stable temperatures and with a sensorily calm environment where the engine can run without sudden accelerations or load changes that could skew seating. During break‑in, listen for unusual noises or any signs of oil leakage. If you detect smoke, a strong odor of fuel, or a loss of compression, stop the engine, recheck all the fasteners and seals, and inspect the sleeve and piston for any signs of interference or improper seating. After the break‑in, a routine check of oil marks and compression is wise before resuming more aggressive operation.
The knowledge behind these steps rests on a broader understanding of what sleeving means in engine design. Sleeves are not mere spacers; they define the inner surface against which the piston rings seal for compression and oil control. They must be manufactured to tolerances that align with the piston and rings and the overall dynamic behavior of the engine under heat and vibration. In high‑end contexts, materials such as forged steel, ductile iron, or specialty alloys are specified for certain performance profiles, and the choice influences wear, heat transfer, and ring seating. For most hobbyists, however, the daily practical concern is compatibility and proper fit. The emphasis should be on selecting a piston and sleeve kit that matches your engine’s bore, stroke, and operating regime, and on following the installation steps with care rather than chasing exotic materials. This approach yields reliable results while keeping the hobby accessible and enjoyable. As you navigate the process, it is helpful to keep in mind that the sleeve’s surface finish, the ring end gaps, and the piston’s skirt geometry work together as a system. When one element deviates from spec, even slightly, the entire seal and power delivery can suffer. That is why the measurements, the cleanliness, and the absence of forcing are the quiet guards against early failure.
To contextualize the practical details, consider the typical workflow as a single, continuous performance rather than a series of discrete tasks. Prepare the workspace, remove and inspect the existing assembly, measure the bore and the piston with care, select and insert the new sleeve with proper lubrication and alignment, install the piston with the rings properly oriented, reassemble the engine with attention to torque and cleanliness, and finally execute a disciplined break‑in. Each phase reinforces the next; a slight lapse in one part of the sequence can cascade into a seal failure or uneven wear later on. The discipline of the process is directly linked to the reliability of the engine under racing loads or high‑revolution operation. This is where patience pays dividends. It is better to take a little more time during setup than to chase intermittent failures after you have already reinstalled the engine in the chassis and tested it at speed.
In keeping with best practices, it is also important to acknowledge that the literature and manuals often stress matching materials and tolerances for high‑duty applications. While those considerations matter most in heavy‑duty or professionally engineered engines, hobbyists benefit most from choosing compatible, high‑quality aftermarket piston and sleeve kits designed specifically for their nitro model. Rely on official documentation from the component manufacturer for precise technical specifications and assembly nuances. This ensures your work aligns with the engine’s design intent and typical wear patterns observed in similar builds. For readers who want to deepen their understanding of sleeving in engines beyond the RC world, a concise primer on sleeving concepts provides a useful backdrop to the practical steps described here. See the discussion on What sleeving an engine means for a broader perspective on how liners influence engine behavior and longevity. What sleeving an engine means.
Ultimately, the aim is not merely to replace components but to restore the engine’s breathing and its sealing performance. When the piston and sleeve meet the bore with the right clearance and a flawless surface finish, the engine returns to a state where compression is crisp, fuel is burned efficiently, and the exhaust ports stay clean of excessive oil blow‑by. The moment you hear a smooth idle, feel a confident pull at mid‑range, and observe stable oil consumption after a few tanks of fuel, you know the process has paid off. The joy of a well‑executed rebuild is not in the moment of reattachment but in the hours of confident running that follow, when the engine behaves predictably under heat and load, and you can trust it to perform as you expect during a race or a controlled test session.
For readers seeking further depth or a practical corroboration of the steps outlined here, consult external expertise that delves into detailed, technician‑level guidance on piston and sleeve changes. A focused, technical reference, such as the RC Tech guide on replacing a piston and sleeve in an RC nitro engine, provides a complementary perspective and a real‑world workflow that aligns with the principles described above. This external resource helps reinforce the practicality of careful measurement, appropriate tooling, and methodical assembly, offering additional context that can be valuable when you plan your own rebuild project.
In sum, replacing the piston and sleeve in a nitro RC engine is a precision operation that rewards patience, meticulous preparation, and disciplined execution. When approached as a unified process, rather than a sequence of isolated tasks, the rebuild becomes an opportunity to re‑establish the engine’s harmony—its compression, its sealing, and its predictable response under load. The result is not just a fresh component set but a renewed sense of confidence in the machine you’ve built to perform under demanding conditions. With care, the engine returns to life as a cohesive, well‑behaved system that rewards the craft of precision work and the discipline of a thoughtful break‑in. For readers who want to explore related maintenance topics or expand their practical knowledge, there are several resources on engine sleeves, wear, and general upkeep that can offer additional insights as you plan future projects.
External reference: RC Tech – How to Replace a Piston and Sleeve in an RC Nitro Engine.
Precision in Motion: Break-In, Inspection, and the Technical Craft of Replacing Piston and Sleeve in Nitro Engines

Nitro engines are compact powerplants that whisk a blend of fuel, oil, and air through a tiny yet intensely engineered world. They operate at blistering RPMs and temperatures, where even minute tolerances decide whether a performance boost translates into smooth power delivery or unwelcome bluing of the exhaust and premature wear. Replacing the piston and sleeve is not mere part swapping; it is a restoration of the engine’s precision, a recalibration of the interplay between bore, rings, and piston. When done well, the rebuilt assembly breathes with a steadier compression, more consistent ring seating, and a reliability that rewards patient work and disciplined habits. When done poorly, it invites seizure, overheating, or erratic tuning that undermines every subsequent pass of the throttle. This chapter threads together the expectations, careful checks, and technique that make a piston and sleeve change a true rebuild rather than a quick swap, all while keeping the operation accessible to hobbyists who respect the engine’s tinybut-mighty physics.
Before any wrench turns, the environment and the mindset matter just as much as the parts themselves. The engine should be completely cool, not just after a brief rest, to prevent heat-related distortion during reassembly. The fuel line is disconnected and the tank drained so that a sudden surge of fuel cannot flood the carburetor during the reassembly, which could skew compression measurements or cause a dangerous misfire when first started. The work surface should be stable, well-lit, and free from tools that could rattle loose or be mistaken for small engine components. The kit of replacement parts must match the engine’s specs in displacement, porting, and the specific sleeve and piston design. Precision is the north star here; every dimension matters, from bore diameter to ring end gap, and even the orientation of the piston’s engraving or mark when present.
Inspection begins long before the old parts are out. A meticulous pre-installation checks the fitment and condition of both the new piston sleeve assembly and the engine block. Look for manufacturing flaws on the new parts—cracks, warps, or surface imperfections can doom a break-in if left unaddressed. A mismatch in piston diameter and bore size translates to either excess clearance or binding, both of which spell poor compression or, worse, seizure once heat and friction climb. The cylinder wall must be free of scoring, pitting, or deformation; a worn bore is not a candidate for a quick re-seal, but a candidate for reboring or replacement. End gaps in the piston rings matter too; the typical spec sits in a tight range, and even a minor over- or under-gap shifts the engine’s compression and timing margins. A reliable rule of thumb often cited in hobbyist communities—use a micrometer to verify piston and bore clearance within a narrow window—helps prevent surprises when the engine warms up after the first few breaks.
Once the inspection confirms the parts’ integrity, the process proceeds to disassembly and careful extraction of the old components. The exhaust, carburetor, and other peripherals are removed to clear the path to the crank and cylinder. The wrist pin is taken out with appropriate tools to separate the piston from the connecting rod, and the old sleeve is coaxed free from the bore. If the sleeve is stubborn, gentle heat around the block may help loosen it, but caution is essential; overheating can warp the aluminum and ruin the alignment. The goal is a clean slate, where every contact surface—piston, rings, sleeve bore, and the block’s inner wall—meets within spec and with minimal friction under running temperatures. As you prepare to seat the new sleeve, the bore is cleaned of oil and debris, then lightly oiled on the outer diameter of the sleeve to aid insertion. The sleeve installer press fits the piece with care, avoiding any claim of force that might bow or misalign the sleeve as it slides into position. The choke point here is not raw force but alignment and clean surfaces. A snug but not forced fit is the mark of a well-installed sleeve.
With the sleeve in place, attention turns to the new piston. A light coat of RC engine oil on the piston skirt and rings reduces initial friction as the rings begin to shear into the new bore. The piston is then guided into the cylinder with the rings oriented correctly; the top ring typically has a marker indicating which side faces up. The wrist pin completes the connection to the connecting rod, and snap rings are seated in their grooves. The moment the piston is in place, you rotate the crank by hand to confirm smooth movement of the assembly. Sticking, grinding, or hard spots indicate misalignment or debris. If any anomaly appears at this stage, it is far easier to address it now than after the engine has run and the load increases.
As work resumes toward reassembly, precision continues to govern the process. The crankshaft must rotate freely, the flywheel reattached with the correct torque on the retaining nut, and all fasteners tightened to the manufacturer’s specifications. The carburetor, air filter, and exhaust system return to their mounts, and the fuel line goes back in place. A crucial but sometimes overlooked step is ensuring that no tools are left inside the engine bay; nothing is worse than a grind or a bolt tearing into a new sleeve’s wall on a first start. The gasket integrity cannot be neglected. Cylinder head gaskets should be replaced whenever the head is removed to guarantee a reliable seal. The same applies to any other gaskets that may have been disturbed during disassembly. Contamination control is nonnegotiable; even a tiny speck of grit can gouge the cylinder wall and negate all the meticulous work that preceded it.
Supportive guidance from the broader mechanical literature emphasizes that the durability of a new piston and sleeve depends on tolerances and material compatibility. Although the core aim for hobbyists is a compatible kit designed for their model, the underlying principle is that the match between materials, surface finish, and the engine’s operating environment matters as much as the assembly procedure. This is where technical resources from piston manufacturers and sleeve specialists illuminate the ideal relationships between forged steel, ductile iron, or other advanced materials and the thermal and loading demands of nitro engines. While a hobbyist may not replicate industrial-grade machining, honoring the same design logic—correct material pairing, precise bore finish, and matched ring profiles—helps ensure the rebuild remains dependable under high RPM and heat.
A practical frame for the break-in procedure follows. This phase is not optional; it is the bridge between a static mechanical rebuild and a reliable running engine. Begin with a lighter fuel mix, reducing nitromethane content, and increase the oil fraction to foster lubrication under early ring seating. The engine should run at partial throttle, roughly 60 to 70 percent, for a period of 10 to 15 minutes. The goal is to seat the piston rings gradually, letting the rings mate with the bore without imposing the harsh friction of full power. A cyclic approach—one to two minutes of running, followed by a brief idle—helps to moderate heat buildup and maintains a controlled growth of ring contact and sealing pressure. Monitor temperatures; if the engine runs hotter than expected, stop promptly to cool and reassess the fitment or lubrication. Blue or white smoke from the exhaust after the break-in is not unusual as oil is burned off during initial sealing; however, persistent smoking or a sudden shift in color or tone of the exhaust can signal improper seating or an overly rich running condition that should be corrected in subsequent tuning.
Manufacturers and experienced builders often recommend the use of a dyno or test stand during break-in to monitor heat distribution and performance in real time. This approach allows the operator to log temperatures at different RPM zones and observe how the engine responds to the transition from break-in to steady-state running. It is in this window that subtle changes in carburation, timing, and compression become apparent and can be refined with measured adjustments rather than trial and error on the track.
In the course of installing and breaking in a piston sleeve assembly, a number of technical considerations warrant emphasis. Use the correct tools throughout. A piston ring compressor is essential to avoid bending rings or nicking the bore as you slide the piston into the sleeve. Lubrication should be applied sparingly but sufficiently to coat the piston skirt and rings; too much oil invites detonation or carbon buildup, while too little invites excessive wear before rings seat. Align the piston’s top mark with the intended orientation; improper orientation disrupts ring gaps and can alter combustion chamber geometry in ways that degrade sealing. When reassembling, torque the cylinder head to the specified values; over-torquing can warp the head or crush the gasket, leading to leaks and efficiency losses. Replace the head gasket with each removal to preserve the seal and prevent nuisance leaks. Finally, avoid contamination at all costs. A clean environment—free of dust, lint, and metal shavings—safeguards the cylinder bore from scoring that would compromise compression and wear characteristics.
Post-installation testing and tuning complete the cycle. A short, gentle run at low speed confirms the assembly is functioning without leaks or unusual noises. A careful carburetor tune follows, typically requiring a slightly richer mixture than the final running condition due to the improved sealing and higher compression. The engine should exhibit steady idle, smooth acceleration, and consistent torque delivery at midrange; any knocking, pinging, or unusual noises should trigger an immediate shutdown and a reassessment of the piston rings, sleeve fit, or detonation margins. Over the first few cycles on the bench or track, you’ll gather data on how the engine responds to throttle changes and how heat is managed by the cooling system. This data informs subsequent refinements to timing and lean/rich settings, an iterative but controlled process that yields a reliable, repeatable power curve rather than a one-off performance spike.
The broader takeaways extend beyond the mechanical sequence. A successful piston and sleeve change relies not only on the right parts but on a disciplined process that respects the engine’s operating envelope. The pre-installation inspection anchors the rebuild in reality, ensuring that the bore, rings, and block share a common precision standard. The break-in procedure translates design intent into enduring performance by guiding the rings to seat without overheating. The installation itself—ring orientation, lubrication, and correct torque—translates that precision into a durable seal. Finally, post-installation testing disciplines the run-in, allowing tuning to converge toward a stable and efficient operating point. The totality of these steps elevates a routine maintenance task into a structured rebuild that can extend the engine’s life and optimize its performance on the track or bench.
To deepen the conceptual frame, consider the role of sleeves and how their function translates into practical outcomes. A sleeve is more than a boundary for the piston; it defines the surface that experiences the majority of wear and heat transfer. The relationship between bore finish, ring tension, and piston displacement sets the sealing geometry that ultimately governs compression pressure and power delivery. As you plan future maintenance or upgrades, remember that sleeves come in different designs and material families, each with trade-offs in wear resistance, heat tolerance, and machinability. This awareness helps you choose a kit that aligns with your engine’s operating style, your track conditions, and your maintenance cadence. For a concise primer on engine sleeves and their role in this orchestration, you can consult a focused resource on engine sleeves and their functions: What are engine sleeves?.
As you advance through your project, it is also prudent to keep in mind that the specific tolerances and procedures can vary by model and manufacturer. The resourceful path is to consult the official service manual for your engine’s particular model to confirm diameter tolerances, ring end gaps, and torque values. The general narrative above captures the core sequence and the mindset that sustains it, but the exact numbers and steps are the product of the engine’s design intent. The play between material choice, wall finish, and ring geometry under high RPM is delicate, and even seemingly small deviations can accumulate into meaningful differences in performance, reliability, and life expectancy.
In the spirit of building this knowledge into practice, it is worth recognizing that the materials science behind piston and sleeve assemblies is a field with dedicated engineering insights. The same principles that govern high-performance engines in larger machines translate, in scaled form, to nitro-powered RC engines. When you read about piston kits, sleeve materials, and tolerances on authoritative sites, you are seeing the same design logic at work: harmonious fit, controlled clearances, and durable seals under demanding thermal loads. For broader context on the engineering standards that shape these components, refer to the external resource from a respected engine materials provider.
In sum, changing a piston and sleeve on a nitro engine is a disciplined craft. The sequence—thorough inspection, careful disassembly, precise bore preparation, snug sleeve installation, mindful piston seating, controlled break-in, and patient post-installation tuning—forms a coherent narrative that respects the engine’s physics. The goal is not merely to complete a swap but to restore a fragile balance within the combustion chamber, a balance that translates into reliable power, consistent response, and long-term durability on the bench and on the track. The satisfaction comes not from the numeric win of a single run but from the quiet confidence that your rebuilt nitro engine will perform predictably across sessions, temperatures, and tracks, driven by the careful choices you made in the workshop.
External context beyond the workshop helps round out this understanding. For deeper technical context on piston and sleeve materials and their engineering standards, you can explore resources from established engine engineering references at https://www.mahle.com/en/, which discuss piston kits and the engineering standards that guide modern precision components. This external perspective complements the hands-on practice outlined here and reinforces the principle that high RPM power is built on disciplined engineering discipline as much as on careful assembly.
Final thoughts
A piston and sleeve change in a nitro engine is a disciplined sequence that rewards precision with reliability. Start with thorough safety and preparation, confirm all disassembly steps were performed cleanly, and execute installation with careful lubrication, alignment, and torque control. The break-in phase, though brief, is critical: run at partial throttle to seat rings and verify temperatures, oiling, and compression. Use high-quality, engine-specific sleeve and piston kits that match your engine’s tolerances and your distributor’s recommendations. When followed as a cohesive process, the piston-sleeve upgrade delivers enduring performance, smoother operation, and a lower total cost of ownership for shop owners, distributors, and serious hobbyists alike.