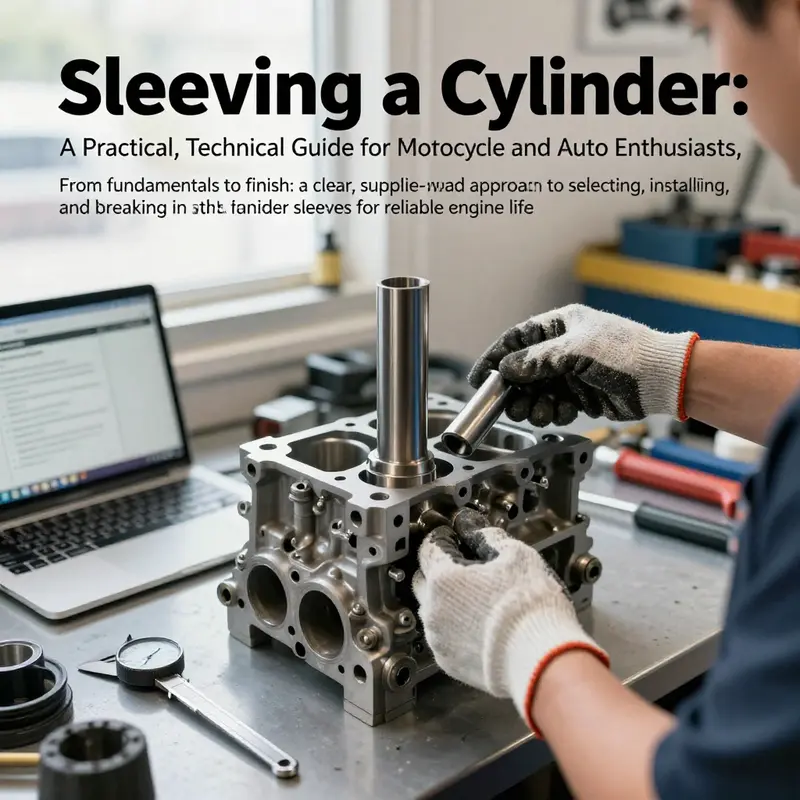
Cylinder sleeves restore bore integrity when a block reports wear, scoring, or cracks. For motorcycle owners, auto enthusiasts, and repair shops, sleeves offer a cost-effective path to extend engine life without a full block replacement. Sleeves come in two fundamental flavors: dry liners, which press into the block bore and rely on precise interference fit and oil sealing, and wet liners, which contact the coolant jacket and require top and bottom seals to keep coolant out of the combustion zone. The choice between dry and wet affects machining tolerances, sealing surfaces, cooling strategy, and serviceability.
Core ideas you’ll see threaded through the chapters: how sleeves work, how to inspect and prep the bore, how to pick the right sleeve material and size, and how to execute both dry-liner press-fit and wet-liner installations with proper sealing and finish. We’ll also cover finishing, reassembly, testing, and the crucial break-in to seat rings and condition new surfaces. Whether you’re a motorcycle or car owner, a parts distributor, or a shop technician, understanding these steps helps you source quality sleeves, communicate with suppliers, and achieve durable results.
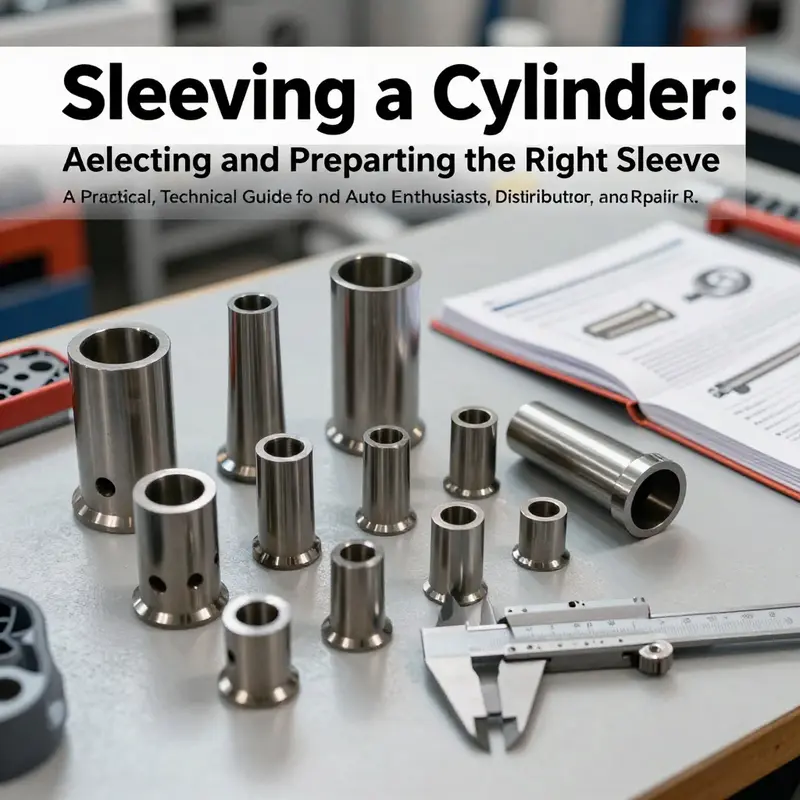
Key considerations to guide your planning include sleeve material (cast iron or stainless), inside diameter and length, flange and sealing features, compatibility with your engine model, and the required tooling for bore prep and pressing or seating. With proper tooling, methodical machining, and alignment with the engine’s service manual, sleeving can restore performance and preserve block integrity.
Between Dry and Wet: Mastering Cylinder Sleeve Technology for Durable, Leak-Free Power
When a worn cylinder threatens the life of an engine, sleeve restoration offers a repair path that preserves bore geometry, seals, and the core timing of power delivery. A cylinder sleeve, or liner, is a replaceable inner surface that forms the piston’s working wall. It is not merely a maintenance item; it is a engineered interface that must transfer heat, retain oil, resist wear, and survive repeated cycles of rapid temperature change. In practice, the sleeve comes in two broad flavors, each with its own heat management strategy, sealing method, and installation complexity. Understanding these two paths—dry liners and wet liners—helps a technician or shop decide how to return an engine to reliable service without compromising durability or efficiency. The choice is not about which is easier, but which design better matches the engine’s duty cycle, cooling system layout, and the tolerance the block can sustain after a bore repair.
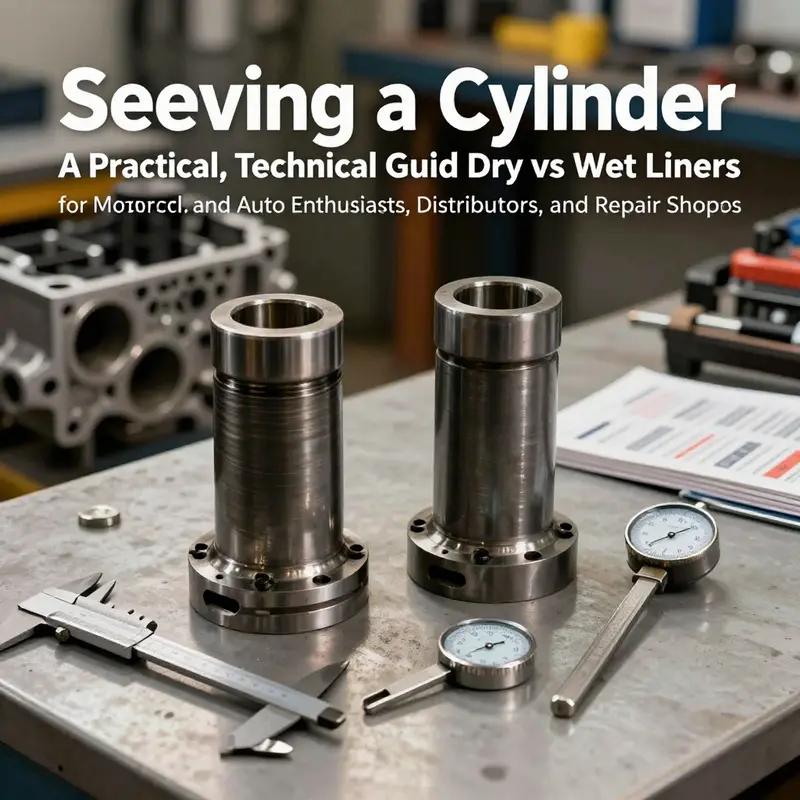
Dry liners are inserted into the block and do not contact the coolant directly. Heat must move through the block to reach the cooling channels, so the liner can be thinner and simpler in profile. In typical dry-liner configurations, walls are slender, often in the 1 to 3 millimeter range, and the sleeve is pressed into the bore with a precise interference fit. The materials are usually high-strength cast iron or steel, chosen for dimensional stability under temperature swings and for good surface hardness against the piston rings. The benefits are clear: a clean, robust seal with the block and a straightforward path to manufacturing and assembly. There is less risk of coolant leakage into the oil system, and the assembly tolerances can be tightly controlled when the sleeve is rigidly seated. These attributes make dry liners attractive in smaller to mid-range engines where heat density is moderate and the cooling system is designed around a fairly stable bore surface.
Yet dry liners carry a heat-handling burden. Because the sleeve does not have a direct water jacket around its outer surface, the block itself bears most of the heat load. If the engine experiences high thermal demand or aggressive tuning, the bore can run hotter, and heat transfer becomes a limiting factor for long-term ring seal and bore wear. In daily operation, that means dry liners perform very well in reliability-focused applications where modest power output is the norm and coolant leakage risk must be minimized. The design tends to give excellent sealing margins and straightforward reconditioning, making it a solid choice when the engine layout emphasizes leak avoidance and block integrity.
Wet liners, by contrast, are designed so that the sleeve’s outer wall sits in direct contact with the engine’s cooling water. A water jacket surrounds the liner, and the outer surface is shaped to maximize heat transfer to the coolant. The wall thickness is typically thicker than a dry liner, often in the 5 to 8 millimeter range, and the top flange provides precise seating in the block. Sealing at the top and bottom is maintained with O-rings or gaskets that prevent coolant from invading the crankcase or leaking into the combustion chamber. This direct cooling pathway yields superior thermal management. Cylinder walls stay cooler under heavy load, which reduces thermal distortion and helps preserve tighter tolerances over time. In high-output diesel and turbocharged gasoline engines, the improved heat rejection can translate into longer engine life, the possibility of higher compression or tighter ring gaps, and a more compact overall engine footprint because the cooling system can be shared across more of the engine’s surface area.
The advantages of wet liners are substantial. With direct water cooling, temperatures at the bore can drop by a meaningful margin, often allowing increased peak power and more aggressive tuning without sacrificing durability. The heat exchange efficiency is markedly higher because there is no intermediate barrier between the liner and the coolant. Weight savings also come into play in modern powertrains; a well-designed wet-litted cylinder block can be lighter, because the cooling system can be more compact and the liner can contribute to a leaner overall architecture.
Of course, this design comes with trade-offs. Wet liners require careful sealing, particularly at the interfaces where the liner meets the top and bottom seals. The potential for coolant leakage into the crankcase is a critical fault mode if seals degrade. The outer water jacket means that any corrosion, cavitation, or seal failure can lead to coolant loss or oil dilution. The maintenance pace for wet liners often includes more vigilant inspection of O-rings, gasket surfaces, and sealing integrity, especially in engines that operate at high speed or under heavy loads for extended periods. The trade between thermal performance and sealing reliability is at the heart of choosing between dry and wet liners.
Material choices reflect these functional differences. Both types rely on precision-cast alloys, followed by machining to tolerances that create the working bore surface. The inner surface is honed or roller-reamed to achieve a smooth, uniform finish, typically in the roughness range that supports stable oil film formation and consistent ring seating. The exact alloy and heat-treat regime are selected for wear resistance, corrosion resistance, and the ability to maintain dimensional stability through thousands of cycles of heat and cooling. In wet liners, the sealing interfaces are matched to the gasket and O-ring materials that live at room temperature or at elevated coolant temperatures. In dry liners, the focus is on ensuring a robust, uniform press fit that resists relaxation or loosening under load.
Selecting the right sleeve also requires careful consideration of bore dimensions and the way the bore is prepared before seating the sleeve. For a dry liner, the bore is machined with a boring bar to exact specifications so that the sleeve can be pressed in with a precise interference fit. For a wet liner, cleaning and preparing the coolant jacket sealing surfaces becomes essential, and the top flange must align perfectly with the block face to establish the correct positioning. The outer dimension of a wet liner must accommodate the water jacket’s geometry while preserving a path for coolant flow and maintaining proper centering within the block. In both cases, the inner bore must be finished to exacting dimensions to support piston rings’ seating and oil control, often followed by honing to a target roughness that supports durable oil retention and ring seating throughout the engine’s life.
In practice, the sleeve installation is a balance of precision and practical limits. A hydraulic press or a specialized sleeve installer may be used for dry liners to achieve a controlled, uniform seating pressure. Wet liners rely on careful placement and the sealing sequence, with gaskets or O-rings arranged to prevent leaks and ensure long-term coolant integrity. After installation, the inner surface is honed to the correct finish, typically in the 20 to 40 microinches Ra range, to balance oil retention with minimal friction. The final steps of reassembly follow the engine manufacturer’s torque specifications and assembly procedures. Once the engine is back together, a measured approach to testing becomes essential: compression testing confirms bore integrity, and a careful break-in at low RPM with gradual load increases helps the rings seat and the sleeve surfaces adapt to the new chamber geometry.
Understanding when to sleeve a cylinder is as important as choosing the sleeve type. Wear that exceeds a nominal limit by a wide margin—such as bore oversize beyond 0.020 inches—or visible scoring, pitting, or cracking, indicates the bore has reached a repair threshold where a sleeve offers a durable fix. Bad compression due to ring seal loss, or repeat bore damage after a rebuild, often points to sleeving as a favorable path. For engines that see heavy duty use, weathering, or long service life at high loads, sleeving can restore reliability without a full block replacement.
The process is most successful when paired with careful inspection and measurement. Clean bores with appropriate solvents, use a dial bore gauge to confirm bore dimensions, and evaluate warpage or ovality before any sleeves are selected. The block must be free of cracks; if structural damage compromises core integrity, sleeve installation cannot recover the block to spec. With the correct sleeve chosen, proper preparation, and precise seating, the new bore becomes a durable wear surface that handles the piston movement, ring seal, and oil control just as the original bore did when the engine was new.
For a deeper dive into the specific concept of dry sleeves, see the dedicated guide on dry sleeve engines, which explores the nuances of that approach and how it aligns with a given block design. Dry sleeve engine explained.
As a practical reminder, reliable sleeving hinges on disciplined workmanship. Cleanliness, precise measurement, and adherence to the engine’s service manual are non-negotiable. When done correctly, sleeving can extend an engine’s life, maintain compression, and keep friction within the oil film’s comfort zone, preserving power without inviting leakage or overheating. In the end, the decision between a dry liner and a wet liner reflects a simple truth: the engine’s duty cycle and cooling philosophy dictate the best path to durable performance. The skill is not merely in inserting a sleeve but in understanding how that sleeve will conduct heat, seal, and endure under the engine’s many miles of service.
External resource: For a detailed technical overview of cylinder liner fundamentals, including material science, failure analysis, and application-specific design criteria, refer to the Engineering Toolbox resource at https://www.engineeringtoolbox.com/cylinder-liners-d_1467.html.
Before the Sleeve: Precision Block Inspection and Bore Preparation for Reliable Cylinder Sleeving
The decision to sleeve a cylinder begins long before any sleeve is pressed into place. It starts with the block itself and a disciplined process that exposes the truth hidden in metal. Sleeving a worn or damaged bore is not a quick fix; it is a restoration project that demands patience, exacting measurement, and an eye for small imperfections that can magnify into major failures if left unchecked. In the heart of every successful sleeving job lies a stage that often gets overlooked in favor of sleeve selection or honing: the thorough inspection of the block and the careful preparation of the bore. This is the moment when the engine block is declared fit or declared unfit for sleeving, and it sets the tone for what comes next.
Disassembly is the first practical step that doubles as a diagnostic in disguise. The engine is taken down to the bare cylinder block, all oil and gasket residues are removed, and the surfaces are exposed to be scrutinized. The aim is not only to remove worn liners or old components but to reveal any cracks, distortions, or hidden damage that could compromise the sleeve’s life. A degreaser and appropriate solvents are applied to clean the bore and its surroundings, and every trace of carbon, oil residue, or old gasket material is coaxed away. Special attention goes to the top portion of the bore where oil control rings operate; lingering residues there can affect the sleeve seal and oil consumption once the engine runs again. What looks like minor buildup can, under pressure and heat, reveal itself as a leak path or a source of poor ring seal if not removed completely.
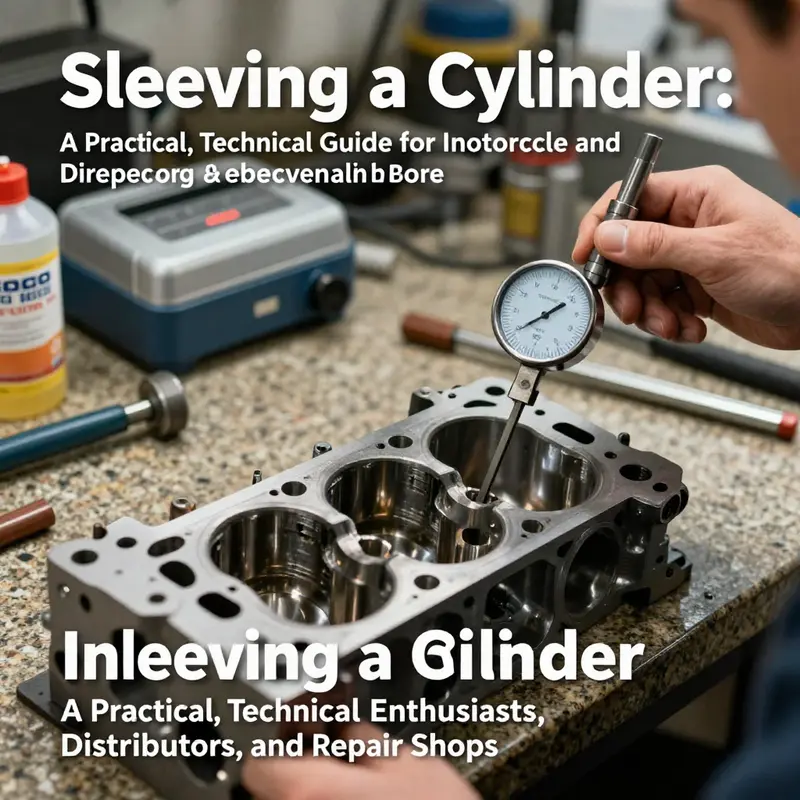
Once clean, the bore becomes a canvas for precise measurement. The visual inspection quickly gives way to dimensional checks. A dial bore gauge is used to measure the bore diameter at multiple points along the bore’s axis—top, middle, and bottom—to evaluate taper and roundness. The goal is to confirm that the bore remains within tolerance after prior wear and that there are no cracks radiating from the surface or micro-mistracking that could undermine the sleeve’s seating. In many engines, standard practice defines strict limits: a taper greater than about 0.025 millimeters (0.001 inch) or an out-of-round condition greater than about 0.038 millimeters (0.0015 inch) triggers the need for machine work or, in some cases, block replacement. These figures are guides that reflect common industry experience; the exact thresholds depend on the engine model, the sleeve type, and the service cycle the engine is destined for.
The block’s deck surface deserves equal scrutiny. The head gasket must seal perfectly, and any deviation in deck flatness can introduce gaps that invite leaks or misalignment. A warped deck not only prevents proper sealing but can alter coolant flow and heat transfer, accelerating thermal stresses that wear sleeves unevenly. A straight edge and feeler gauge are used to check flatness across the deck, and if necessary, the deck is resurfaced with a milling operation to restore true mating. This step is not cosmetic; it is a functional prerequisite for the sleeve’s seating surface to achieve an even, uniform seal. In practice, the decision to resurface rests on the measured deviation and the block’s overall integrity. Patching small warps with masking techniques or adhesive compounds is not a substitute for genuine flatness; the deck must be accurate enough to maintain a stable head gasket seal and predictable coolant channels.
Perpendicularity to the crankshaft centerline is another dimension of precision that cannot be ignored. The bore must sit square to the crank’s axis; any angular deviation introduces uneven sleeve loading, which in turn can cause uneven wear, poor seal, and accelerated heat transfer problems. This check is typically performed with a dial indicator mounted on the crankshaft or with a dedicated alignment fixture that measures the bore’s alignment relative to the crank’s centerline. Even a small misalignment becomes magnified once the sleeve is pressed in and the piston rings begin to seat. The operator’s experience matters here: the most accurate readings come from a clean setup, stable fixtures, and controlled measuring conditions. If misalignment is detected, corrective actions—such as truing the block or choosing a different block altogether—may be required. Skipping these steps invites a cycle of wear that undermines the sleeve’s purpose rather than supporting it.
The logic behind these checks is straightforward. A sleeve is a precise, replaceable inner surface that must meld with very tight tolerances to function correctly. If the bore’s roundness, alignment, or deck flatness is marginal, the sleeve’s fit will be compromised, oil seals will be stressed, and oil or coolant leaks can follow. In turn, those issues translate into oil consumption, reduced compression, and a shortened engine life. The objective of this phase is not to condemn a block at the first sign of imperfection but to identify the scope of required work and to establish whether restoration to a reliable state is possible. Thorough cleaning precedes measurement because residues and contaminants can mask or exaggerate true conditions. Accurate measurements across the bore ensure any taper or out-of-round condition is detected early, guiding decisions about bore preparation, sleeve sizing, and the ultimate reliability of the sleeved cylinder.
With the block deemed structurally sound and dimensionally controllable, the preparation moves toward the sleeve itself. This transition is seamless when the earlier steps have been performed with discipline. At this point, the sleeve type is selected to match the engine’s needs—whether a dry liner that relies on a press-fit within the block, or a wet liner that shares coolant contact and requires robust seals at top and bottom. The preparation of the bore should align with the sleeve’s characteristics. For a dry liner, the bore is machined to exact specifications to ensure an interference fit that the press can achieve without bruising or misalignment. For a wet liner, the coolant jacket surfaces and sealing faces must be clean and true; any debris can create a gasket or O-ring leak that defeats the sleeve’s purpose. In either case, the bore must be prepared so that the sleeve sits square, with a consistent interface around its circumference, and with a finish that invites proper ring seating later in the cycle.
Before moving forward, a useful mental cross-check helps keep the process anchored: the block is not simply a housing for a new sleeve, but a partner in a larger system where heat, pressure, oil, and coolant interact in a tightly choreographed dance. The bore’s finish after honing—typically a smooth, controllable micro-roughness in the range of 20–40 microinches Ra—must promote stable oil retention and predictable ring seating. The final dimension of the bore becomes a function of the sleeve’s inner diameter and the chosen honing strategy, designed to provide the optimum surface for the piston rings to seat and seal during break-in. This is where the shop’s expertise intersects with the manufacturer’s specifications; it is a moment when meticulous measurement, predictable machining, and a clear plan for assembly converge.
For readers seeking a concise synthesis of what sleeving entails and how it relates to the larger process, a short reference lays out the concept clearly: What sleeving an engine means. This provides a high-level map of the sleeving journey without getting lost in the granular steps that differ from one block to another. As you prepare to select sleeves and schedule installation, the block’s readiness becomes the compass that guides every subsequent decision. The goal is to finish this stage with a deck that is true, a bore that is true to size across its length, and an axis that aligns cleanly with the crank. Only then can the sleeve be pressed in with confidence, the inner surface honed to the right finish, and the reassembly proceed toward a long, dependable service life. External references and catalogs for sleeves and compatibility can offer broader perspectives, but the essence remains unchanged: precision in inspection and dedication to bore preparation are the quiet engines driving successful cylinder sleeving.
External resource for sleeves and compatibility: https://www.made-in-china.com
null
null
Sleeve by Sleeve: Precision Installations for Dry-Liner Press-Fit and Wet-Liner Cylinders
Restoring a worn or damaged engine cylinder is a test of precision, patience, and the ability to reconcile a damaged bore with a tight, reliable seal. Sleeve installation sits at the heart of a rebuild because the sleeve becomes the durable, inner surface the piston and rings rely upon for compression, lubrication, and heat transfer. Whether the chosen path is a dry-liner press-fit or a wet-liller approach, the process demands a clean block, carefully prepared bores, and a disciplined sequence that respects the tolerances spelled out by the engine’s makers. The goal is not merely to drop a sleeve into a cavity; it is to recreate a cylinder that is true, concentric, and capable of withstanding thermal and mechanical stresses through countless cycles of combustion. In practice, sleeve work blends metallurgical understanding with meticulous machining, and the best successes come from following a methodical plan rather than improvising on the shop floor. A well-executed sleeve job does not just restore size; it restores confidence in the engine’s future reliability and service life.
The decision between a dry-liner press-fit and a wet-liner installation centers on how the sleeve interfaces with the engine block’s cooling system and how heat is conducted away from the bore. A dry liner is pressed into the bore and relies on the block’s material to provide the structural support and heat transfer, while the liner itself remains sealed from the coolant. A wet liner, by contrast, sits in direct contact with the coolant, with seals that isolate the cylinder from the rest of the block’s interior while the liner itself carries the chamber walls. Each approach has its own preparation, fitment, and sealing challenges, and the choice hinges on the block design, the engine family, and the repair’s intended durability.
Before any sleeve is touched, the block must be treated with the same respect the rest of the rebuild receives. The cylinder bores are cleaned thoroughly using degreasers and mechanical brushing, followed by inspection for cracks, warping, or material loss that would undermine the sleeve’s seating. A dial bore gauge becomes a trusted companion, revealing whether the bore roundness and size stay within tolerance. If the block shows signs of structural damage beyond repair, replacement may be the only legitimate option. Once the bore looks sound, the preparation shifts to the sleeve itself. The outside diameter, length, and sealing features on the sleeve must be matched to the bore’s dimensions with clear, measured margins. The top and bottom edges of the sleeve are lightly chamfered to ease entry and to minimize micro-damage when the sleeve slides into place. The lubrication path is considered at this stage as well; light oil or assembly lube is applied to the sleeve’s exterior to ensure a gentle, non-scoring contact during installation.
For the dry-liner path, the bore is often slightly refined to the final size with a boring bar, ensuring a coaxial, true surface that the sleeve can bite into securely. The block might be heated to a modest temperature in the range of 150 to 200 degrees Fahrenheit to coax the bore slightly larger and make the press fit easier. The key here is to apply even, controlled force rather than hammering the sleeve into place. A hydraulic press or a dedicated sleeve installer tool with a guide bushing keeps the sleeve aligned with the bore centerline, and every press stroke should be smooth and measured. After seating, the deck surface is checked for flushness with a straight edge and a feeler gauge. Depending on the surrogate measurement, the deck may need light machining to bring the sleeve into proper alignment with the deck plane. The post-install honing of the inner bore is performed to deliver a precise surface finish—typically in the range of 20 to 40 microinches Ra—to promote proper piston ring seating, oil retention, and reliable break-in. The emphasis is on a uniform, smooth surface that doesn’t invite scuffing or uneven oil film during first starts.
In the wet-liner route, the approach shifts toward sealing integrity and coolant compatibility. The bore is again inspected for cleanliness and roundness, but the critical sealing surfaces require additional attention. O-rings or gaskets must seat in grooves without nicks or debris, and the liner’s alignment must be supreme to avoid gaps or misfit that would allow coolant leaks or improper cooling at the ring land. The installation proceeds with gentle hand seating, followed by careful tapping if needed with a soft-faced mallet to coax the liner into place without squeezing or bending it. The liner’s height relative to the deck is then measured with a dial indicator, and the spec is followed to achieve flush or a defined recess in line with the manufacturer’s recommendation. With wet liners, the sealing surfaces are the weak link; any misalignment or damaged O-rings can defeat the coolant seal, so special attention is paid to grooves, seals, and the orientation of the liner with respect to the coolant passages.
Regardless of method, cleanliness remains non-negotiable. Debris anywhere in the bore or on the sleeve can become a contaminant that scores the piston rings, blocks oil film formation, or disrupts the seal. Lubrication, too, must be deliberate. A light coat of assembly lubricant is applied to the sleeve’s exterior for dry liners, and O-rings or gaskets receive a compatible lubricant to prevent pinching or tearing during seating. The assembly is not complete until the sleeve is verified for true seating and a robust seal is confirmed. The final checks commonly include a compression test across the cylinder to ensure that the bore has not developed leakage paths and that the piston and rings will seat properly during break-in.
Learning to sleeve an engine cylinder is as much about process discipline as it is about precision tools. The tools themselves—bore gauges, honing tools, a trustworthy dial indicator, a hydraulic press, a sleeve installer kit, and the appropriate lubricants—are not merely conveniences; they provide the measurements and control needed to keep the bore true and the seal reliable. The preparation is as important as the installation. It is not enough to simply fit a sleeve; one must ensure the bore remains perfectly circular, the sleeve sits flush with the deck, and the inner surface finishes correctly to promote optimal wear characteristics when the engine is fired up for the first time. This is where the conversation with service manuals and sleeve manufacturers matters. Those documents anchor the practice in the realities of material behavior and design tolerances, and they remind the builder to respect the engine family’s expectations for heat transfer, cooling, and combustion dynamics.
To ground the discussion in practical steps, consider the dry-liner press-fit as a baseline. The bore is prepared with careful, measured roughing and finishing passes to a precise final size. The sleeve is chamfered to ease entry, oiled on the exterior, and pressed with steady force until it bears fully against the block. The deck is checked, and if necessary, faced to bring it level with the sleeve. Then the inner surface is honed to the target roughness. The wet-liner method follows a parallel arc but adds the complexity of seals and coolant interfaces. The liner is positioned with exact alignment, O-rings seated in pristine grooves, and the height checked against the deck per specification. After installation, the coolant system is purged of debris, the head is torqued to spec, and a slow, controlled break-in begins. A careful eye is kept on pressure, temperature, and any sign of leakage or abnormal noise.
If you’re seeking a concise entry point into the theory behind why a sleeve behaves as it does, a focused guide on dry sleeves can illuminate the fundamental concepts and common missteps. For a concise primer on what engine sleeves are and how they function, see Dry-sleeve-engine-explained.
The broader practice draws on a shared understanding: sleeves restore a worn bore by providing a stable, precisely sized interior surface, while the block and sleeve assembly must work in harmony with heat transfer, lubrication, and the engine’s dynamic loads. The work demands attention to tolerances not just at the minute inner diameter, but along the length of the bore, the seating depth, and the interface with the head gasket and coolant passages. The repair’s success hinges on a plan that blends the right tooling, the correct sleeve type, clean surfaces, proper lubrication, and a tested pathway for the engine’s first run. The energy behind a good sleeving job is the confidence that, once reassembled and started, the newly sleeved cylinder will live up to the engine’s original performance promises—without leaks, without warping, and with consistent compression and oil control through the life of the repair.
To keep the chapter grounded in practical expectations, consult the engine service manual or the sleeve supplier’s technical sheets for the exact clearances and steps your block requires. The specifics matter, and small deviations can cascade into longer downtime or costly rework. When done correctly, sleeving a cylinder extends the engine’s service life, enabling higher mileage between overhauls and restoring performance without compromising reliability. The art and science of sleeve work sit at the intersection of machining accuracy, materials science, and careful reassembly—and it is this blend that makes the cylinder’s interior frankly the most consequential stage of an engine rebuild.
External resource for deeper technical context: Cylinder sleeve – Wikipedia.
From Fit to Fire: Finishing, Reassembly, Testing, and Break-In for Sleeved Engine Cylinders
When the sleeve sits in the bore, the work shifts from a mechanical fit to a precisely finished surface that will live with the engine for miles and power cycles to come. Finishing, reassembly, testing, and break-in are not mere aftercare steps; they are the final sculpting of a bore that must seal, wear evenly, and guide oil with predictable behavior. The finishing stage transforms a correctly installed sleeve into a living part of the engine, one that can deliver reliable compression and clean, controlled oil film across heat cycles. This is where theory meets practice, where the bore’s geometry is refined enough to respect the rings and the pistons while resisting the constant assault of combustion, heat, and vibration. The goal is a bore that is truly concentric with the crank axis, a smooth inner surface with the right roughness, and the right plateau height so the rings can seat cleanly without scuffing or glazing as the engine first runs under load.
Finishing begins with honing, a process that is more about creating a controlled microstructure than simply smoothing the surface. The bore must present a crosshatch that promotes oil retention without trapping excess oil in pockets that would stall ring seating. In practice, technicians aim for a predictable crosshatch pattern and a plateau finish that provides a stable seating path for the rings during the break-in. The surface roughness is deliberately tuned; too smooth and oil films break too easily, too rough and the rings can scour or wear unevenly. A correctly honed bore also helps maintain concentricity, ensuring the piston’s rings travel in true alignment with the liner. For engines under demanding duty, such as those required to sustain high loads or higher combustion pressures, the nuance of finishing becomes even more critical. It is here that a carefully controlled honing operation reduces the chance of early wear and sets up reliable ring sealing from the first crankshaft rotation.
The practical measurements matter as much as the feel of the stone and the torque of the tooling. Technicians verify bore roundness and alignment with a dial bore gauge, checking for minute deviations that could translate into uneven ring contact. Concentricity and bore size must hold within the engine manufacturer’s tolerances, because even a small misalignment across the bore length can magnify into blow-by, loss of compression, and inconsistent lubrication. The finishing phase also includes validating the sleeve’s inside diameter and the sleeve-to-block interface. If the liner is a press-fit, the finish of the outer diameter and the block bore must be such that the sleeve seats squarely without bowing or tilting; for wet liners, the sealing surfaces and the sealing interfaces must be free of debris that would compromise O-rings or gaskets. In short, finishing is not cosmetic; it is functional engineering that governs how the engine will breathe, seal, and wear.
With the bore properly finished, the reassembly phase begins, and the focus shifts to re-creating the precise, clean environment that the pistons and rings require to function for thousands of miles. Every component that touches the bore—piston rings, pistons, bearings, and seals—comes under scrutiny for cleanliness and compatibility. The build requires scrupulous cleaning of all parts, with every oil channel, ring groove, and sealing surface wiped to remove any machining debris, dust, or stray particles. The torque figures that lock the main caps, the connecting rods, and the cylinder head bolts must be observed to the letter; over- or under-torque can distort the liner or warp the block face, undermining the seal between the sleeve and the liquid cooled jacket. When sleeves are dry, a press-fit installation typically benefits from a carefully controlled hydraulic press or a sleeve installer with calibrated force, plus a touch of engine oil as a lubricant to prevent galling and to minimize cold-welding between the sleeve and the block. Wet liners add their own considerations: the O-rings and gaskets at the top and bottom must seal precisely to separate the coolant from the combustion chamber while maintaining a robust heat transfer path. The process demands patience and a steady hand, because misalignment here can ripple through the entire engine’s timing and compression.
Reassembly also hinges on honoring the subtle interaction between the bore surface and the ring pack. The rings must seat in a controlled fashion as the engine starts rotating, so the first startup must be done with care. It is not enough to slide parts in and crank up the engine; the rings require a seating window, and that seating, in turn, relies on the correct oiling and a near-constant, moderate temperature rise that protects the new surface from glazing or rapid wear. Engine assembly lube is applied to critical contact surfaces to reduce initial friction while the rings seek their mating bore. The assembly must avoid introducing misalignment—whether from a misfitted sleeve, a misindexed ring groove, or a protruding portion at the block-sleeve interface. Such missteps can force the rings to ride on an uneven topography rather than the intended crosshatched surface, defeating the whole purpose of the finishing work.
Once the engine is back together, testing becomes the bridge between an assembled machine and a running one. The first test is a hydrostatic check, where a controlled pressure is introduced into the cylinder or the cooling jacket to confirm there are no cracks, leaks, or seepages around the sleeve joint. This step is crucial because any hidden flaw will become a failure point as soon as combustion heat arrives. Following the hydrostatic check, dial indicators or bore gauges are used again to verify bore concentricity after the sleeve’s final seating, ensuring that the finished bore remains true when pressed into service. A visual inspection of gaskets, seals, and contact surfaces closes the verification loop. If any sealing surface shows debris or improper fit, the risk of coolant leakage or oil ingestion into the combustion chamber rises sharply.
With the mechanical integrity verified, the break-in period begins—a window when the engine learns to operate with a new bore. The science behind break-in is practical and somewhat unforgiving: early in the life of the sleeve, friction and wear are at their peak as the piston rings mate to the new surface. Reports and studies suggest that the most significant wear occurs during the first 500 miles, after which wear rates decline as the rings conform to the bore. The aim during this interval is to establish a stable ring seal without inducing glazing, scuffing, or excessive heat buildup. Practical break-in guidelines emphasize avoiding sustained high engine speeds or full-throttle acceleration, instead favoring varied engine speeds to encourage uniform ring seating. An interim oil change after roughly 500 to 1,000 miles is advised to flush metal particles released during the initial wear-in and to replenish the oil film with fresh additives tuned for the running clearance. Temperature and oil consumption must be monitored closely; unusual readings can indicate an imperfect seal, a misfit, or an area where the surface finish is not performing as designed.
The finishing, reassembly, testing, and break-in sequence is a guarantee that the sleeve becomes a durable, predictable part. The process weaves material science with careful mechanical work, balancing the hardness of the sleeve, the finish of the bore, and the precision of the assembly. It is the difference between a cylinder that merely works and one that lasts under load, maintains compression, and preserves oil control for the long haul. If the sleeve material is a robust choice for heat transfer and wear resistance, and if the inside diameter, length, flange thickness, and sealing features are matched to the engine design, the result is a bore that can support efficient combustion and consistent lubrication across thousands of operations. For a concise primer on engine sleeves, see What Are Engine Sleeves. The entire sequence relies on adherence to the technical standards and guidelines laid out in the engine’s service manual and on careful, disciplined execution rather than improvised methods.
External reading and further context can deepen understanding of the wear characteristics during break-in. In particular, research on break-in liner wear and piston ring assembly friction highlights the dynamic interactions that occur in the early running of a sleeved engine and why a controlled break-in matters for long-term durability. External resource: https://www.sciencedirect.com/science/article/pii/S004268769800021X
Final thoughts
Sleeving a cylinder is a disciplined process that returns a worn bore to serviceable life without a full block replacement. Start with a clear assessment of bore wear and the engine’s cooling and lubrication demands, then choose a sleeve type that matches the block geometry and service requirements. Precise bore prep, correct sleeve material and fit, and proper sealing—whether dry or wet—are non-negotiable. Finish with accurate honing, controlled reassembly, and a deliberate break-in to seat rings and stabilize the new inner surface. For motorcycle and auto owners, this approach preserves engine integrity and value. For distributors and repair shops, standardizing sleeve specifications, stocking the right sleeves, and documenting tolerances streamline workflow and improve customer confidence. When done with care and cross-checked against the engine manual, cylinder sleeving delivers durable performance and extended engine life.