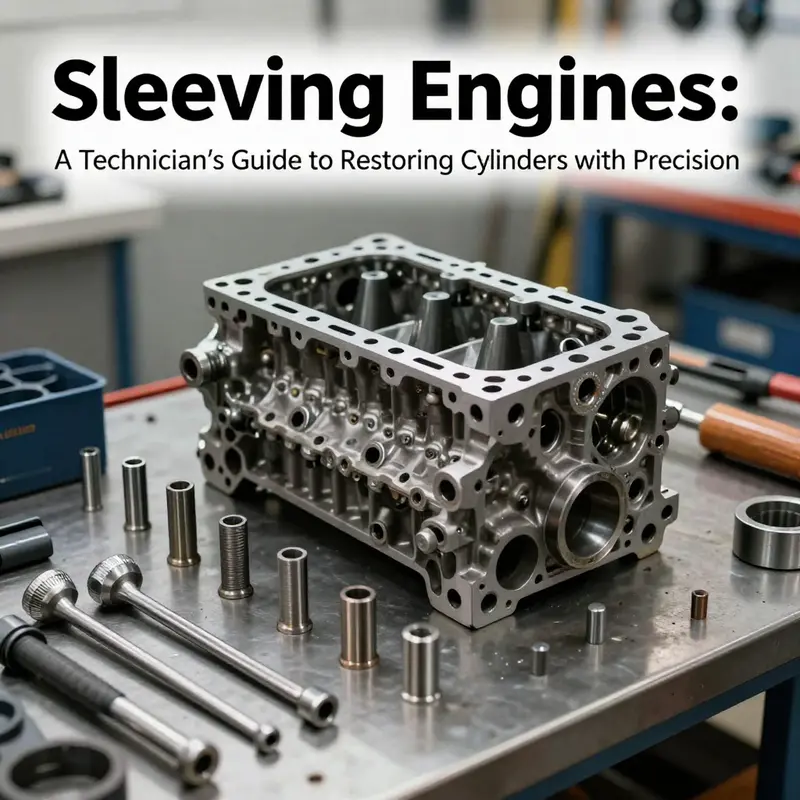
Engine blocks wear out, but a full block replacement isn’t always the practical path for motorcycles, daily drivers, or the shops that service them. Sleeving — installing new cylinder sleeves to restore bore diameter and sealing surfaces — is a precise, repeatable rebuild technique that can recover performance, reliability, and resale value without wholesale hardware replacement. Used in performance builds, commercial diesels, and high-mileage engines, sleeves let you bring worn cylinders back to factory specs while preserving the integrity of the block. This guide walks readers through five interconnected chapters that tie engineering standards to practical shop floor steps. Chapter 1 starts with assessing the block condition: cracks, warping, bore wear, and water jacket integrity all influence the sleeve strategy. Chapter 2 covers choosing the correct sleeve type, with dry sleeves for many gasoline engines and wet sleeves for heavy-duty diesel or high-heat situations. Chapter 3 focuses on block preparation, including cleaning, machining, and resurfacing as needed to ensure a precise sleeve fit. Chapter 4 details sleeve installation, from lubrication and alignment to seal considerations for wet sleeves or press-fit accuracy for dry sleeves. Chapter 5 covers final machining and finishing, ensuring proper bore size, crosshatch finish, and measurement checks before reassembly. The conclusion highlights decision criteria, safety considerations, and the importance of OEM-compatible sleeves and torque/tolerance adherence. Whether you’re a motorcycle owner, auto owner, parts distributor, or repair shop, the method remains the same: diagnose, select, prepare, install, and finish with precision. By following the five chapters, you’ll gain a clear, actionable framework to decide when sleeving makes sense and how to execute it with confidence.
Assessing the Engine Block’s Health: The Critical First Step in a Sleeving Project
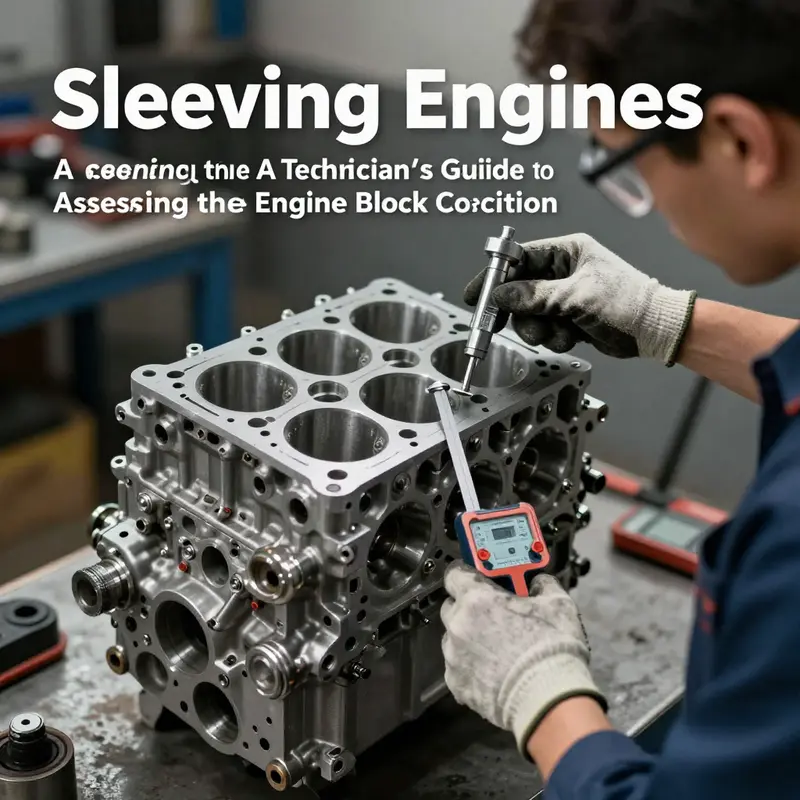
Assessing the engine block’s health is the crucial first step in any sleeving project. It sets the boundaries of what is possible and frames the entire repair strategy. Sleeving can restore worn cylinders to factory-like tolerance, but only if the block itself remains sound enough to support a precise, repeatable bore after sleeves are installed. This chapter guides you through the disciplined evaluation that separates a routine rebuild from a successful sleeving job, focusing on the observations that determine suitability, the measurements that establish a reliable machining plan, and the mindset that keeps the process honest and repair-oriented rather than speculative.
Safety and preparation come first. Before you touch a wrench, isolate power, relieve pressures, and ensure the block is secured on a rigid work surface. Remove all components—pistons, rods, head, oil and coolant systems—and make sure the block is clean and dry. Calibrated measuring tools are nonnegotiable: bore gauges, micrometers, straight edges, and dial indicators must be traceable to recent calibration records. Document the setup so you can reproduce measurements and verify repeatability. This is not mere housekeeping; it is the backbone of a trustworthy assessment that will guide every subsequent machining decision.
A thorough visual assessment follows the prep work. Clean surfaces reveal cracks, corrosion, and hidden damage that would otherwise be masked by oil films or carbon. Look for cracks emanating from deck corners, water jacket interfaces, and around main bearing saddles. Deck-to-block separation or obvious warpage can destabilize the head gasket seal and complicate sleeve seating. Exterior corrosion, pitting, or evidence of previous repairs may hint at deeper issues. Each observation should be recorded with location references so you can correlate findings with bore condition and planned sleeve geometry. The goal is not to be punitive in critique but to establish a truthful map of the block’s condition so you don’t mask a risk later in the build.
The deck and block geometry demand careful scrutiny because the deck’s flatness and its axis alignment to the bores directly influence sleeve seating and head gasket integrity. A straight edge across the deck, checked at multiple points, yields a flatness profile that helps determine whether planing or deck resurfacing is warranted. In many blocks, a few thousandths of deviation are tolerated, but larger distortions can compromise sealing surfaces and cause uneven sleeve contact. Beyond flatness, you must assess deck alignment relative to the bore axis. Any winding, taper, or misalignment across the deck can create head gasket leakage risk or uneven bore geometry after sleeving. If warpage is detected, the plan must weigh whether the head gasket interface can be reclaimed and whether sleeving remains viable without introducing new points of failure.
Bore condition represents the heart of the assessment. You will measure each bore at several depths and in several angular positions—commonly top, mid, and bottom—at 0°, 90°, 180°, and 270°. This matrix reveals taper, out-of-roundness, and any localized wear patterns such as ridge formation at the top lands or deep scoring marks. Compile a map of diameters, then compute taper (diameter variation from top to bottom) and ovality (difference between maximum and minimum diameters across a cross-section). The objective is to decide whether bore wear can be corrected with sleeves and honing to a precise final size, or whether the wear pattern renders sleeving impractical. Equally important is the surrounding wall thickness around the bore. A sleeve requires a stable land to bite into; if walls are already thin due to prior machining or material loss, the risk of future fatigue grows. In such cases, even a technically perfect sleeve fit may not deliver the required long-term integrity.
Non-destructive testing (NDT) provides a magnifying glass on hidden flaws. Dye penetrant testing helps reveal surface-breaking cracks in bore entrances, deck edges, and water jacket interfaces. Magnetic particle inspection can uncover subsurface defects that could propagate after machining. The data from these tests should be correlated with visual and dimensional findings. A crack near a planned sleeve location can derail sleeve feasibility or prompt remedial work, such as local retreatment or, in some cases, block replacement. The aim is to identify defects that would compromise sleeve seating, coolant sealing, or structural endurance under load and temperature cycling. Keep a clear log of NDT indications, their precise locations, and how they influence the sleeves’ placement and fit.
Cooling passages warrant equal attention. The water jacket condition can cast a long shadow over sleeving feasibility. Corrosion, scale buildup, or wall thinning around a sleeve bore can create leakage risk or reduce sleeve stability. If passages show signs of significant damage, you may need targeted cleaning or selective repairs that preserve sleeve seating geometry without inviting future leakage. In high-heat applications, where sleeves must transfer heat reliably, cooling-path integrity becomes a practical constraint on the final choice of sleeve type, fit, and bore finish. This is not a cosmetic concern; poor cooling can undermine ring seal, oil film integrity, and ultimately engine reliability.
With observations in hand, you face a decisive question: is sleeving viable for this block? The feasibility assessment weighs bore wear patterns, deck integrity, wall thickness, and water jacket condition against the sleeve approach you intend to use. If wear is excessive in a way that the bore cannot be reliably restored to the required tolerances, the answer may be to accept a different repair path or to replace the block. If, however, the block remains sound enough to anchor a strong sleeve, you move forward with a chosen sleeve strategy—full-sleeve or partial-sleeve—guided by where wear patterns concentrate and by the engine’s intended use. The selection of sleeve material and the seat method (interference fit versus bonded or adhesive approaches) becomes the practical hinge that translates assessment into machining instructions. A well-conceived plan also anticipates the final bore finish after sleeving and honing, ensuring the piston rings will seat correctly and maintain stable oil control and compression.
Documentation is the quiet engine of reliability. Capture every measurement, test result, and observation in a structured data sheet. Include block identification data, bore diameters at multiple depths and angular positions, taper and ovality calculations, deck flatness results, wall-thickness estimates, NDT indications, and water-jacket observations. The documentation should spell out the recommended sleeve type, size, and the machining plan to achieve the final bore size and geometry. A clear, traceable record is essential not only for the current build but for any future work and for quality control when the block returns to service. If a decision goes against the common path—such as partial sleeving in only the most worn cylinders or choosing a nonstandard sleeve diameter—the justification should be explicit and anchored in data rather than intuition.
As you translate assessment into action, you articulate a precise machining plan: the sequence of cleaning, deburring, edge radii preparation, bore alignment checks, sleeve seat preparation, and final bore sizing after sleeve installation. The plan must align with sleeve manufacturer guidance and the engine builder’s standards, while reflecting the engine’s service profile—whether diesel, high-performance gasoline, or heavy-duty industrial use. A robust plan also details post-sleeve inspections: bore roundness, runout, crosshatch finish, and the surface condition of the sleeve seating and piston ring contact areas. The goal is not only a correct fit but a durable, repeatable bore geometry that will stand up to engine wear and heat for the intended service life.
Ultimately, the assessment frames the sleeve decision and, in turn, the entire rebuild path. A thoughtfully executed assessment confirms whether sleeving will restore reliability and performance or whether other options are more prudent. It makes the difference between a repair that feels provisional and a sleeved bore that behaves like a factory fit. The work done at this stage—careful measurement, disciplined testing, and candid judgment—cultivates confidence that the engine can be rebuilt with sleeves and then reliably returned to service. If the assessment confirms viability, you proceed with a well-documented plan, confident that the sleeves will meet the targeted tolerances and that the final finish will deliver precise compression, efficient heat transfer, and enduring ring seating.
To deepen your understanding of sleeves, you can read What are engine sleeves?. For more programmatic standards and interpretive guidance on sleeves, refer to authoritative industry guidelines and manufacturer resources. External reference: https://www.mercedes-benz.com/en/technical-information/engineering/cylinder-sleeve-guide/
Choosing the Right Cylinder Sleeve: Balancing Heat, Fit, and Longevity in a Rebuilt Block

When you set out to sleeve an engine block, the decision about which type of cylinder sleeve to use is as foundational as selecting the pistons or choosing a compression ratio. The sleeve is not merely a replacement part; it defines how heat moves, how the bore wears over time, and how forgiving the rebuild will be under long-term service. The two main options—dry sleeves and wet sleeves—differ in how they interact with the block and with the cooling system. That interaction drives every other choice in the process, from the precision of the bore preparation to the seal method at the top and bottom of the sleeve. In practical terms, the right choice hinges on the engine’s size, its expected duty cycle, and the level of maintenance you can commit to over the life of the restoration. For many applications, the decision can be summarized as a trade-off between weight and heat management, with a clear line between lighter, tighter applications and larger, hotter, more demanding environments.
Dry sleeves, the thinner-walled option, rely on the block’s own material to conduct heat away from the outer surface of the sleeve. They are pressed into a precisely machined bore and are sealed only at their ends by the deck and top lip. The lack of direct coolant contact means these sleeves are inherently lighter and can offer a compact engine design with improved structural rigidity. They excel in smaller, higher-efficiency engines where thermal loads stay within what the block can manage with its own cooling system. The heat transfer path in a dry-sleeve setup is indirect, and that fact carries practical implications. If the block’s deck remains perfectly flat and the bore is precisely aligned, heat still has a reliable path to the water jacket; misalignment or distortion can create hotspots, uneven wear, or a loss of bore roundness over time. For builders and technicians, this means meticulous block prep and strict adherence to OEM tolerances. A helpful way to visualize the dry sleeve concept is to compare it to a tight, reliable jacket that relies on the host fabric’s strength to carry the load. If you’re curious about the operational behavior and nuances of this sleeve type, consider reviewing a focused explainer like dry-sleeve engine explained. dry-sleeve engine explained.
Wet sleeves, by contrast, are designed to sit in direct contact with the engine coolant. They are noticeably thicker, typically in the 5–8 mm range, and the outer surface acts as a heat exchanger. Seals at the top and bottom—often gaskets or O-rings—prevent coolant from leaking around the sleeve and ensure that the heat picked up during combustion is efficiently transferred into the cooling circuit. The payoff is superior thermal management: a more uniform temperature profile across the cylinder wall and the potential for higher output, longer life under sustained heat, and more predictable piston ring seal behavior. Wet sleeves shine in larger, high-heat engines and industrial or heavy-duty applications where the cooling system bears a heavier thermal load. The ability to manage heat effectively translates into less bore distortion over time and reduces the risk of heat-related wear patterns that can compromise ring sealing and bore geometry. An added practical advantage is serviceability: in many cases, wet sleeves can be replaced without pulling the entire engine from the vehicle, minimizing downtime and labor costs when maintenance or overhauls are necessary.
The choice between these sleeve types is rarely a matter of a single feature but a balance of several interacting factors. Engine size and power output set the ceiling for thermal stress. A passenger car engine with a modest duty cycle may comfortably operate with a dry sleeve, if the block has good material integrity and if the cooling system can carry the heat. In contrast, a high-mileage workhorse or a high-load diesel that experiences sustained high temperatures will typically benefit from the robust heat management of wet sleeves. The operating environment also matters. If the engine must tolerate frequent bursts of high power, or if overnight cooling and downtime are costly, the reliability of a wet sleeve can be worth the added machining and sealing complexity. It is not simply about whether the sleeve can do the job; it is about how consistently it can do so under the engine’s expected service life.
Machining and preparation play a defining role in whether a dry or wet sleeve will live up to its potential. For a dry-sleeve build, the block often requires more aggressive and precise machining to ensure a perfect bearing surface and a true, square deck. The old walls must be bored to a specific size, then honed to achieve the exact surface finish and roundness required for a solid press fit. End-gap control, deck flatness, and the absence of warping all contribute to a successful dry-sleeve installation. The critical step is ensuring the bore and deck are aligned to OEM specs to maintain piston ring geometry and oil control. In many guidelines, dry sleeves depend on a flawless interaction between sleeve outer diameter, block bore, and deck height. The result should be a snug, uniform fit with minimal radial play and a robust seal at the top where the piston crown approaches the bore. If you want to explore the dry-sleeve concept in more depth, a detailed technical primer is available at the linked explainer above.
Wet sleeves demand their own set of precise preparations. Since the sleeve is in contact with coolant, the bore must accommodate not only a precise inner diameter for the sleeve’s wall but also external features that allow for reliable sealing against coolant outside the sleeve. The top and bottom seats must be machined with care, and the sealing interfaces require careful selection of gasket or O-ring materials compatible with the engine’s coolant chemistry and operating temperatures. The installation sequence for wet sleeves emphasizes reliable sealing and heat transfer. The sleeve must be seated flush with the block deck to ensure a consistent compression surface and to prevent coolant leakage. Any deviation in depth or alignment can compromise heat transfer, promote scuff wear, or cause leakage. The heat-exchange role of the sleeve’s outer surface is central to its value; when sealing and geometry are correct, heat is more evenly distributed, diminishing the likelihood of localized hotspots that can accelerate bore wear.
From there, the choice threads into assembly philosophy. In a dry-sleeve build, the additional attention to machining accuracy is a direct investment in long-term durability. The block must be prepared with high precision, and the sleeves are installed with strict press-fit tolerances. A misstep here can manifest as a taper, out-of-roundness, or cold-wedging effects that compromise cylinder geometry and oil control. In a wet-sleeve build, the installer must rigorously verify the coolant seals and gasket integrity after installation. Even if the bore is flawlessly round, an improper seal can undermine the entire cooling strategy and put the engine at risk of leak or erosion. These considerations tie back to the engine’s intended use: for performance builds, the thermal behavior and maintenance window define whether a dry sleeve or a wet sleeve better supports the desired power curve and drivability.
In practice, the decision process is iterative rather than linear. A technician starts with the block’s condition and the engine’s service expectations, then weighs the heat-management demands against the block’s capacity to dissipate that heat through its cooling system. The goal is a bore that remains true across thermal cycles, a sleeve that maintains concentricity with the crank axis, and a seating arrangement that prevents any coolant or oil cross-talk that could degrade performance. Once the sleeve type is selected, the subsequent steps—bore preparation, sleeve installation, final machining, and finishing—follow with the same discipline and precision, regardless of sleeve type. As the process unfolds, the unified thread of reliability runs through the entire rebuild, from the first cut of a bore to the final crosshatch pattern that helps piston rings seat and break in smoothly.
For those who want a concise reference to the sleeve types and their implications, the topic remains central to achieving a durable rebuild. The right sleeve type aligns with thermal expectations, mechanical strength, maintenance practicality, and the engine’s operating environment. It also aligns with an overarching goal: restoring cylinders to factory or near-factory specifications while preserving the block’s integrity and ensuring long-term performance. If the chapter ahead evaluates the final machining, you’ll see how the chosen sleeve type informs the hone strategy, the surface finish, and the tolerances to target for optimal piston ring seal and oil retention. In this sense, sleeve selection acts as a bridge between the block’s structural heritage and the engine’s modern operating demands.
For further technical guidance on sleeve selection and installation standards, consult authoritative resources such as SME International’s cylinder sleeve guidelines, which provide comprehensive standards that can help calibrate your approach to both dry and wet sleeves. https://www.sme.org/technical-resources/engineering-guides/cylinder-sleeve-selection-and-installation
From Bare Block to Sleeved Cylinder: Precision Preparation for a Reliable Engine Rebuild
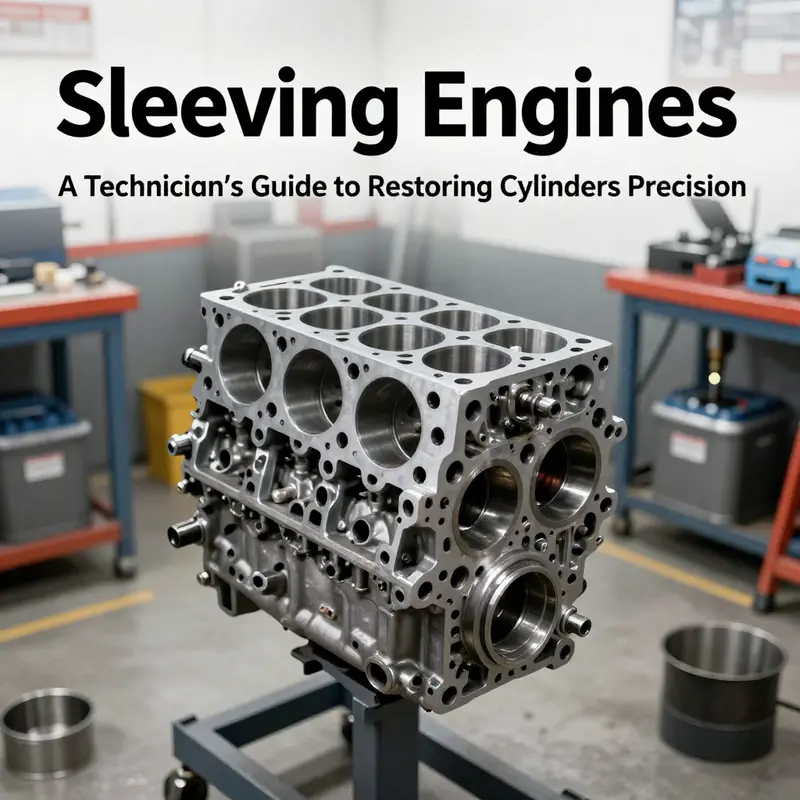
Sleeving a block begins long before the first sleeve is touched. It is a bridge between a worn, uncertain bore and a refurbished cylinder that can tolerate modern tolerances, rings, and temperatures. The preparation phase lays the foundation for success, aligning material choice, machining accuracy, and sealing integrity with the engine’s intended duty. When done well, this phase preserves block integrity, ensures proper heat transfer, and creates a predictable platform for the sleeves to live and work within for many miles of reliable service. The chapter that follows examines the preparation mindset—the careful checks, meticulous cleaning, and disciplined machining that convert a rough bore into a round, true partner for the sleeves and the pistons that follow. It is a process that rewards patience and precision, because even a small misstep here can ripple through every later step, from sleeve seating to head gasket sealing and beyond. In practice, preparation is as much about protection as it is about fit. You are protecting the block’s structural integrity, the water jacket passages, and the oiling routes that keep heat and friction from turning a rebuild into a reliability issue. Every decision—dry sleeve versus wet sleeve, the order of operations for boring and honing, the way you mask and protect surfaces—affects the final reliability and, ultimately, the engine’s performance envelope.
The assessment begins with a careful, almost clinical look at the block. Cracks may be visible, but many reveal themselves only under magnification or dye penetrant testing. Warps on the deck surface can hide under the gasket, distort head geometry, and unsettle valve timing. The water jackets must retain their structural fidelity, because a poor seal or misalignment here will undermine cooling later. The bore itself is the central element: wear patterns, ovality, taper, and the presence of witness marks from previous sleeving attempts all tell a story about how the block has lived and how it must be prepared to live again. A responsible engineer documents bore diameters, deck height, and any deviations before taking a single cut. This baseline becomes the reference against which every subsequent operation is measured. The goal, in rough terms, is to restore the block to a state that allows the bore to be round, coaxial with the crank axis, and true to the block’s datum. It is not merely about removing material; it is about preserving the structural heart of the engine while setting up a bore and sleeve interface that will endure heat, pressure, and timing.
Within this framework of assessment, the choice between dry sleeves and wet sleeves emerges as a crucial guiding decision. Dry sleeves suit many passenger cars and typical gasoline engines because they rely on a precise interference fit and do not have direct coolant contact on the outer surface. Wet sleeves, on the other hand, excel in high-heat environments and large-diameter diesel engines, where cooling needs are intense and heat dissipation cannot be compromised. The selection is not an afterthought but a driver of the block preparation strategy. For instance, dry sleeve installations demand highly controlled bore machining, exacting alignment, and careful surface finishing to ensure the sleeve seats truly and remains concentric with the deck. The block’s iffy years of life can be redeemed by a sleeve that is properly coaxial and seated at the same plane as the deck. In contrast, when wet sleeves are chosen, sealing interfaces become more complex because the sleeve must seal against coolant pathways and gasket-like interfaces without leaks. The proper preparation thus harmonizes with the sleeve type, foretelling how the block will respond to heat, pressure, and service loads. A concise primer on these sleeve types clarifies their roles and limitations and helps the reader connect preparation choices with the expected performance. For readers seeking a quick primer on sleeves, see the linked resource What are engine sleeves?
From the outset, preparation is a process of securing cleanroom-like discipline in the shop. The block is stripped of pistons, rods, the head, and ancillary hardware that could contaminate delicate machining operations. Every fluid path that could carry debris—oil galleries, coolant passages, and feed channels—must be thoroughly drained and cleaned. After disassembly, the block receives a comprehensive cleaning using approved cleaners and, where feasible, ultrasonic baths to dislodge stubborn residue. A visual inspection accompanies this cleaning, but an NDE step—such as magnafluxing or dye penetrant testing—is often prudent to reveal subsurface flaws that would render sleeving ineffective or unsafe. The deck surface undergoes a twofold scrutiny: flatness and perpendicularity to the bore centers. Warpage or misalignment here is not cosmetic; it changes the way the head gasket seals and how the sleeves seat. If deck flatness is compromised, resurfacing or selecting a different block architecture may be warranted. The block must present a true reference plane for the sleeves to operate within, and that reference hinges on a stable deck that remains true when the head is torqued and the block is loaded during operation.
Machining the block to accept sleeves is where preparation transforms intent into tolerances. Bore preparation is not a trivial step; it is the art of widening and aligning the old walls so they accept new sleeves with the right fit and alignment. The machining sequence typically involves careful alignment work, followed by boring to the correct size and honing to the final finish. Alignment is not only about the bore diameter; it is about coaxiality to the crankshaft axis, perpendicularity to the deck surface, and consistency along the bore length. In dry sleeves, the bore must be precisely prepared to an interference-fit specification so that heating or cooling interventions bring the sleeve into a secure, uniform seat. In wet sleeves, the outer surface must tolerate coolant flow and sealing interfaces without introducing distortion that could affect seal areas or warping under thermal load. The block often requires deck milling or resurfacing to maintain flatness after bore work and sleeve seating. The engineering emphasis here is that the sleeve installation is not a separate operation; it is the culmination of careful preparation where each cut supports the next without introducing new sources of error.
The actual sleeve installation, while a discrete mechanical operation, is deeply informed by the preparation work. A sleeve must be coaxial with the bore and fully seated at the correct depth relative to the deck. A hydraulic press or specialized tooling is used to press the sleeve into the prepared bore, with lubrication and the proper thermal strategy applied to control fit. For dry sleeves, the end face of the sleeve must align flush with the deck surface, ensuring that the piston rings will travel through a bore that is true and square. For wet sleeves, sealing is a more explicit concern; end seals, O-rings, or gaskets must seat without leaks while the sleeve remains in the correct orientation. The preparation phase is what makes these delicate steps reliable. If the bore is not truly round or if the sleeve misalignment exists, the risk of ring seal failure, coolant consumption, or accelerated sleeve wear increases dramatically. It is here that a well-executed preparation proves its value by reducing the need for rework and by setting up the final honing to produce a surface finish compatible with the new bore geometry and the piston rings.
After sleeves are seated, finishing operations complete the transition from a rough, worn engine to a precision-built unit. Each sleeve bore is re-bored or honed to final diameter, and a controlled crosshatch pattern is introduced to promote oil retention and piston ring seating. The aim is a bore that is not only round and straight but also oil-friendly, providing an ideal surface for break-in and long-term wear characteristics. The deck is re-checked for flatness, and the sleeve-to-deck interface is scanned for any gaps or distortion. Deburring and cleaning must follow to remove any metal fines or lubricant residues that could contaminate oil or coolant paths. Finally, the block is prepared for reassembly with careful attention to oil passages, coolant channels, and the seating surfaces that will meet the cylinder head. The emphasis throughout is on maintaining tolerance integrity and preventing any distortion that could undermine the integrity of gasket seals, heat transfer, or valve geometry.
Quality control and documentation cap the process. Dimensional checks verify bore diameter, roundness, taper, and coaxiality. Surface finishes are checked for the proper roughness and compatibility with piston rings and sleeve materials. A fit-check confirms that sleeves sit square and stable without runout. If feasible, leak tests for coolant and oil flow paths may be performed to identify issues before full assembly. Documentation records measurements, machine shop notes, and any deviations from nominal specifications. This traceability ensures future maintenance or inspection can reference the exact setup used for sleeving. Safety and best practices underpin all operations. PPE, calibrated tools, clean work environments, and adherence to OEM tolerances and torque specifications are the quiet backbone of a reliable sleeving project. The goal of all this discipline is straightforward: to restore cylinders to factory-like specifications or better, while preserving block integrity and ensuring that longevity and performance follow through the rebuild.
As you move from preparation toward assembly, the decision whether to sleeve versus replace remains a decision that must be grounded in the block’s overall condition. If the core is cracked or warped beyond practical repair, replacement of the block may be the smarter route. If the block is structurally sound but the bores are worn beyond practical repair, sleeving offers a cost-effective, performance-oriented path. In either case, the preparation phase described here is the same: establish true bore alignment, protect the block’s heat and oil paths, and create a reference that sleeves and head gaskets can trust. For readers seeking deeper technical guidance and manufacturer-approved tolerances, official resources provide the definitive standards that translate this preparation philosophy into a repeatable, engine-specific procedure. For a concise primer on sleeves, see the related page What are engine sleeves? and for formal guidelines, consult the technical information portal that covers cylinder-sleeve practice in detail.
In the broader view, preparation is the quiet but essential act that unlocks the sleeve’s promise. It is where engineering intent becomes practical reality: a block able to carry a new bore, a sleeve that anchors heat and wear, and a rebuilt engine that can return to service with confidence. The depth of this work cannot be overstated. It demands respect for tolerances, appreciation for material behavior under heat, and an unyielding commitment to cleanliness and measurement. The result is a sleeved engine block that not only meets specifications but also earns a reputation for reliability under high-mileage use or demanding performance. If you want a concise, image-free primer on engine sleeves as a preparatory context, the linked resource provides a readable overview that complements the hands-on guidance embedded in this chapter. What are engine sleeves?
For those seeking official guidelines and compatibility context, reference can be made to formal engineering resources that document sleeve types, installation practices, and heat-management considerations. These guidelines reinforce the practical lessons offered here and help ensure that the preparation phase aligns with the engine’s long-term reliability goals. In the end, preparation is the quiet art of turning wear into a structured plan, and a block that has survived years of service into a platform that can endure new hours of precision operation. The sleeves do not merely fill a hole; they restore a process—heat transfer, lubrication, and compression—that keeps energy where it belongs: inside the cylinders, doing the work that keeps an engine moving.
External resource: For official guidelines and detailed tolerances, consult the Mercedes-Benz Cylinder Sleeve Guide. https://www.mercedes-benz.com/en/technical-information/engineering/cylinder-sleeve-guide/
Chapter 4: Precision Sleeve Installation—Rebuilding Bore Integrity with Cylinder Liners
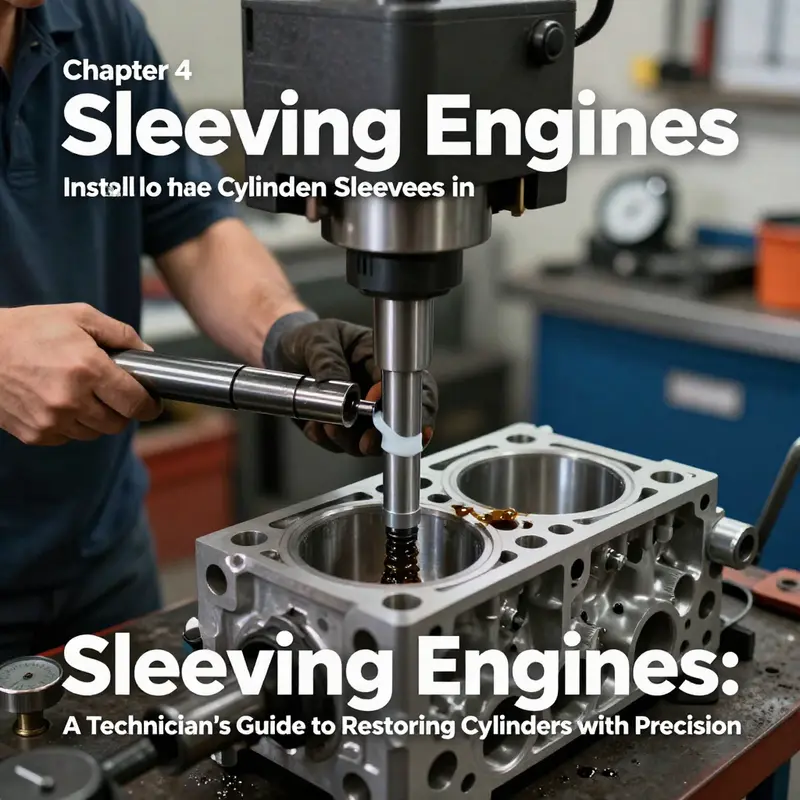
Sleeving a block is more than a mechanical fix; it is a precision rebuilding process that returns worn bores to their designed geometry and thermal behavior. When done correctly, it restores cylinder wall integrity, improves sealing, and sets the stage for reliable piston motion and predictable ring seal after startup. The choice between wet and dry sleeves guides the entire approach, because each type demands different seating depths, sealing strategies, and finishing steps. For readers new to engine sleeves, a quick primer helps: sleeves are liners that form the new inner wall of each cylinder. To understand the fundamental distinction and how sleeves interact with piston rings, you can consult a concise overview like the one found in dedicated technical resources on engine sleeves, including discussions that explain the concept of sleeves in practical terms. In particular, consider What are engine sleeves? as a starting point to ground the installation in the broader context of sleeve design and function. With that in mind, the installation phase becomes a blend of measurement discipline, clean room behavior, and controlled force that respects the block’s original architecture while reestablishing a precise bore axis. A well-executed sleeve installation begins with a sober assessment of the block and a clear plan for the sleeve type that best matches the engine’s cooling strategy, power target, and service history. Dry sleeves, which rely on an interference fit and do not contact coolant, are common in many automotive applications where the goal is to restore a worn bore with minimal disruption to the block’s cooling channels. Wet sleeves, exposed directly to coolant on their outer surface, are favored in engines designed for heavy duty or high-heat operation because they can offer superior heat transfer and more forgiving bore finishing inside the sleeve. The decision shapes the machining approach, the sealing interface, and the final bore finish inside the sleeve. Beyond the type choice, material compatibility matters. Cast iron or alloyed steel sleeves must harmonize with the block’s substrate and with the piston rings’ finishing, so the final bore surface inside the sleeve can be honed to the correct crosshatch and finish. The engine’s service manual or manufacturer guidelines provide the definitive tolerances for the sleeve’s outer diameter, deck protrusion, seating depth, and finish requirements, and a careful technician will align every step with those specs. In practice, the preparation phase is as critical as the actual pressing or driving of the sleeve. The block is stripped of its major components, thoroughly cleaned, and inspected for cracks, warpage, and the condition of coolant passages near the intended sleeves. A visual check for deck flatness and bore axis alignment helps determine whether the block can hold a sleeve set true over the life of the engine. In high-mileage or high-performance applications, even minor distortions can translate into bore misalignment after reassembly, so surface plates, straight edges, and precise measurement tools become essential allies in the workspace. Once the block is deemed suitable, the sleeve selection is confirmed, and the tools are laid out. A robust sleeve installation calls for a well-prepared bore pocket, a clean interface, and a controlled introduction of the sleeve into the block. For wet sleeves, the process emphasizes a clean seating surface and a precise depth. The sleeve must sit flush with the deck, with no protrusion beyond the surface that could distort the head gasket seal or piston crown geometry. Any misalignment at this stage will propagate into the finishing process, complicate bore finishing, and increase the risk of coolant leaks. The actual install uses a purpose-built sleeve driver or a hydraulic press, paired with appropriate lubrication. The sleeve is aligned with the deck markings and coolant passages before it is seated. Depth measurements with a depth micrometer verify that the top edge of the sleeve aligns to the OEM-recommended protrusion relative to the deck. The importance of alignment cannot be overstated; even small angular deviations can translate into nonuniform bore finishing or sealing challenges later. After seating, the bore inside the sleeve is honed to final size. This requires a consistent lubrication flow and careful control of pressure to avoid galling or chatter. The honing step is where surface texture is established—the crosshatch pattern that retains oil, guides piston ring seating, and supports long-term ring seal. The goal is a bore that is round, true, and free of taper within the engine’s specified tolerances. The next critical phase concerns deck surface and sealing interfaces. For wet sleeves, the top of the sleeve should be flush with the deck, or slightly recessed, according to the manufacturer’s callout. Mixing overly aggressive deck machining with an improper sleeve depth is a common source of gasket leakage and early bore wear. For dry sleeves, sealing relies on the interface geometry and any required O-rings or gaskets. The seal surface must be perfectly smooth, with no raised burrs, and the sealing elements must be placed in their correct grooves to prevent coolant migration into the combustion chamber or oil passages. After the sleeves are finished, a battery of checks follows: the finished bores are measured for concentricity to the crank axis, roundness, and size. A dial bore gauge or an equivalent measurement system provides the final verdict on bore condition. The process also includes a cross-check against piston ring end gaps and the anticipated piston-to-bore clearance to ensure that, when the engine is eventually started, the rings can seat properly without scuffing or excessive oil consumption. With the sleeves seated and the bores finished to spec, the block can be reassembled in a careful, orderly fashion. Piston assemblies, connecting rods, crankshaft, and the cylinder head are installed in sequence, each fastener torqued to OEM specifications and in the required sequence to preserve gasket sealing and bearing preload. A final leak-down test targets the sleeve interfaces and the cylinder walls to confirm that the sleeves have sealed properly and that the bore is holding compression as designed. The handling of finish, alignment, and sealing feeds into the broader theme of reliability: a sleeve that is correctly installed under controlled conditions reduces the risk of early wear, scuffing, or overheating, and it enables the engine to maintain uniform bore pressure and oil control across the life of the rebuild. Throughout this process, attention to cleanliness and process discipline is as important as any measurement. Debris anywhere near the bore finish can paint a future with scoring or ring-seeding issues. Proper lubrication during insertion prevents galling and helps the sleeve settle evenly. Documentation of measurements and any deviations from OEM specs supports traceability and future service work, should it be needed. If at any point the block shows signs of warpage, misalignment, or a brittle interface between the sleeve and block, escalation to professional service is prudent. In such cases, a shop with dedicated fixture sets and alignment rigs can verify seating depth, parallelism, and concentricity to tighter tolerances than a typical home workshop might achieve. This is especially true for high-performance or mission-critical builds where precision tolerances translate directly into reliability and longevity. For ongoing reading, the broader literature on cylinder sleeves emphasizes the importance of compatibility charts and manufacturer guidance for final bore size, deck finish, and sealing requirements. As a reference, consult the Mercedes-Benz Cylinder Sleeve Guide for systematized guidance on industry standards and recommended practices. External reference: https://www.mercedes-benz.com/en/technical-information/engineering/cylinder-sleeve-guide/
From Sleeve to Seal: Precision Final Machining and Finishing That Make a Reborn Cylinder

The moment the sleeves are seated, the engine block enters the final phase where precision decides whether a rebuilt bore will endure the next decade of service. This chapter follows a single, focused thread: final machining and finishing that turn a sleeve installation into a true, sealed cylinder surface. It is a careful choreography of boring, honing, alignment, and surface treatment, all aimed at delivering true roundness, parallelism to the crankshaft, and a finish that promotes reliable piston ring seal and healthy oil control. Every choice here—tool geometry, feed rates, lubrication, and inspection methods—speaks to the requirement that the bore be perfectly aligned with the crank axis and free of any deviation that could invite wear or leaks. The result is not just a dimension, but a bore that behaves predictably under load and heat, a key to longevity in both high-mileage street builds and demanding industrial engines.
Boring the cylinder bores to their final size is the truth-teller in this stage. A precision boring bar, guided by high-stiffness fixtures and calibrated to the block’s centerline, removes the tiny irregularities left by sleeving and any minor misalignment from the machining process. The target tolerance is tight: typically within ±0.001 inches (±0.025 mm). This level of exactness ensures the piston rings can seat evenly and seal consistently across the stroke, reducing oil burn and minimizing ring land wear. Boring also corrects any ovality or taper that may have crept in during sleeve installation, establishing a true cylindrical cross-section that the piston rings can track without binding. The operator constantly checks runout and bore finish with micrometers and dial indicators, verifying that each bore is concentric with the crankshaft’s axis and square to the deck surface. This is where the block’s geometry reveals itself as either a clean platform for assembly or a warning of deeper issues that warrant corrective action before proceeding.
Honing follows boring as the essential bridge between precise size and practical surface finish. The aim is not a bare hole but a controlled, crosshatched surface that retains engine oil while promoting piston ring break-in. The crosshatch angles are chosen to balance oil retention with ring seating dynamics specific to the engine’s application. The specified surface roughness in this guide is a precise range, with roughness values typically between 3–6 microinches (0.1–0.2 micrometers) in this context. While some high-performance or racing builds may push for finer finishes, the general principle remains: a well-defined crosshatch fosters oil retention, minimizes scuffing during break-in, and allows rings to seat evenly under load. The honing operation is carefully controlled for depth of penetration, stone wear, and feed direction. Too aggressive a cut or uneven wear on the honing stones can alter bore geometry just enough to spoil ring seal. Each bore is measured for roundness and straightness after honing, with multiple passes if needed to achieve a uniform, cylindrical finish across all cylinders.
Beyond the boring and honing, cylinder alignment checks become the quiet gatekeepers of long-term reliability. The block must align parallel to the crankshaft axis and perpendicular to the deck surface with minimal deviation. Dial indicators measure bore-to-crank alignment, while laser or optical systems may be used in higher-precision shops to verify consistency across all bores. Any misalignment can manifest as piston slap, uneven wear, or early gasket failure once the engine heats up and tolerances shift. When alignment checks reveal a stubborn deviation, the deck surface may need resurfacing to restore true flatness and proper head gasket seating. Deck surfacing is not an automatic step, but a prudent option when flatness has degraded or when a slight tilt in the deck could compromise sealing. The decision to surface is guided by a combination of deck flatness measurements, gasket seating needs, and the engine’s intended service.
Cleaning and inspection cap the finishing phase with a discipline that rivals the earlier machining work. All debris—from coolant residues to honing abrasives—must be purged completely. Cleaning methods range from compressed air and solvent wipes to ultrasonic baths that dislodge microscopic particles tucked in oil galleries and around the sleeve edges. A thorough visual inspection follows, supported by micrometers, bore gauges, and, where available, borescopes that reveal the sleeve-to-block interface beyond what the naked eye can see. The goal is to confirm that each bore meets OEM or performance specifications, that roundness and straightness are within tolerance, and that there are no signs of surface damage in the bore walls or deck.
In industrial and high-heat applications, surface treatments may extend the service life of the sleeved block. Nitriding or chrome-like surface hardening can be applied to the bore region to improve wear resistance and thermal stability. These techniques reduce the rate of bore wear and help the engine maintain compression after many cycles of heat expansion and contraction. When such treatments are appropriate, they are scheduled after the finishing steps and before any assembly work begins. The mechanics of these processes demand strict control of coating thickness and uniformity, because uneven layers can alter bore diameter or create stress concentrations that propagate cracks under load. The decision to employ surface treatments reflects the engine’s role—whether it’s a daily-driven workhorse, a performance dynamo, or a high-mileage diesel that must live through harsh duty cycles.
With the bore geometry confirmed and the surface finish established, the chapter moves toward the reassembly with a focus that is rarely glamorous but always essential. Pistons, rings, and connecting rods go back into the sleeves with proper orientation and care. The crankshaft, bearings, and cylinder head follow under OEM torque specifications, and a meticulous leak-down and compression test becomes the final gate before the engine is started. Even here, attention to detail matters; a small mismatch in torque or an overlooked porting variation can mask itself as a false positive during the initial startup. The process, therefore, remains a sequence of checks and confirmations, where each step validates the last and keeps the assembly honest to its design tolerances.
The final machining and finishing phase is more than a set of procedural steps. It is the realization of the sleeving concept—a restoration approach that returns worn bores to factory-like specifications without replacing the entire block. The sleeve forms a reliable working surface, and the subsequent bore preparation unlocks consistent ring seal, controlled oil film, and predictable wear patterns. For readers seeking a concise primer on the sleeves themselves, a broader explanation is available through a dedicated guide that unpacks the sleeve types, their applications, and their implications for heat management and service life. See Sleeve an Engine Explained for an accessible overview and context as you move toward these finish steps.
As you reflect on this final machining phase, consider how the discipline of precision, the insistence on clean surfaces, and the insistence on true geometry shape the engine’s future. The sleeved block will not fail because of a single misstep at the bore edge; it will reveal weaknesses only if the bore is not truly round, not parallel to the crank, or not properly sealed at the deck. In practice, this means that every measurement matters, every tool should be in good condition, and every operator should understand the critical interplay between bore finish, ring seal, and heat management. The result is a cylinder block that behaves as a cohesive component—one whose sleeves are not just sleeves, but integral members of a durable, reliable engine.
For further reading on the broader industry practices and detailed technical guidance that informs these steps, see the SAE International Technical Paper on Sleeve Installation and Cylinder Bore Machining. This reference provides deeper context on the machining strategies that underpin reliable sleeved blocks. https://www.sae.org/publications/technical-papers/content/2023-01-0897/
To connect this detail with practical understanding and real-world explanations, you can explore this related article on engine sleeving concepts: Sleeve an Engine Explained. This resource offers a broader narrative that complements the precise finishing steps described here, helping readers see how sleeving fits into overall engine restoration and performance goals.
Final thoughts
Sleeving an engine block is a precision, engineering-driven repair that fits motorcycles, autos, and diesel or high-heat applications alike. The five chapters map a complete workflow: assess the block, choose the sleeve type, prepare the block, install sleeves, and finish with controlled machining. By confirming structural integrity, selecting the right sleeve technology, and executing alignment and sealing with strict tolerances, you can restore cylinders to OEM specifications, improve heat management, and extend engine life. For shops and distributors, the framework supports consistent service quality and reliable sourcing of sleeves and tooling. For owners, it translates into informed decisions about repair versus replacement and a dependable path back to peak performance.