Engine sleeves is not standard automotive terminology, yet the task it implies—gaining safe access to the engine via the undertray—occurs across motorcycles and cars. The engine undertray, or skid plate, shields vital components from road debris while simplifying under-hood maintenance. In some models the undertray is the primary barrier to routine checks, while in others it serves as an access panel for oil, belts, wiring, and fasteners. This four-chapter guide anchors the process in safety, precise fastener identification, a step-by-step detachment approach, and a disciplined reassembly and final inspection. By starting with safety and prep, moving through meticulous fastener and tool recognition, executing the detach-and-release sequence, and finishing with inspection and reassembly, technicians and enthusiasts can approach engine sleeve terminology with clarity while delivering repeatable, damage-free service for both motorcycles and automobiles.
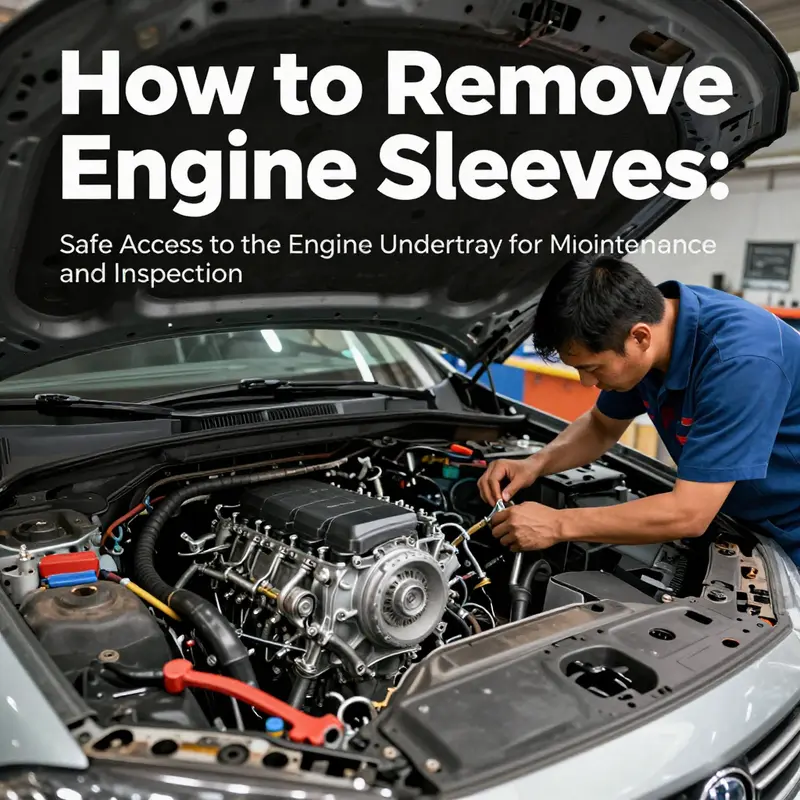
Exposing the Core: Safe Access, Realistic Expectations, and the Path to Cylinder Sleeve Work
When people first hear the phrase engine sleeves, they often picture a quick swap or a simple pull of a stubborn part. In reality, engine sleeves—more precisely, cylinder sleeves or liners—sit inside the heart of the engine block, protecting the bore walls and maintaining the precise geometry that keeps a combustion chamber efficient and reliable. The term itself is easy to misinterpret because, in ordinary service, we rarely “remove the sleeves” as a routine maintenance task. Instead, sleeves are replaced as part of a larger engine rebuilding process, typically handled by skilled technicians in a machine shop. This chapter digs into what an engine sleeve is, why someone might remove one, and what it means to prepare for access in the vehicle. It also clarifies how preparing a car for this level of work often begins much earlier—by establishing a solid safety routine, selecting the right approach, and understanding the limitations and risks involved. In short, sleeves are not a quick, DIY weekend job, but a gateway to serious engine work that begins long before the first tool touches metal. To navigate this terrain responsibly, it helps to start with a sound mental map of the vehicle’s different layers: the exterior panels, the protective undertray or skid plate, and the engine itself with its cylinders and their protective liners. The undertray, in particular, is a practical first portal to sleeve work because it is designed to shield the crankcase, oil pan, and lower sections of the engine from road debris while also granting access routes to the lower hardware. As you prepare to work toward sleeves, you will inevitably come to a point where you must peel back that protective shield, and that requires discipline, patience, and a careful checklist. The idea is to reach the sleeves without turning the project into a source of recurring setbacks, or worse, damage to the engine block or nearby components. The details below weave together the practical reality of undertray access with the larger context of sleeve work, so you can approach the task with a clear plan rather than a thicket of guesswork. A reader may encounter this topic most clearly when they recognize that sleeves, while not visible from the hood, play a decisive role in bore wear resistance and sealing integrity. If you want a concise primer on sleeves themselves, one accessible explanation frames them as the replaceable liners inside a casting or a wet liner setup, offering an immediate sense of why a restoration project might require their removal. For those who want to start with a strong foundation, the best starting point is to understand sleeves not as a DIY texture of the moment, but as a component with a specific function and a specific service path. For example, readers who are curious about the broader concept can consult resources that answer fundamental questions like what sleeves are and whether all engines use cylinder sleeves. That context helps frame the larger narrative of access and disassembly. And while sleeves are often discussed in the context of high-performance builds or heavy-use engines, the practical workflow to reach them begins with the most common barrier most cars have: the undertray. A typical service path begins with a careful, methodical disassembly to provide access to the engine’s core areas. The undertray is held by a combination of screws, bolts, and plastic clips, and it is important to approach its removal with respect for the way the fasteners are designed to accommodate vibration and heat cycles. The removal process is not just about loosening a few fasteners; it is about respecting the design of locking tabs, screw clamps, and the way the tray itself interfaces with the engine’s chassis. The underlying principle is that access is earned, not forced. This is why the first part of any sleeve-related task should be preparation, safety, and a clear plan that does not skip the crucial steps that protect you and the vehicle. The safety first mindset is not a mere courtesy; it is a practical boundary that prevents careless mistakes from turning into costly damage. It begins with the vehicle fully cooled, the engine off, and the battery disconnected to minimize the risk of short circuits during service. It extends to the use of appropriate hand tools and, when needed, a trim removal tool to ease plastic clips away from their housings without snapping them. It also includes a systematic approach to tracking fasteners—keeping screws and bolts with their corresponding locations is essential because the undertray often uses a mix of hardware of different lengths and threads. This discipline pays dividends later when it comes time to reassemble or to take the project further into the sleeve domain. It is also important to acknowledge that not every car model permits easy access in the same way. Even within the same vehicle family, the undertray design can vary by year, trim, and engine option. The Geely Boyue, for example, may share a common philosophy with other compact SUVs of using a plastic or composite undertray that can be released with a careful sequence of fastener removal, but it is not identical to every model’s approach. This is why the owner’s manual or service manual becomes the most reliable compass for exact removal steps—and why a general description must be treated as a starting point rather than a universal recipe. Once the undertray is removed and the lower engine area is visible, the path toward sleeves begins to emerge, but it is not a direct line. Access is often a gateway to more comprehensive disassembly, including removing components such as the oil pan, timing cover, and possibly the cylinder head or other ancillaries depending on the engine architecture. Each of these steps has its own safety notes, torque requirements, and potential for misalignment if done hastily. The overarching principle remains: sleeves are not a one-tool, one-skill job. They sit inside a chain of operations that test the limits of precision and cleanliness. If the goal is sleeve replacement or sleeve work, the scope expands beyond the engine bay to machine shop environments where the block is machined, honed, sleeved, and tested. This is not about wrench-and-go repairs; it is about a controlled transformation that preserves the engine’s bore geometry, lubrication channels, and overall sealing integrity. The conversation about sleeves naturally invites a moment of humility: the person seeking to remove sleeves must accept that the project’s complexity grows as the engine is opened. The decision to proceed beyond mere inspection into full sleeve work should involve a clear assessment of the engine’s condition, the availability of the proper sleeve material and dimensions, and the right tooling, including boring bars, honing equipment, and measuring devices. In a well-managed workflow, the sleeves would be removed only after careful documentation of every bore’s diameter, roundness, and surface finish, followed by precise calculations to determine whether an overbore, a reline with new sleeves, or a complete rebuild is warranted. The practical implication for the practitioner is straightforward: sleeve work is best performed with clean, controlled environments, where coolant and oil leaks are minimized, and where the crankcase can be protected from debris during disassembly. This often means preparing a dedicated workspace, laying out clean trays for fasteners, and ensuring that the engine’s mating surfaces stay free of dust and metal shavings. In this light, the undertray’s removal becomes more than a convenience; it is an essential step toward achieving the level of cleanliness and access that sleeve work demands. As you reflect on the procedure, you may find value in connecting the general concept of sleeves to more accessible maintenance knowledge. A helpful way to deepen understanding is to consider sleeves as a protective lining that keeps the bore interfaces consistent across cycles of heat and pressure. This framing emphasizes the importance of precise machining and proper material choice when sleeves are replaced. If you want a concise primer on sleeves yourself, you can read about engine sleeves and understand more about their function and how they interact with the engine’s core components. For those seeking a quick reference to the broader subject, a short overview can offer insight into why sleeves are used in some engines and not others. The nuance matters because sleeve removal and installation are tightly coupled with engine design. While this chapter has focused on access, the larger arc of sleeve work is about restoring the engine’s structural integrity and ensuring that every bore remains within its intended tolerance band. This is the point at which the reader is reminded that the path from undertray removal to sleeves is not a straight line but a long, carefully measured journey that demands respect for the engineering boundaries that separate simple maintenance from major rebuilds. It is equally important to recognize that the information here should be used as a guide to informed decision-making, not as a direct, one-size-fits-all protocol. To broaden the reader’s understanding and to reinforce the factual basis for sleeve work, the following internal resource offers a focused exploration of engine sleeves. What are engine sleeves? This linked piece helps clarify the terminology and the basic principles behind cylinder liners, which is foundational before attempting any disassembly oriented toward sleeves. If readers wish to extend their learning beyond the internal reference, a broader external reference is available that explains cylinder liners from a general, non-brand-specific perspective. For a broader, neutral understanding, see the cylinder liner overview on Wikipedia, which discusses materials, designs, and typical applications across engine families. It serves as a good companion read to ground one’s expectations in standard mechanical practice. While the content here foregrounds safety, access, and the reality that sleeves involve substantial disassembly, it also emphasizes a practical middle ground: when sleeves are part of a larger rebuild, the safest, most reliable path is to plan a professional route that coordinates the shop’s capabilities with the vehicle’s design. This approach invites readers to balance curiosity with responsibility—recognizing what can be done safely in a home shop and what warrants the attention of a professional machine shop. The end goal remains the same: preserve engine integrity while navigating the delicate boundaries between accessible maintenance and complex component replacement. Sleeve work—whether partial or full—must be anchored in precise measurement, careful handling of bore surfaces, and strict adherence to the engine maker’s specifications. The undertray removal serves as a practical illustration of the first stage of access, showing how a seemingly simple protective panel can unlock access to the engine’s heart. In the absence of a complete, model-specific service procedure within this narrative, the core takeaway is clear: sleeves represent a specialized repair pathway that begins with proper preparation, correct disassembly sequence, and a sober assessment of whether the work should be handled in-house or by a machine shop. The decision should hinge on engine design, bore condition, and the availability of the right tools and measurement equipment. The journey from safety-oriented preparation to the metallic truth of sleeves is not a single leap but a sequence of deliberate moves. It is a journey that respects the complexity of internal combustion engines and the precision required to maintain them. For a reader who wants to build confidence, the best practice is to frame sleeves as part of a bigger puzzle, one that includes the engine’s protective layers, the removal and inspection of the undertray, and the realization that some tasks belong in the hands of skilled technicians who can ensure that every bore, every seal, and every surface meets specification. By approaching the task with this mindset, you can avoid common pitfalls and preserve the engine’s longevity. In short, sleeve work is a serious, measured undertaking that deserves thoughtful planning, a strict safety routine, and an honest assessment of whether the project should stay within the realm of a professional rebuild. The undertray’s removal is a meaningful first step that illustrates this journey: it is the gatekeeper that reveals whether the project remains within the realm of feasible home maintenance or has stepped into a machine shop’s precise, controlled environment. This is the broader lesson behind the topic: the road to sleeves is a road through access, safety, and professional clarity, not a shortcut around the fundamental demands of engine integrity. The more you understand sleeve technology and the more you align your expectations with engine design realities, the better equipped you are to decide the right path forward. And when you finally decide to proceed with sleeve work, you will do so with the confidence that you have prepared, measured, and respected the engine’s demanding standards. The journey starts with the basics—safety, preparation, and measured access—and ends with the professional fidelity that keeps engines running smoothly for miles to come.
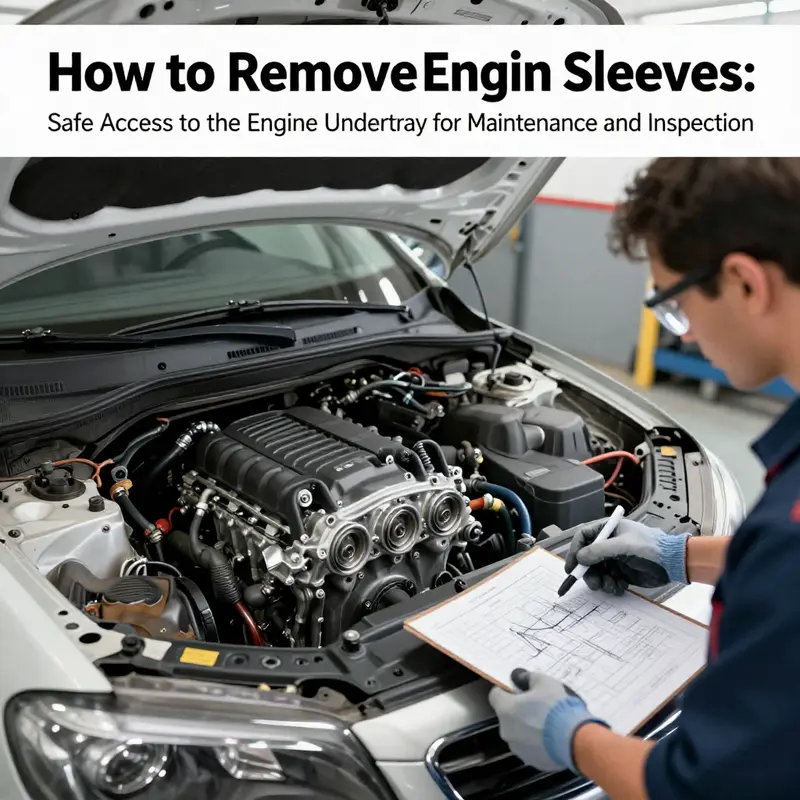
Uncovering Access Beneath the Shield: Mastering Engine Undertray Removal to Reach the Sleeves
Removing an engine undertray is not flashy, but it is a reliable doorway to the heart of the engine bay. The undertray, sometimes called a splash shield or skid plate, is a plastic or metal panel that protects the bottom of the engine and helps manage debris, water, and oil splash. For the quiet, routine inspections that lead to a healthy engine, this shield is the first practical barrier you must clear away. In the broader arc of learning how to remove engine sleeves, the undertray is a practical gateway. It does not directly touch the sleeves themselves, but it grants access to the components that surround the sleeves, such as the lower portions of the cylinder head, coolant lines, oil galleries, and the valley area where the sleeves reside in many engines. The step-by-step discipline of undertray removal—patience, systematized intake of fasteners, and careful handling of delicate clips—lays a foundation for more complex sleeve work that may come later, whether you are inspecting for wear, replacing seals, or preparing the engine for a more comprehensive teardown. The process here is a test of method, a test of tool control, and a test of how well you can read the layout of fasteners and clips on a vehicle you may not know by heart. The more you practice, the more confident you become in tackling the sleeves themselves when the time comes. The goal, then, is not merely to remove a shield but to build a workflow you can repeat across different models with minimal drama and maximum reliability.
The first principle is safety, simple in its premise but demanding in its execution. Park the vehicle on a level surface, shift into park or first gear as appropriate, and engage the parking brake. Let the engine cool completely; the undertray sits close to hot components when the vehicle has just been running, and a delayed touch can lead to burns or warped plastics. If your model has a battery located in the engine bay that could be exposed to water or metal tools, consider disconnecting the negative battery terminal. It’s a small precaution that can prevent an accidental short or a spark near a plastic shield that might house wiring. With the engine cooled and the power supply isolated, you can open the hood to access the top edge of the tray and begin the search for fasteners.
The typical undertray is secured by a combination of screws, bolts, and a constellation of plastic clips. The most common fasteners are hex bolts, Phillips-head screws, and plastic push-fit clips that snap into molded holes around the perimeter of the tray. In some older or more basic configurations, you may encounter U-shaped retaining clips or self-tapping screws that clamp the tray to the lower body panels. The exact mix depends on the model and year, which is why a careful survey of the mounting points is essential before you touch a fastener. The underside of the hood rises into view, and the edge of the undertray often sits just forward of the bumper. The front edge typically has several bolts or screws stopping it from tipping forward, while the sides anchor near the wheel wells and the lower edges of the engine cradle. The goal is to map out all attachment points, so you do not miss a hidden fastener that would leave you stuck halfway through the job.
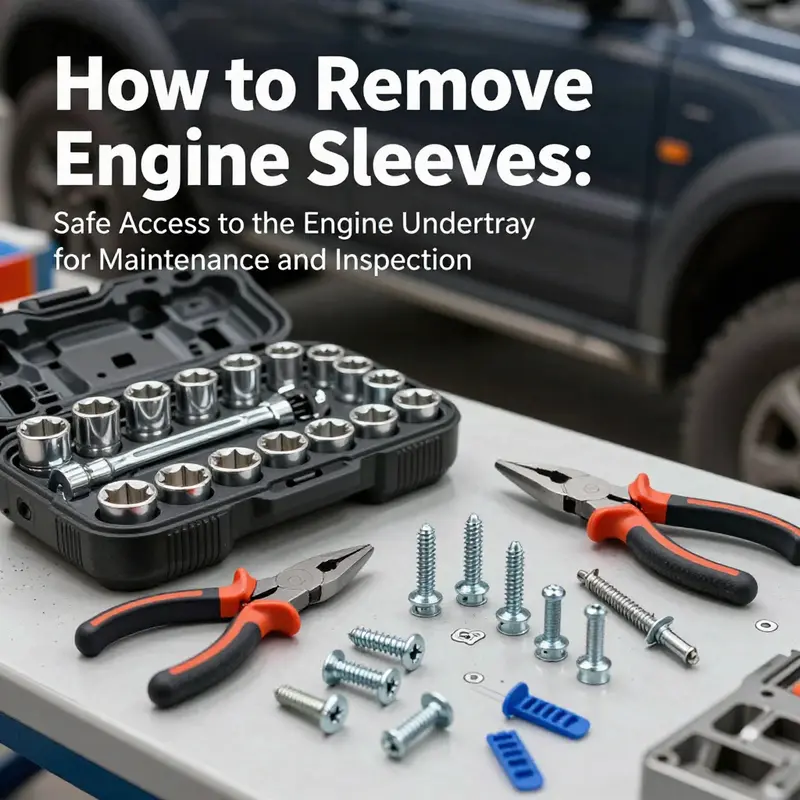
Gathering the right tools is the second pillar of success. You will want a socket wrench set that includes 8mm, 10mm, and 12mm sockets, a Phillips screwdriver, and a flat-head screwdriver as a backup for stubborn fasteners. A trim removal tool or a plastic pry bar is essential for releasing plastic clips without tearing them. The clips are plastic by design, and forcing them can crack the head or the base, turning a clean removal into a replacement headache. A ratchet handle helps in tight spaces, where the undertray sits close to the frame rails and the radiator. If you plan to reinstall the same panel after inspection or work, a torque wrench becomes useful to reapply snug, even pressure to fasteners without over-tightening, which is a common cause of clip failure or thread stripping. It’s not glamorous, but it is a foundation for repeatable, clean work that protects both your hands and the car’s hardware.
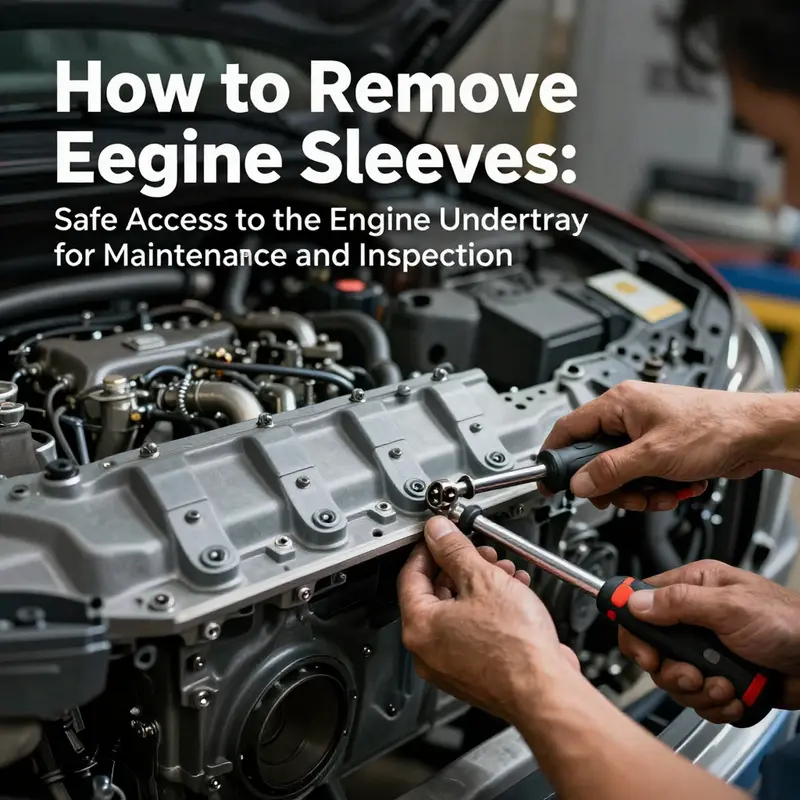
With tools in hand and the vehicle prepared, you begin the actual removal by approaching the work with a methodical mindset. Start at one edge, usually the front edge that sits closest to the bumper, and inspect how the fasteners organize themselves around the perimeter. Unscrew or unbolt the visible fasteners first, taking care to place each removed fastener in a labeled tray or a magnetic dish so you do not lose track of its origin. In many cases, the left and right sides behave a little differently because of the way the engine cradle and body panels are integrated. A few of the fasteners may be captured by a combination of a bolt and a retaining clip. Here you must respect the clip’s function and release it with deliberate, even pressure rather than yanking the tray forward. For plastic push-fit clips, the best approach is to insert a trim tool underneath the edge of the clip’s head and gently pry outward. Do not pry upward; the goal is to pop the clip out cleanly so you can reuse it or replace it with a matching clip if it shows signs of stress.
In some models you may encounter a screw-type clip on the left side that resembles a tiny captive fastener. The documented technique often requires rotating the screw-type clip counter-clockwise to loosen it, then withdrawing it from its seat. On the right side, you may face a locking tab that you must pull forward toward the vehicle’s front to release. The need to respect these opposing release directions underscores the value of a calm, deliberate approach rather than a brute force method. Once all fasteners and clips have been accounted for, you will be ready to release the front edge of the undertray. With the initial edge free, you can lift gently and slide the panel backward along its guides. This back-and-forth motion is deliberate: you want to disengage any lower-edge clips or guides that hold the shield in place. If you feel resistance, pause and recheck that you have not left a clip unseated or a bolt half-threaded. A surprising amount of time in the shield-removal process is spent confirming you have released every fastener and avoided snagging on hoses or wires that might exist along the tray’s underside.
A common concern during removal is the risk of damaging the undertray, the clips, or the panel’s edges. Plastic components are often resilient yet unforgiving when forced. Gentle, measured movements are the rule, not the exception. If a clip resists, don’t hammer it free. Instead, re-check its alignment, use the trim tool to create a little space, and work the clip with a steady rocking motion. When a screw head shows signs of stripping, stop and switch to a substitute tool that fits the slot more precisely. The object is not to finish the job in a single sustained burst but to maintain the integrity of both the undertray and its mounting points. When the panel finally gives, you will notice a clear separation as the fasteners release, and you can tilt the undertray downward slightly before lifting it away from the vehicle. The first feel of the shield coming free is a small victory, a tactile reminder of how a well-executed sequence makes the difference between a struggle and a smooth operation.
After the shield is free, there is usually nothing more than a light connection in the form of a small wire or hose that might have been routed to or along the tray. This is rare, but you should inspect for any such connections. If you find one, disconnect with care and note where it came from for reattachment during reinstallation. The process thus far—from safety checks through the careful release of fasteners—creates the critical context for sleeve-related work that commonly follows. If you are conducting a routine inspection or a focused sleeve-related service, this moment may reveal the first view of the engine’s lower regions, where the sleeves sit and where seals may show wear. The undertray removal is one of the few steps that offer a direct, non-destructive window into this area without a full engine disassembly.
Reinstalling the undertray is the mirror image of removal and requires discipline. Begin by ensuring that the underside is clean and free from debris that could trap moisture or grit. Align the tray with its mounting points, guiding the edge onto the front edge or the most forward clips first. Work your way along the perimeter, reengaging clips and snugging bolts or screws in a pattern that distributes pressure evenly. If you encountered clips that showed signs of fatigue, replace them with new ones and use the torque wrench to secure each fastener to the manufacturer’s recommended specification. The goal in reassembly is not simply to fit the shield back into place but to ensure it sits flush against the relevant panels and that none of the fasteners bind or create gaps that invite debris or moisture. The careful sequence will reduce the chance of misalignment that can complicate future sleeve work, such as inspecting seals around the cylinder liners or checking for oil seepage near the lower valve area. The shield’s role in protecting the engine, while seemingly peripheral, actually supports the long-term health of the sleeves by maintaining a clean, dry environment around the bottom end of the engine.
The variations among models are a final, crucial point. Vehicle design evolves, and some manufacturers change the layout of the undertray, the position of the fasteners, or the clips themselves from year to year. This reality means that a universal script for every car is impossible. The best practice is to consult the vehicle’s service manual for model-specific diagrams and step-by-step instructions. The manual often contains exploded views of the undertray mounting, which provide a precise map of where to find each fastener and how the clips should engage with their corresponding holes. Where manuals are scarce, trusted automotive repair resources online can supply model-specific diagrams and guidance. To broaden your toolkit and your skill set, you might explore resources focused on broad maintenance skills, such as the general competencies needed to work on the underside of a vehicle. For a consolidated overview of practical car maintenance skills, see car maintenance skills.
As you gain experience with undertray removal across different models, you’ll start to recognize patterns in fastener types and clip behavior. Hex bolts tend to be standardized in size across many platforms, but the length and thread pitch can differ by model. Plastic clips often reuse in later assemblies but can become brittle after exposure to heat and time. Self-tapping screws may indicate an older or more basic design where the shield itself doubles as a structural element for the lower body panels. By building a small, organized system—labeling fasteners, aligning clips, and returning them to their original spots—you can reduce the risk of misplacing parts and maintain a smoother workflow for any future sleeve-related service that requires access to the lower engine area.
The practical payoff of this chapter’s focus is not merely the shield’s removal but the confidence you gain in approaching more delicate tasks connected to sleeves themselves. If your sleeve work involves inspection for wear, assessment of the gasket interfaces around sleeves, or even planning a more involved dismantling, the undertray removal practice becomes a foundational step. You’ll often be able to observe how oil, coolant, and debris accumulate near the lower sleeves, which can inform your approach to sealing or reseating tasks. You’ll also have a clearer understanding of how the engine bay is laid out, which is invaluable when you need to navigate around hoses, sensors, and the lower portions of the intake and exhaust systems. This knowledge streamlines any future work and lowers the risk of damaging hidden components during a dissassembly or when you reassemble parts in the future. The experience you gain here translates into less time spent hunting for fasteners and more time spent on the actual sleeve work that matters.
In short, the undertray removal is a measured blend of technique and respect for the vehicle’s design. It demands attention to safety, a methodical approach to fasteners, and a mindset that alternates between careful observation and decisive action. It also invites you to see beyond the immediate task and recognize how every bolt, clip, and panel piece plays a role in protecting and enabling access to the engine’s internal components. This perspective—viewing the shield as a facilitator rather than a nuisance—can transform how you tackle related tasks, including sleeves that sit just out of direct sight behind the layers of the engine. The pathway to sleeves is, in many ways, about learning to read the engine bay’s layout, to anticipate what is likely to be found in the shadows, and to practice patience as you release, protect, and eventually resecure the parts that keep the engine healthy.
External resource: For further model-specific guidance on undertray removal, consult established repair guides from reputable online sources that provide diagrams and step-by-step instructions. These resources complement the practical steps outlined here and help you tailor the process to your particular vehicle. As you grow more comfortable with the undertray’s fasteners and their behaviors, you will find that your ability to navigate sleeves-related tasks grows correspondingly, too. The goal is not to memorize a single routine but to develop a reliable workflow that you can adapt to different car families and generations. This adaptability is what transforms a routine removal into a confident stride toward broader engine work, including the sleeves that fuel the engine’s performance and longevity.
External resource: https://www.autozone.com/repair-guides/Engine-Undertray-Removal
Under the Shield: A Cohesive Walkthrough on Removing Engine Sleeves, Detaching the Undertray, and Releasing Retainers
The phrase engine sleeves can be a misnomer in common automotive practice. Most readers, especially those new to DIY car work, encounter sleeve terminology when the discussion shifts toward cylinder liners or decorative parts rather than the protective panels that sit beneath the engine. In practical terms, and for the sake of clarity as you navigate a real-world repair, the task at hand often boils down to a more mechanical and straightforward operation: removing the engine undertray (sometimes called the engine shield or skid plate) and releasing the variety of fasteners that hold it in place. This chapter follows that practical path. It treats the undertray as a single, cohesive unit designed to quiet the engine, protect vital components from road debris, and improve aerodynamics. Understanding this component is essential, not as a component in itself, but as a gateway to accessing the parts that lie behind it. It is a tactile, hands-on skill set that every DIY enthusiast can master with patience and respect for the vehicle’s design. While the language around sleeves may wander into the domain of cylinder liners or internal sleeves in different manuals, the approach here remains grounded in the tangible, visible world beneath the engine bay—the undertray and the fasteners that keep it tethered to the chassis. And, for the curious reader who wants to broaden their toolkit, there is value in connecting this practical sequence to broader car maintenance skills that empower safer, more reliable vehicle care.
Begin with a mindset of safety and method. The best work begins long before you touch a fastener. Park on a flat, level surface, apply the parking brake, and if possible, disconnect the negative battery terminal. This last step is a prudent precaution; it reduces the chance of accidental shorts if your impact or torque wrenches contact any electrical points while you’re reaching up toward the undercarriage. The undertray itself is typically a large, flat panel crafted from plastic or light metal. It hangs roughly under the front half of the engine, spanning from the radiator support to the lower edge of the engine bay. In many designs, the tray also extends toward the sides, achieving a more complete shield against debris and splash. The design intent is straightforward: to simplify maintenance access by shielding components that do not require daily, routine exposure, while still allowing access when service work is needed. The removal process thus becomes a methodical dance of locating fasteners, freeing them, and guiding the tray away without snagging nearby hoses, wires, or sensors.
The next layer of comprehension concerns the fasteners themselves. Most undertrays use a combination of screws or bolts and a set of plastic retainers or clips. Think of screws and bolts as the structural anchors, holding the tray to the frame rails or engine cradle. Think of plastic clips as the field-hardened, clip-on latches that snap the tray into position, preserving a flush, clean silhouette against the bottom of the engine. The exact layout can vary by model and even by year, which means you should inspect the perimeter carefully before you begin turning wrenches. This variability also underscores a central rule of this work: proceed slowly, document each fastener’s location, and avoid forcing anything when it seems resistant. The tendency to rush can lead to broken clips, misaligned holes, or cosmetic damage to the plastic, all of which complicate reinstallation.
With the vehicle secured and the undertray identified, you proceed to the heart of the operation: removing fasteners in a controlled, systematic fashion. Start by locating all visible screws or bolts along the tray’s edge. Most vehicles will present a mixture of fastener types, often with reinforced positions along the front edge, the sides, and near any cutouts that accommodate other components. The torque and size of the screws can vary; you may encounter 8mm or 10mm bolts, both common in undertray applications. Keep a small tray or magnetic bowl handy to hold these fasteners as you remove them. The goal is not to leave the fasteners scattered in the pathway of your next steps but to preserve their order so reinstallation is straightforward. As you remove each screw or bolt, place it in your container with a note of its original position. The goal is to mirror the conservatism of a scientific experiment: track every variable so you can reproduce the outcome later.
While screws and bolts serve as the structural anchors, the plastic retainers demand a different touch. These clips are small, sometimes deceptively fragile, and they can be stubborn if pried in the wrong direction. There are three general varieties you’re likely to encounter: push-in retainer pins, grommeted or clip-in retainers, and locking tabs that snap into slots in the vehicle’s underside. The critical principle for these retainers is gentle manipulation. Begin at a corner or near a straightforward accessibility point. Use a plastic trim tool, or a thin blade screwdriver if a tool dedicated to trim removal is not available. The aim is to pry the retainer away from its mounting point with careful leverage, avoiding the tab’s breakage. When you work around the perimeter, you will hear a subtle but distinct click or release as each clip disengages. It’s a relief when you feel that liberation—the undertray’s rigidity begins to yield without forceful wrestling.
A point worth amplifying concerns the subtle mechanical differences between the left and right sides of the undertray. In many cars, certain retaining methods are mirrored on opposite sides. The left side may employ a screw-type clip that you rotate counter-clockwise to loosen, as some workshop manuals describe. The right side might rely more on a locking tab that you pull forward, toward the front of the vehicle, to release. If your vehicle uses this arrangement, adopting this left-right awareness from the outset helps you avoid the experiment of random force that could lead to clip damage. The key tactic is to work steadily and sequentially: release, don’t yank. By the time you reach the final clip along the edge, you should have a comfortable arc of liberated fasteners and an undertray eager to be freed rather than fighting you.
After you’ve removed the screws and pried out the plastic retainers, you can begin the final liberation phase. With your hand under the front edge of the tray, gently lift it a few inches to check for any resistance. It’s possible you’ll discover a few clips or guides still engaged with holes or slots on the vehicle’s underside. In that case, carefully guide the tray toward the rear of the vehicle. This sliding motion ensures the tray clears any mounting rails or edge guides before you attempt to pull it straight out. The moment you’ve created that clearance, lift and tilt the tray away. Do this slowly, because the tray may rest against components like the lower radiator hose, wiring harnesses, or access panels. If any resistance appears, pause and visually inspect the path. Sometimes, a single remaining clip may be hidden behind a protective grommet or nestled in a recess. A careful second pass often resolves these issues without damage.
With the tray fully removed, you will walk into the next stage: inspection and preparation for reinstallation. This is the moment to check the undertray for cracks, missing clips, or obvious wear. If any clips are damaged or cracked, you’ll want to replace them before attempting to reinstall the panel. Damaged clips can cause improper sealing and generate increased road noise if not properly seated. Also, inspect the mounting points on the chassis for rust or deformation. A clean faith in the basics—no dirt, no grime—will make the reinstallation smoother and reduces the risk of misalignment. This is a practical reminder that the undertray is not a decorative feature; it is a functional shield that contributes to engine cleanliness, aerodynamics, and, in some cases, acoustic dampening. Treat it with due care.
If the undertray has wires or hoses that appear to be connected to it or running near its edges, you should verify that none of these are inadvertently damaged or pinched once you move the tray away. In most designs this is relatively rare, but it’s not impossible. The moment you’ve confirmed the absence of stray connections, you may set the undertray aside in a clean, protected area. The reinstallation steps mirror the removal steps, but in reverse. Start by aligning the undertray with its guides or mounting rails. As you ease it into position, ensure that each clip seats properly into its corresponding hole. If the tray has a curved edge or a particular contour, you may need to tilt it slightly as you move it into place. Once the tray is aligned, reinsert the screws and bolts first, loosely, to prevent misalignment. Then tighten them in a pattern that resembles a star or a cross, ensuring even seating rather than a single corner being cinched. Finally, re-engage each plastic clip with incremental pressure until you hear or feel the lock engage. Don’t be alarmed if some clips require a firmer push to lock; brittle plastic can resist at first but settle with the tray’s thermal cycling and the pressure of proper tightening.
This entire sequence—remove, release, lift, and re-seat—embodies a practical approach to a class of tasks that share common mechanics across many vehicles. The more you practice, the more you’ll appreciate the nuance: some designs favor a quick, bold removal, while others demand a patient, clip-by-clip approach. The skill lies not in brute force but in controlled, repeatable actions that respect both the hardware and the vehicle’s design. In this sense, the undertray becomes not merely a shield but a training ground for broader maintenance competence. You will develop a tactile sense for where fasteners live, how they interact with plastic, and how a panel will respond to careful prying or deliberate seating. In turn, that competence translates into more confident work on other parts of the vehicle, including areas that intersect with the sleeves debate. It is not so much about sleeves themselves as about the hygiene of maintenance work—the habit of recognizing components, of reading the obvious clues, and of proceeding with a plan rather than improvisation.
For readers who want to situate this practical knowledge within a broader set of car maintenance skills, you can explore resources that frame maintenance as a toolkit rather than a chore. A useful companion is a guide that emphasizes the core competencies of general car care—safety, tool selection, and methodical problem solving. The link provides a pathway to expanding your maintenance literacy and integrating new tasks into a coherent workflow, which makes future operations less daunting and more predictable. If you are drawn to deeper reading about the terminology and broader concepts around sleeves and engine components, you will find that terminology can vary across manufacturers and literature. Yet the underlying ethos remains consistent: work deliberately, respect the hardware, and maintain a clean workspace so that chores become predictable tasks rather than surprises.
As you advance, you might wonder how this knowledge translates to other components that share the same design philosophy. The undertray’s role in protecting and routing can parallel the protective shields found under other parts of the drivetrain and engine bay. The exact fasteners and clip configurations may differ, but the procedure—identify fasteners, remove them in an orderly fashion, separate the shield without forcing it, and reassemble with careful alignment—constitutes a universal approach. If you explore the broader context of maintenance techniques, you may come across discussions that demystify more specialized topics, such as the true nature of engine sleeves and their function in cylinder assemblies. While those sleeves occupy a different domain, crossing the threshold from a shielded engine bay to the engine’s interior becomes a meaningful journey—one that begins at the surface level, with the stubborn, patient removal of the undertray and a respectful curiosity about what lies beyond.
In closing, the practice of removing an engine undertray and releasing its clips is more than a mechanical chore. It is a discipline in which anticipation, careful touch, and orderly workflow converge to produce a clean, efficient service experience. The task teaches the importance of different fastener types, the importance of avoiding unnecessary force, and the value of documenting each step for future maintenance. It invites the reader to adopt a mindset of gradual improvement, recognizing that each successful removal builds confidence for the next maintenance task. And if you want to weave this specific skill into a broader maintenance repertoire, remember that the path to mastery is not a single, isolated operation but a chain of informed decisions—each anchored in safety, respect for the vehicle’s design, and a steady, patient hand. For readers who wish to deepen their understanding of the broader topic of engine sleeves and related components, there is a valuable reference point that frames maintenance skills within a larger context: car-maintenance-skills. This internal link offers a gateway to practical knowledge that complements the hands-on technique described here, helping you grow from a competent amateur into a more confident, capable technician. See the linked resource for a broader toolkit as you continue to explore maintenance tasks and the language that describes them.
External reference for further study and validation of service practices can be found at a reputable automotive information resource: https://www.autodata.com. This link provides access to service procedures and diagnostic guidance that can inform your understanding of how components like undertrays are addressed in professional settings and help you compare DIY methods with factory procedures. The chapter’s focus on careful disassembly and reassembly aligns with best-practice guidelines you would encounter in formal repair manuals, and the external resource above offers a broader perspective on procedure reliability and safety considerations that support the work described here.
Lifting the Shield: A Thorough, Safety-First Guide to Removing the Engine Undertray and Inspecting What Lies Beneath
When people first encounter the phrase engine sleeves, the mind often hops to sleeves inside the engine block, those finely machined liners that separate the moving piston from the cooling and lubrication systems. In the context of routine maintenance, however, the practical target is almost always something simpler and more accessible: the engine undertray, also known as the engine splash shield or underbody shield. This plastic or composite panel rides beneath the engine and transmission, acting as a shield against road debris, water spray, and small stones that would otherwise chase their way straight into hard-to-reach corners of the engine bay. Clarifying that distinction matters. It helps set expectations for what you can and should do with your own hands, and it grounds the approach in common-sense safety and efficiency rather than chasing a misapplied notion of sleeve work within the engine block. The chapter that follows treats undertray removal as a deliberate, inspection-oriented activity. It remains mindful of the broader task implied by the article’s topic: understanding what belongs to the user’s reach and what should stay to professional hands, especially when concerns about engine sleeves or cylinder liners arise. The route we chart is practical, thorough, and designed to minimize risk while maximizing the ability to inspect, clean, and reassemble without introducing avoidable damage to brittle plastic clips, fasteners, and nearby hoses and wiring.
From the start, safety anchors the entire process. A cool engine, a flat work surface, and a stable vehicle are not optional extras but core prerequisites. Park the car on level ground, engage the parking brake, and, for extra protection around delicate electrical areas, disconnect the negative battery terminal. This precaution may feel excessive for a routine undertray task, but it eliminates the risk of short circuits if a tool slips and contacts a live connection or a sensor. Such prudence becomes particularly important when the undertray may cradle wiring harnesses or sensors that quietly contribute to the vehicle’s health and diagnostics. With the car safely supported, a quick survey of the area beneath helps orient your hands and mind to the structural realities you will encounter. Under many vehicles, the undertray is a two-part assembly: a primary front shield and a rear section, sometimes joined by additional clips that keep the shield aligned with the contours of the engine bay. The difference in design is not merely cosmetic. It can determine whether you can remove the shield in one piece or must take it off in sections. The most common mechanism you will encounter includes screws or bolts securing the shield to mounting points along the perimeters, along with plastic push-in clips or snap tabs that hold it to the frame or to other shields. A flashlight and a basic panel-removal tool or a plastic trim tool are the kinds of implements that keep you from marring the plastic clips or the metal mounting points. A gentle touch and patience go a long way here.
As you loosen the fasteners, the feeling of stepping from a protective cover to the hidden, intricate world beneath the engine becomes almost physical. For the screws or bolts, it is important to keep track of their positions. The longer fasteners often correspond to locations that bear more weight or stress; a simple misplacement can create fitment trouble during reinstallation. For plastic clips, which tend to be more fragile, a careful pry with a plastic trim tool minimizes breakage and keeps a ready supply of clips available for reassembly. One common approach you may read about involves locking mechanisms that behave a little differently from one side of the vehicle to the other. On the left side of many undertrays, you might encounter a screw-type clip that needs to be rotated counter-clockwise to loosen, whereas on the right side, a locking tab may require a forward pull toward the front of the car to disengage. While the exact hardware can vary by model and year, the principle remains consistent: verify how each fastener is meant to release, and apply the method described in the vehicle’s manual or the service guide for your car’s specific generation.
The step-by-step motion of removing the undertray becomes a dance between friction, gravity, and the careful alignment of edges with mounting points. After all fasteners are released, you begin by lifting the front edge of the shield—just enough to feel the initial looseness. The aim is not to yank but to guide the shield free from any remaining clips or guides. A deliberate, steady pull backward toward the rear of the vehicle helps to disengage it from the remaining connections while minimizing strain on any hoses or sensors that might cross the shield’s path. If you encounter resistance, pause and re-check that every fastener and clip has indeed been released. It is tempting to assume you have extracted the piece when it feels almost free, but a second check prevents the common mistake of tearing a clip that you cannot see from the top. When the panel finally slides out, you have access to the area that used to hide the essential parts of the engine’s lower half. Yet that view is not simply for admiration. It is a critical opportunity to assess the engine’s environment for debris, leaks, or corrosion that might have otherwise remained concealed.
The value of this access becomes evident as you inspect. Without the shield, you may notice dirt and debris accumulations in crevices that would quickly return if left unattended. A muted oil sheen around the oil pan or around the edges of the transmission casing can be a subtle signal of a slow leak, even if you do not yet see active drips. Coolant traces around the block or near heater hoses can also appear as faint staining that would not be obvious with the shield in place. The undertray’s absence does not just expose the engine bay for casual observation; it also makes the protective function of the shield visually obvious. If you find any cracks or warping in the undertray itself, it is a good sign you should replace the shield before reassembly to ensure that the new installation maintains its protective role. If the metal or plastic mounting points show signs of wear—stripped threads, enlarged holes, or cracked ears—these are exactly the kinds of issues that can cause rattles or misalignment after reinstallation. The careful eye becomes a practical tool here: note any damaged clips, damaged fasteners, or compromised mounting points, and plan to replace them before putting the system back together.
This moment of inspection also invites you to consider the broader context of the task at hand. The terminology may lead to a quick assumption that you are addressing sleeves—an engine component that typically requires specialized knowledge and tools. In reality, the undertray removal carries a more accessible entry point into engine health and maintenance. It is a chance to perform a lightweight, noninvasive check that can save you from more invasive work later. Do not confuse this with cylinder liner work, which is a different discipline altogether and typically not user-serviceable without specialized equipment. If you do uncover signs that fuel a deeper concern—oil or coolant mixing, significant coolant loss, or a hot-spot smell—do not press forward with speculative DIY remedies. Instead, document what you observe, consult the vehicle’s service manual, and consider professional diagnostics. The practical takeaway is that undertray removal is a maintenance step that supports better engine hygiene and longer-term reliability, not a substitute for more complex repairs.
Reassembly follows the reverse path, but the execution requires meticulous attention to the order and integrity of every connection. Begin by cleaning the undertray mounting surfaces and the engine bay contact points with a damp cloth. While the undertray itself is plastic, its mounting points can accumulate dust, grit, or oil residues that can hamper a secure fit. Align the shield with the vehicle’s mounting points, and reinsert the fasteners in their proper locations. If you encountered clips during removal, re-clipping them in the exact same positions ensures that each clip engages its corresponding hole or slot. When replacing, it is critical to tighten screws and bolts according to the manufacturer’s torque specifications. A common pitfall is overtightening, which can fracture plastic clips or strip threads in aluminum anchors. A light, steady hand, followed by a final verification that every fastener is seated and snug, helps prevent a rattling or loose shield at highway speeds.
With the shield secured and the engine bay cleared of loose tools, perform a post-installation check that confirms the shield does not contact any moving parts. Reconnect the battery, if you had disconnected it, and start the engine. Listen carefully for any new sounds—rattling, dragging, or scraping—that might indicate interference with a hose, a wire loom, or a heat shield that is now exposed once the shield is back in place. A brief idle run of a few minutes, followed by a short test drive, provides practical confirmation that the undertray is properly reinstalled and that nothing harmful remains hidden behind the new assembly. If everything remains quiet and the vehicle tracks smoothly without new vibrations, you have likely completed the process correctly.
It is worth acknowledging a broader guideline embedded in responsible maintenance practice. Engine sleeves—the actual metal liners that sometimes inhabit discussions about engine internals—are not the objects you remove during undertray work, and they are generally not accessible for regular servicing without extensive disassembly and specialized tools. Any concerns about sleeve wear or liner condition should prompt professional evaluation rather than DIY attempts under the vehicle. This chapter, then, preserves a careful boundary: work that improves visibility and basic protection, while deferring deeper engine internals to the technicians who are equipped to handle the task with the proper jigs, fixtures, and torque tools. The instinct to protect the engine and its surrounding infrastructure—radiator hoses, fuel lines, electrical harnesses, and sensors—drives the discipline of a measured, safety-forward approach to undertray work.
For readers seeking a more expansive blueprint on related topics, a broader grounding in car maintenance can be found through established guides that emphasize safety, planning, and methodical procedure. These resources offer foundational advice on how to handle tools, measure torque, and organize fasteners so that a pastime of maintenance remains a reliable habit rather than a source of frustration. In this chapter’s context, the emphasis remains on prudent practice, not speed, and on recognizing the limits where professional intervention becomes the wisest option.
Internal linking to a broader maintenance guide can provide a helpful complement to this focused discussion on undertray removal. For readers interested in expanding their practical skill set beyond the shield, a concise overview of essential car maintenance skills can serve as a useful reference. Learn more here: car maintenance skills. This link leads to a general guide that reinforces best practices for handling fasteners, hoses, trim pieces, and electrical connections across a range of vehicles, keeping the emphasis on safety and correct technique.
In sum, removing and reinstalling the engine undertray is a straightforward task when approached with care, a clear sequence, and respect for the hardware’s delicate nature. It affords a rare, direct view of the engine’s beneath-life and offers a practical opportunity to verify cleanliness, identify leaks early, and ensure that every component remains properly shielded from the road’s unpredictable debris. The process also reinforces a thoughtful boundary about what is within the DIY wheelhouse and what warrants professional attention, particularly on matters as consequential as engine sleeves, whose serviceability is region-specific and time-consuming. By treating undertray work as a disciplined maintenance step, you not only protect the engine’s heart but also cultivate a mindset of proactive care that serves your vehicle’s longevity and your own confidence as a responsible vehicle owner.
External resource for deeper technical reference: Toyota Maintenance Manual – Undertray Removal & Inspection. This manual provides model-specific diagrams, fastener types, and torque recommendations that can guide you to a precise, safe reassembly. https://www.toyota.com/tappf/techinfo/manuals/2023/20232024TechnicalServicesManual.pdf
Final thoughts
Engine sleeves may be an unconventional term, but the underlying task—gaining safe access to the engine by removing the undertray—remains consistent across motorcycles and cars. By prioritizing safety, identifying every fastener and tool, executing a controlled detachment, and completing thorough inspection and reassembly, you create a repeatable workflow that protects critical components and reduces the risk of damage. A disciplined approach ensures the undertray seats properly, fasteners stay secure, and wiring and hoses remain undisturbed. With the framework outlined in the four chapters, technicians in shops and home garages alike can perform undertray service with confidence, delivering reliable maintenance outcomes and protecting vehicle longevity.