
Car sleeves, often referred to as car covers, stand as essential protective gear for vehicles ranging from motorcycles to cars in garages and dealerships. Their ability to shield against dust, pollutants, and environmental hazards preserves the paint and overall vehicle condition. However, keeping these protective sleeves clean and well-maintained is paramount to maximizing their effectiveness and lifespan. This guide delves into the step-by-step process of assessing both the dirt level and material type of your car sleeves, providing detailed cleaning methods suitable for different soiling conditions. It further outlines specialized approaches for handling clear protective films, which require extra care when cleaning. Recognizing when professional intervention is necessary safeguards your investment from improper cleaning methods. Lastly, the guide delivers crucial maintenance tips to prolong the life of your protective gear. Whether a motorcycle owner, auto parts distributor, or auto repair professional, understanding these aspects ensures the optimal upkeep of car sleeves in varied automotive environments.
Reading the Fabric First: How Material and Dirt Level Shape Cleaning Dirty Car Sleeves
Cleaning dirty car sleeves begins long before you pick up a sponge. It starts with a careful assessment of two intertwined factors: the material of the sleeve and the degree of soil clinging to it. Treating a polyester sleeve the same as a vinyl-coated variant is asking for trouble, because each fabric responds to moisture, detergents, and mechanical stress in different ways. In practice, this means a patient, diagnostic approach rather than a reflex cleaning sprint. The sleeve is not merely an outer garment for the vehicle; it acts as a shield for the paint and a barrier against the elements. Misreading its material or its dirt load can ripple into coating damage, fiber thinning, or creasing that stubbornly refuses to disappear after reinstallation. The first step, therefore, is a quiet inventory: identify the sleeve’s fabric family and gauge how stubborn the grime has become. Sleeves are often made from polyester, polypropylene, or vinyl-coated fabrics. Each of these carries its own sensitivities. Polyester-based sleeves tend to be durable and somewhat forgiving; they usually tolerate routine washing without dramatic loss of shape. Polypropylene behaves similarly in many respects but can be a touch more sensitive to heavy scrubbing, especially if the fabric has any stretch. Vinyl-coated varieties, by contrast, can crack or peel if exposed to harsh chemicals or heat. They demand gentler cleaners and stricter temperature control. Special features also matter. Sleeves sporting printed logos or textured surfaces may fade or abrade if you scrub aggressively or use abrasives. With those distinctions in mind, the dirt level becomes the second axis of our diagnostic. Light dirt—dust, pollen, and mere surface grime—often responds best to minimal intervention. A soft brush or a clean, dry microfiber cloth can lift loose particles without saturating the fabric. The path of least resistance is to work from top to bottom. This helps prevent streaks and keeps the surface looking even as you clean. The advantage of a light-dirt approach is that you can often accomplish the task with the sleeve still on the vehicle, saving time and reducing wear. The moment soil deepens, however, the plan must shift. Moderate grime—mud splatter, bird droppings, or tree sap—requires a mild solution and a gentler touch. Pre-treatment becomes essential. A small amount of mild detergent dissolved in warm water can loosen residues without assaulting the fibers. For stubborn spots, a soft sponge or brush works best when used with a non-abrasive motion and a light pressure. The key is to keep the action soft and respectful of the fabric’s integrity. For some stains, especially oily residues, a light touch of a neutral solvent on a cotton swab can help, but you should test any cleaner on an inconspicuous area first to ensure there is no unwanted color bleed or coating disruption. Rinsing then becomes a crucial step. The goal is to flush away the cleaning agents completely, leaving no residue that could degrade the fabric over time. Finally, for heavy soil—where grime is embedded or stains have set—a more deliberate approach is warranted. Removing the sleeve from the car allows a more thorough inspection and treatment. Warm water combined with a specialized automotive fabric cleaner can help lift embedded grime. Targeted spot treatment can address persistent marks, while avoiding abrasive tools or high-pressure rinsing that could compromise fibers or coatings. This is where your patience pays off; aggressive scrubbing or forced water pressure can do more harm than good, especially on delicate surfaces or printed logos. A cautious sequence—soak, pause, then gently scrub—often yields the best results. And always, always, rinse thoroughly. Residual cleaner not only dulls the fabric’s appearance but can slowly degrade fibers with time. Then you dry properly. Air drying in a cool, shaded area prevents warping, shrinkage, or fading that direct sun or heat exposure can cause. Tumble drying or hot drying should be avoided, as heat can distort shape and weaken seams. A final note on cleaners: avoid bleach, ammonia, or harsh solvents. These chemicals can break down fibers or erode protective coatings. Neutral detergents are the safer baseline, with car-specific cleaners used when the sleeve’s material or soil type demands it. If you’re unsure about the right product, consult the sleeve’s care instructions or seek guidance from a professional. The principle is simple: treat the sleeve with products compatible with its fiber chemistry and finish, and apply mechanical action only with tools that won’t scratch or tear. The guidance you follow should also align with broader maintenance practices for vehicle coverings. If the sleeve frames a protected surface, you want to safeguard that surface from any potential cleaning missteps. For ongoing care, establish a routine that respects the sleeve’s material and the environment in which it lives. Light dust accumulation is common in many climates, and a quick, top-down wipe every month or two can prevent buildup that becomes heavy soil later. If the sleeve is stored away for long periods, ensure it is dry and stored in a breathable bag to discourage mold and mildew. A careful inspection for tears, fraying, or weakened stitching during cleaning sessions helps catch wear before it becomes a functional problem. The value of this approach extends beyond the sleeve itself. When a sleeve is properly cleaned and cared for, it preserves the vehicle’s paintwork by reducing the likelihood that grit will rub against the finish during removal and reapplication. It also maintains the sleeve’s fit, helping it to drape smoothly over the vehicle rather than bunching and creasing, which can trap moisture or grime in hard-to-see corners. If you need a touchstone for broader guidelines, credible, science-based sources on vehicle maintenance emphasize using neutral cleaners, testing on hidden spots first, and avoiding aggressive tools or heat near coatings or fabrics. These principles apply just as strongly to sleeves as they do to other protective layers. In fact, thinking of the sleeve as a protective interface is a practical mindset. It invites you to respect the fabric’s sensitivities while acknowledging the physics of dirt: moisture, friction, and heat each play their part in how a material responds to cleaning. The approach then becomes less a recipe and more a careful conversation with the fabric, where you start with the gentlest method and only escalate if necessary. If you want a practical, evolution-friendly path to knowledge on similar topics, consider examining how routine maintenance guides frame the care process for various vehicle covers and films. For a cohesive plan that blends fabric science with real-world care, you can explore broader maintenance resources that discuss how to measure soil load and tailor cleaners to fabric type, as well as how to protect finishes from moisture and heat during cleaning. For readers who want a real-world cue to bridge theory and practice, a quick reference is to look at the maintenance skills section of a well-regarded automotive care resource, which offers grounded steps that mirror the approach described here. car maintenance skills. This internal link provides a concise companion to the cleaning guidance, reinforcing how routine care supports longer sleeve life and better vehicle protection. In parallel with material-specific care, it is wise to consult robust external guidance that underpins the science of cleaning protective layers. The Car Care Council’s guidelines emphasize neutral wash solutions, spot testing, and avoiding aggressive cleaners or high-pressure methods near coatings. This external resource complements the practical steps outlined here and anchors them in industry-wide best practices. As you adopt this approach, you’ll find that the rhythm becomes more intuitive: identify, test, treat softly, rinse, dry, and store. The feedback loop grows clearer with each cycle, and the sleeve’s role as a defender of the vehicle becomes more reliable over time. For many readers, the real payoff is not merely a cleaner sleeve but a longer interval before more intensive cleaning becomes necessary. The material’s resilience improves when exposed to timely, respectful care, and the protective performance remains intact for longer. It is a quiet but meaningful form of maintenance that respects both the fabric’s character and the vehicle it guards. If you want to delve deeper into related maintenance concepts, the Car Care Council and other reputable sources provide extensive, science-backed detail that translates well into sleeve care as a subset of vehicle protection. External resource: https://www.carcare.org
The Gentle Path to Fresh Car Sleeves: Cleaning Dirty Covers Without Damaging Fabric and Finish
Car sleeves—often called car covers or car clothes—are more than a simple shield. They quietly preserve paint, preserve fabric, and buy time between washes. Cleaning them properly is not just a matter of aesthetics; it is a careful balance between removing grime and protecting the very surface the sleeve protects. When dirt and contaminants accumulate, they can trap moisture, abrade fibers, or push the wrong residues against the vehicle. The goal is to restore cleanliness with a method that respects both the sleeve’s material and the car’s finish. To achieve this, you start with a mindful assessment of material and soil level and move through a slightly different routine depending on whether you’re dealing with a standard fabric sleeve or a clear protective film laid over the paint. This approach keeps your car looking sharp and your sleeve performing as intended for years to come, and it helps you avoid the missteps that cause creasing, fading, or fabric breakdown.
Before you even dampen the fabric, a quiet, practical step will set the tone for success. Remove the sleeve from the car and gently shake or brush away loose debris. Dust, sand, and small twigs can be stubborn when hidden beneath folds, but they don’t need to be stuck to the surface while you work. If you prefer, a soft-bristled brush can sweep away larger particles while you hold the cover up and let gravity do part of the work. This preparation reduces the amount of brushing or scrubbing you’ll need later and minimizes the risk of forcing grit into fibers, which can cause micro-scratches during cleaning. The most delicate soil is often best treated with pre-treatment that is soft on fibers but effective against grime—think a mild detergent or a dedicated car cover cleaner, applied with a damp cloth or a soft brush to avoid aggressive scrubbing. This initial step frames everything that follows and helps you tailor the method to the sleeve’s fabric and its current state.
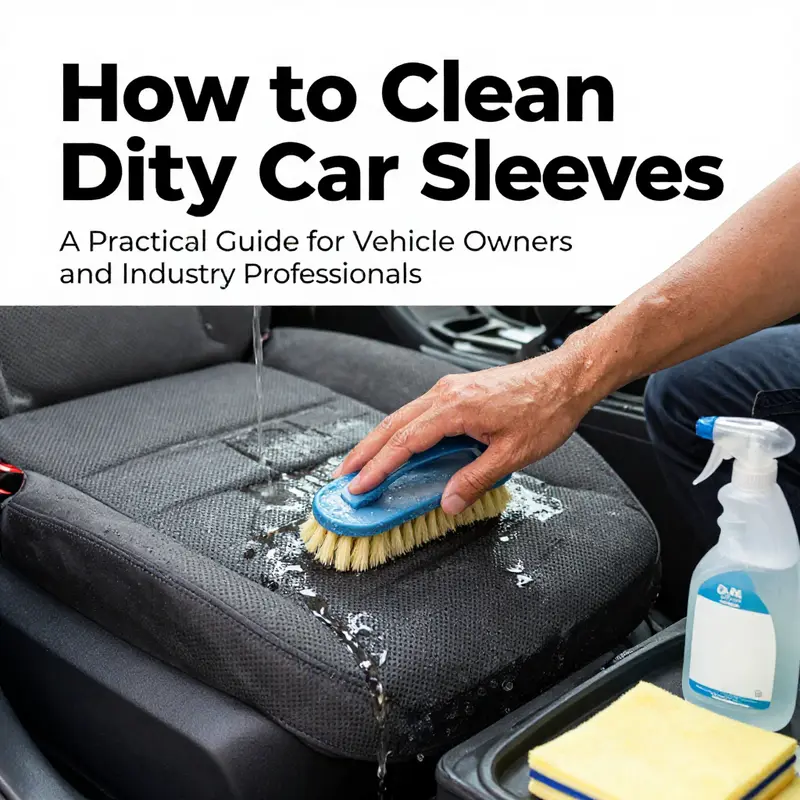
Material type matters deeply here. Standard car sleeves are usually made from breathable, water-resistant fabrics that tolerate gentle washing. These fibers benefit from a hands-on, patient approach. Clear protective films—applied directly to the car’s surface—require gentler care that preserves their clear, glossy coating and avoids edge lifting. When you know what you’re working with, you can choose between two general routes: hand washing, which remains the safer option for most fabrics, and machine washing, which should only be used if the care label explicitly permits it. The distinction is not merely procedural; it is about maintaining texture, color, and protective properties over time. If you find heavy soil—bird droppings, tree sap, or oil films—the strategy shifts from gentle cleansing to targeted treatment while still protecting the fabric’s integrity.
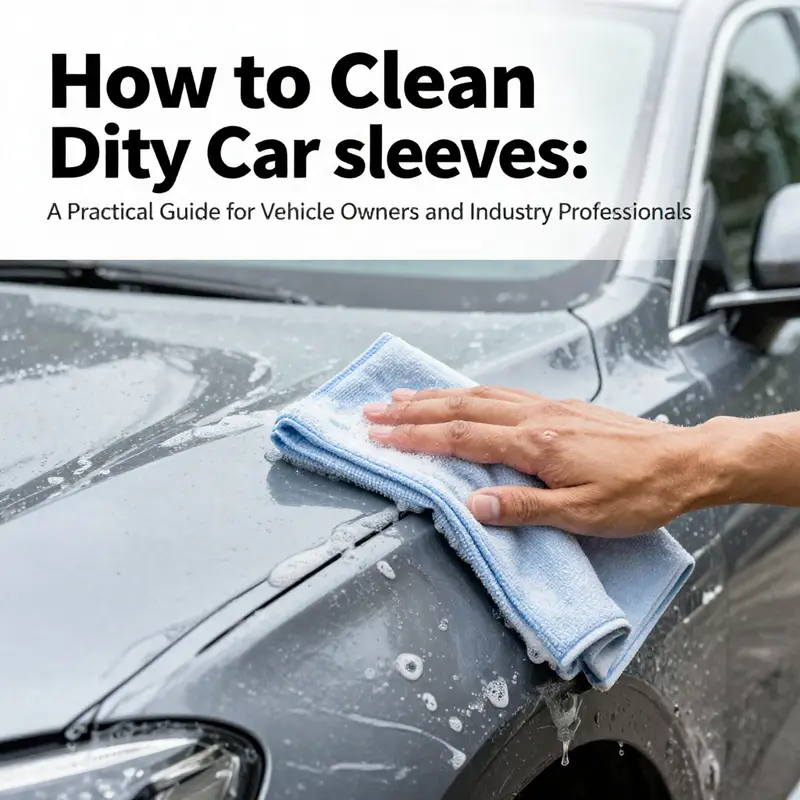
For light dirt, the method is straightforward and low-risk. If the sleeve is off the car, rinse it with a gentle stream of water to loosen dust and surface grime. A low-pressure hose or even a gentle spray from a garden sprinkler is perfect for this initial rinse. The objective is to remove loose material without forcing water under folds that could press against the paint below or displace seams. If you’re cleaning while the sleeve remains on the vehicle, a damp microfiber cloth is your ally. Wipe from top to bottom, with smooth, even strokes, and avoid circular scrubbing that can embed dirt into fibers and create streaks. Allow the cover to air dry in a shaded area for at least 30 minutes. This pause helps prevent creases and preserves the garment’s shape while the fibers relax back into place. A small but meaningful tip: for minor dust buildup, you can spray a little water and wipe without removing the cover at all. It’s a time saver that keeps wear and movement to a minimum, and it’s often enough to keep the surface looking fresh between deeper cleanings.
When soils are more stubborn, removing the cover becomes the prudent choice. Take the sleeve off and lay it flat on a clean surface. Pre-treat stains with care. For bird droppings or sap, a small amount of warm water can soften residue if allowed to sit for five to ten minutes. For greases or oil, a cotton swab lightly moistened with a neutral solution or a mild solvent like windscreen washer fluid can help lift the stain—test first on an inconspicuous area to confirm the fabric’s reaction. Be mindful that solutions with harsh solvents or strong acids can degrade fibers. If stains resist this initial approach, consider a dedicated car cover cleaner or a gentle bug- and tar-removal product designed for fabrics, rather than aggressive solvents that may compromise the sleeve’s weave. The objective is to dissolve or loosen the stain without stretching or abrading fibers. After pre-treatment, a soft brush or sponge should be used with mild, non-abrasive cleansers. A neutral detergent, or a car-specific cleaner designed for fabrics, is often best. The key is to scrub gently, letting the solution do the heavy lifting while your brush does the minimal, controlled work that fibers require to avoid fuzzing or pilling. Rinse thoroughly with clean water until there is no visible cleaning residue left behind. Residue can attract new dirt or degrade the fabric over time, so this rinsing step is not optional but essential. Drying should be performed with care: hang the cover on a clothesline or lay it flat in a cool, shaded, well-ventilated area. Direct sun can fade colors and weaken fibers, while heat can warp or shrink the fabric. A rotating dry plan—checking both sides as it dries—helps ensure even drying and reduces the risk of damp pockets that can foster mildew when stored.
Certain soils call for more nuanced handling, especially when you are dealing with clear protective films. These films, while transparent, respond differently to cleaners and water pressure. The cleaning rule here is simple but strict: use only neutral pH wash solutions or dedicated PPF (paint protection film) washes. Dilution is not a guess; follow the manufacturer’s guidelines, typically a range such as 1:50 to 1:100 cleaner to water. Never employ high-pressure jets near edges or seams, as that can lift the film or peel it away from the vehicle’s surface. Weekly cleaning is common in challenging environments with pollution, coastal salt, or heavy grime, but it should never be rushed. For a deep clean or inspection, professional maintenance every six to twelve months is advisable. After installation, wait at least a week before washing to allow the film to settle, and avoid washing within 24 hours of exposure to corrosive contaminants such as bird droppings. In short, for films, gentleness paired with respect for edges and seams is the governing principle. This approach preserves clarity, adhesion, and the film’s protective properties while still removing grime that can dull the finish.
When to seek professional help is a practical question that arises in more stubborn scenarios. If the fabric shows persistent staining, fraying edges, or a loss of essential protective qualities, a professional car detailing shop can evaluate the sleeve’s condition and perform a deeper clean using equipment and detergents that are not readily available to home users. A professional assessment is also wise if you’re unsure about the material, if you suspect color bleeding, or if you notice any unusual texture changes after a cleaning attempt. The investment in expertise can extend the sleeve’s life and protect the vehicle beneath, especially if the sleeve covers a high–value or frequently used finish.
Maintaining car sleeves extends their life beyond the contemporary wash. A routine cadence of cleaning every one to two months, depending on climate and exposure, will keep grime from building up and becoming more stubborn. After cleaning, store the sleeve in a dry, cool, and dark place—avoiding hot garages or trunks that can speed fiber fatigue or create mildew. A breathable storage bag prevents moisture buildup and keeps the fabric ready for the next use. Regular inspections for tears, fraying, or weakened stitching allow for timely repairs, preserving the sleeve’s protective function. When the sleeve finally shows significant wear, replacing it is preferable to risking paint damage from a compromised shield. This proactive approach minimizes risk and maximizes return on the sleeve’s protective investment.
In weaving together all these threads—the preparation, the material-aware techniques, the careful rinsing, the controlled drying, and the maintenance mindset—you’re not just cleaning a cover. You are stewarding a practical barrier that keeps the car’s finish pristine and the year’s grime from eroding the sleeve’s fabric. The path is deliberate, not hurried. It requires a mix of gentle touch, measured water, and patience. The reward is a sleeve that behaves like new longer and a finished surface that remains unmarred by neglect or aggressive cleaning. For broader reflections on how this practice fits into a larger routine of car care, consider the linked guide on car maintenance skills, which places sleeve care in the broader context of safeguarding performance and appearance. car maintenance skills. In parallel, you can consult an external, standards-based resource that provides additional guidance on fabric care and vehicle protection—such as a reputable car care reference—at https://www.chemicalguys.com/car-care-products/vehicle-protection. This combination of local care discipline and external standards helps ensure your sleeves serve you well, while the car underneath keeps looking showroom-fresh for longer.
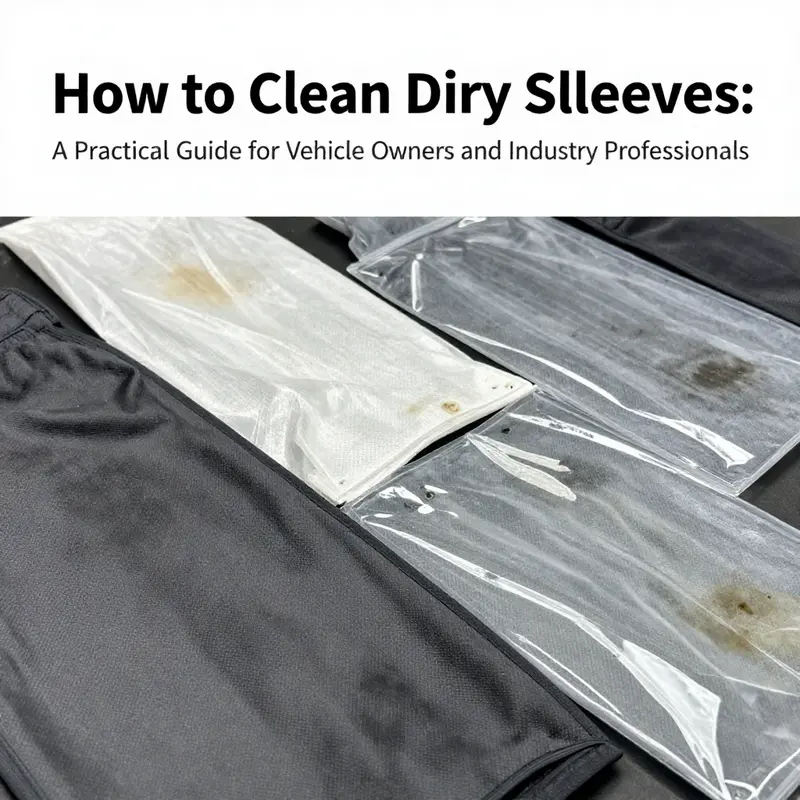
Preserving Clarity: Safe, Gentle Cleaning for Car Sleeves Encased in Clear Protective Films
Clear protective films over interior surfaces, such as the steering wheel, gear shifter, and door handles, offer a shield against scratches and stains. When these car sleeves get dirty, the cleaning approach must be gentle and precise. The goal isn’t just to remove grime, but to preserve the clarity of the film and the safety of the surface beneath it. The film can appear smeared or ambered if harsh cleaners or heavy scrubbing are used. That risk is not theoretical: improper chemicals can cause chemical etching, clouding, or lifting at the edges. Start with a calm assessment: what kind of film is it, and how much dirt are we dealing with? The guidance below draws from expert recommendations that emphasize mildness, testing, and restraint. Even in a crowded, busy cabin, the interior deserves the same care you apply to the exterior—because the film is part of the protective system that keeps the finish of the surface intact. Understanding these cues helps you make decisions that prolong the life of the film and the look of the car.
First, choose a neutral pH cleaner or a cleaner formulated for clear films and automotive interiors. Harsh acids, alkalis, or solvent-based products can interact with the adhesive or the coating and create hazing or discoloration. A mild, automotive-specific cleaner is best, but a plain neutral detergent diluted in water can work if you test on a hidden corner. The key is to avoid anything abrasive or corrosive. Use only a soft microfiber cloth or a lint-free towel; paper towels and rough sponges can scratch or embed particles. Dampen the cloth slightly rather than soaking it. The goal is a light, controlled dampness that lifts grime without letting liquid pool around the edges of the film, where it can seep in and initiate lifting.
With the film clean, apply the solution in smooth circular motions. Begin at the center of the area and work outward, then shift to adjacent zones. Avoid applying pressure that pushes grime into the surface or squeezes liquid into gaps. The circular motion helps dislodge particulates without abrading the film. Because the film covers sensitive edges, you should treat the film as you would a delicate window: gentle taps of the cloth, not a scrubbing frenzy. If you notice slight clouding after wiping, wipe again with a fresh section of cloth to remove streaking. In many cases, a quick wipe with a barely damp cloth followed by a dry pass yields the clearest finish. For a broader approach, see the resource on car maintenance skills.
Moisture management is critical. Do not soak the film or let water gather behind an edge. Excess moisture can lift the adhesive or seep into seams, causing clouding or peeling over time. Wring the cloth well, then run it along the surface in light, consistent strokes. After you finish cleaning, immediately dry the area with a clean, dry microfiber to eliminate water spots and to keep edges sealed. If the film has a micro-porous or matte finish, be mindful of how long the surface stays damp; extended dampness can affect the finish more than brighter surfaces. The goal is a pristine, dry surface with zero damp pockets around the borders where dust can cling.
When stubborn grime clings to the film—fingerprints, hand lotion smudges, or light residue from daily use—start with the mildest method. Damp a cloth with the neutral cleaner or just water and test on a hidden corner for compatibility. If a stain persists, you can re-wet the area and repeat, but avoid aggressive scrubbing or any scrubbing with rough tools. If you must, use only the gentlest scrubbing action with a clean microfiber. Avoid solvents like acetone, ammonia, or any solvent-based cleaners that can degrade the film’s surface or adhesive bond. These films are engineered to resist typical interior grime, but they aren’t impervious to harsh chemical attack. The objective is to remove the grime without altering the surface clarity or the protective layer.
For more tenacious marks, such as dried sap or resin from natural exposure, the recommended approach is a light dwell time with water and mild cleaner rather than heavy scrubbing. Apply a tiny amount of solution, let it sit a moment, then wipe away with a fresh microfiber. If you see any edge or corner lifting during the process, pause and dry that area thoroughly. Persistent issues, such as edge lifting or bubbling of the film, call for a professional assessment. The film’s adhesion can be compromised by improper cleaners or aggressive handling, leading to longer-term damage that undermines the protective purpose of the sleeve.
Regular maintenance matters. Cleaning the interior films once every few weeks may be enough in mild environments, while dustier or coastal climates demand more frequent attention. The concept is simple: low-intensity care performed often beats occasional heavy scrubs. Store the vehicle’s sleeves in a controlled environment, away from direct sun and excessive heat, when not in use. If you frequently handle the interior surfaces, keep hands clean to minimize oil and fingerprint transfer. Also be mindful of moisture when storing—excess humidity can promote mold growth on fabric sleeves; but with film, moisture can still be a concern around the edges, so you should never let damp cloths linger in contact with the surface.
When you’re unsure about the material or when grime refuses to budge, seek professional help. A trained auto-detailer with experience in interior clear films can assess adhesion, edge sealing, and surface clarity and advise on the right maintenance schedule. They can perform a deeper clean if needed and check for potential micro-tears that aren’t visible to the untrained eye. In some cases, owners might need to recondition the film’s surface or propose re-sealing of edges to preserve the protective layer. It’s not a sign of weakness to call in a pro; it’s a prudent investment in sustaining the value and aesthetics of the interior over time. The film is an integrated part of the vehicle’s interior protection, and maintaining it requires the same mindful approach you apply to exterior coatings of the car.
Ultimately, caring for clear protective films on interior sleeves is about balance—careful cleaning with the right products, gentle technique, and mindful moisture control. The aim is to keep the surface clear and the underlying substrate protected, so your car remains inviting to touch and sight. As you build this routine, remember that interaction with the film should be light and respectful, not a battle against grime. For broader interior maintenance concepts, refer to the car maintenance skills resource previously mentioned. For more detailed instructions tailored to film care, see the official care guide from a trusted automotive film specialist here: https://www.v-kool.com
Calling in the Pros: Knowing When Dirty Car Sleeves Demand Professional Cleaning
Dirt on a car sleeve is more than a nuisance; it’s a signal. The fabric or film that guards your finish deserves respect, and when the soil runs deep or the substrate proves unusually finicky, pushing through with a DIY mindset can backfire. The moment you sense that the dirt isn’t lifting with a gentle rinse or a soft wipe, you shift from a routine maintenance task into a decision about expertise, equipment, and environment. This chapter follows that decision-making thread, showing how to read the situation and how to act when professional help becomes the safer, smarter choice for cleaning car sleeves. It isn’t a grim warning, but a practical invitation to weigh material sensitivity, soil complexity, and long-term durability against immediate cleaning results. The goal is to preserve protective properties, prevent damage to paint and fabric, and extend the sleeve’s usable life. In other words, it’s about protecting the investment your car sleeve represents while avoiding costly missteps that could undermine protection in the long run.
Material type is the first and most consequential factor. A standard car sleeve is typically built from breathable, water-resistant fabrics such as polyester or polypropylene. These materials respond well to careful washing with neutral detergents and gentle agitation, and they tolerate air drying in a shaded area. Yet, the moment the sleeve incorporates a delicate finish—premium microfiber blends, wool blends, or custom-coated surfaces—the cleanliness equation changes. Delicate fabrics can fade, shrink, or lose their protective coatings if subjected to aggressive cleaners, high pH formulations, or abrasive scrubbing. Clear protective films, like paint protection films, demand their own discipline: a non-abrasive touch, neutral pH cleaners, and a cautious hand near edges and seams. The contrast between these two broad categories—durable fabrics and delicate coatings—anchors the decision to call in a pro when mess, method, or material compatibility is at stake. Unless you are certain about the substrate and have the right, manufacturer-approved instructions, professional cleaning is worth considering when the sleeve strays from routine dirt into the realm of embedded grime.
The level and type of soil matter just as much as the fabric. Light dust and surface smudges can often be managed at home with a measured rinse and a soft microfiber wipe, working from top to bottom to minimize streaking. The process remains a careful, repeatable routine, and it can be performed with the car sleeve in place or off the car, depending on practicality. But when the questions arise—will a simple rinse dislodge bird droppings, tree sap, grease, or oil stains that have penetrated the fibers? When sap or heavy oil binds with the fibers, or when road grime embeds into the weave, the risk of tearing or permeating the fabric with residual cleaners increases. In these cases, a professional evaluation is prudent. Embedded contaminants often require specialty cleaners, precise dilution ratios, and extraction or steam techniques that go beyond home methods. A pro will assess the nature of the stain, the sleeve’s age, and the fabric’s tolerance for cleaners before choosing a cleaning path that preserves strength rather than sacrificing it.
The decision to seek professional help is also guided by signs that the problem extends beyond cleaning efficacy. If the sleeve shows visible distortion, such as warping, fraying, or stitching looseness, the risk of further damage rises with aggressive home methods. When mold or mildew takes hold, or when persistent odors remain after standard cleaning attempts, the issue moves from surface cleanliness to deeper fiber infiltration and microbial concerns. Mold spores can adhere to fibers, lodging in microscopic pores and crevices. They may require anti-microbial treatments and sanitization processes that are beyond DIY capabilities. In such instances, professional services bring not only expertise but controlled environments that minimize the risk of cross-contamination and ensure the fabric dries uniformly, reducing the chance of mildew returning.
Manufacturer care instructions often reserve certain situations for professional handling. Some covers come with warranty provisions or care guidelines that explicitly discourage aggressive DIY cleaning, submersion for extended periods, or the use of solvents that could degrade protective coatings. When a sleeve carries a warranty or a care label that directs professional cleaning for particular materials or stains, following those recommendations helps preserve performance and protects the investment in the sleeve’s protective mission. A professional cleaner who understands these nuances can interpret the instructions and tailor a cleaning plan that respects the materials while achieving the necessary cleanliness. It is not merely about removing soil; it is about maintaining the protective integrity that the sleeve is meant to provide to the vehicle’s finish.
In practical terms, what does professional cleaning look like for a dirty car sleeve? A trained technician begins with a careful inspection, identifying material type, seams, and areas prone to wear. They select cleaners formulated for the substrate, often opting for neutral pH formulations that minimize fiber stress and coating degradation. For tougher soiling, they may employ equipment such as low-moisture extraction machines or steam systems designed to lift dirt without soaking sensitive fabrics. The approach is methodical rather than aggressive, with tests on inconspicuous areas to confirm compatibility before proceeding. The goal is not to scrub aggressively but to unlock and remove contaminants with controlled, repeatable steps. Drying is performed in a controlled environment, ensuring temperature and humidity are managed to prevent shrinkage, warping, or mold growth. In the case of films, professionals maintain edge protection and use purpose-made washes that leave no cloudy residues on the film surface. In short, the pro clean emphasizes fabric safety, coating preservation, and thorough removal of contaminants, sometimes accompanied by follow-up steps such as reconditioning fibers or applying anti-microbial treatment if the substrate warrants it.
The choice between DIY and professional cleaning is rarely a binary one. It rests on a spectrum of risk versus reward. If the dirt is mild, the sleeve is a robust standard fabric, and you have manufacturer-approved cleaners, a careful at-home approach can be effective. This involves neutral detergents, gentle agitation, a thorough rinse, and air-drying away from direct sun. It also involves a clear understanding that any residue left behind can degrade fibers over time, and that heat, bleach, or solvents should be avoided. Conversely, if the material is delicate, the soil is stubborn or embedded, or the sleeve shows signs of structural stress, the safer route is to engage professional services. A professional can prevent missteps that could void warranties, fade finishes, or warp the fabric, and can deliver results that look and feel like new while preserving protective properties.
For readers who want to keep the maintenance loop tight and avoid surprises, there is value in a preventive mindset. Regular, light cleaning every one to two months can significantly reduce the likelihood of heavy soiling becoming a problem. Storing the sleeve in a dry, cool, and dark place helps prevent mold growth and preserves fiber integrity. A breathable storage bag prevents humidity buildup, and routine inspections for tears, fraying, or weakened stitching catch issues early, when they are easiest to address. If a sleeve is used in harsh environments—coastal air, industrial pollution, or frequent exposure to tree sap or bird activity—the maintenance cadence may need to increase, and professional evaluation may be warranted more often. A proactive, rather than reactive, approach to maintenance pays off in longer sleeve life and more reliable protection for the vehicle’s finish.
If you find yourself weighing the options and considering professional assistance, a useful signal is the balance of evidence: does the sleeve still respond to mild cleaners, or do you feel you are pushing fibers beyond their comfort zone? Is the soil compromise limited to surface dirt, or has it penetrated layers of the fabric or the film’s coating? Do you notice odors that persist after standard cleaning? Each of these signs adds a data point to the decision process. And when doubt remains, the risk of damage from DIY attempts increases the longer you delay professional input. A single well-timed professional cleaning can prevent a cascade of wear and restoration costs later, and it may also restore the original protective properties that keep a car’s finish looking pristine in the long arc of its life.
To anchor this guidance in a broader care framework, consider how you approach maintenance skill sets as a whole. A grounded habit of routine checks, careful material identification, and respect for substrate-specific care can reduce the frequency with which you must call in help. If you want a concise reference point for foundational maintenance habits in this context, you can review broader car maintenance practices that emphasize safe handling, thoughtful product selection, and adherence to material tolerances. For further inspiration and practical reminders on general vehicle care, see resources like Car Maintenance Skills. Car Maintenance Skills.
Ultimately, the aim is clarity and care. You should feel confident in recognizing when a dirty car sleeve is still within the realm of safe DIY cleaning and when it has crossed into territory where professional hands shield the finish, protect the substrate, and extend the sleeve’s lifespan. When in doubt, err on the side of caution and seek a professional assessment. The safest path honors the sleeve’s protective role while safeguarding your vehicle’s appearance for the long haul. And when you do invest in professional care, you’ll often find the results justify the decision: a cleaner sleeve, a more resilient coating, and a finish that continues to shield the car’s paint, year after year.
For readers seeking an external reference on best practices for car cover and film care, consult a trusted industry guide that covers neutral pH washes, safe cleaning sequences, and professional maintenance intervals. This resource provides an evidence-based framework for protecting fabric integrity and coating performance across a range of materials: https://www.carecare.org/car-cover-care-guide.
Guardians of the Gloss: Mastering the Clean of Dirty Car Sleeves While Protecting Paint and Fabric
Guardians of the Gloss is a phrase that fits the routine task of cleaning dirty car sleeves when you understand how a sleeve protects more than the car’s paint. A car sleeve, whether a standard fabric cover or a clear protective film, acts as a first line of defense against dust, bird droppings, tree sap, moisture, and harmful UV exposure. Yet cleaning it correctly matters just as much as choosing the right cover in the first place. This chapter threads together practical steps with a careful eye for material differences, the realities of dirt buildup, and the long-term care that keeps both the sleeve and the vehicle beneath it looking their best. The goal is not merely to remove grime but to do so in a way that preserves fabric integrity, avoids harming finishes, and extends the sleeve’s usable life over many seasons.
Begin with a clear sense of what you’re dealing with. Most sleeves fall into two broad categories. The standard fabric covers are typically made from breathable, water-resistant materials such as polyester or polypropylene. These fabrics welcome gentle cleaning that respects their weave and coatings. The other category comprises clear protective films—paint protection film or similar layers—that cling to the vehicle but require a far gentler touch to preserve their protective coatings. The cleaning technique for a standard fabric cover can tolerate a light wash and a careful scrubbing, while a clear film needs neutral cleaners and restrained water pressure to avoid edge lifting or coating damage. This awareness is not a pedantic distinction; it informs the entire cleaning rhythm, from preparation to drying.
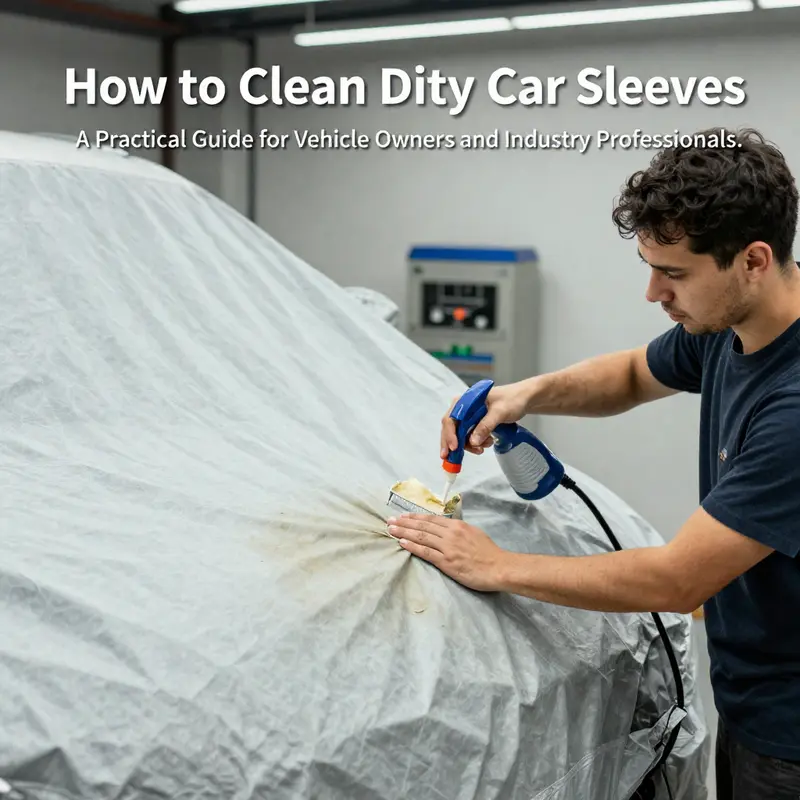
Preparation is the hinge of a successful cleaning session. Begin by removing the sleeve from the vehicle if possible. While some drivers opt for on-car cleaning to avoid the extra step, lifting the cover prevents water and cleaners from seeping into crevices where they could affect the paint or the fabric’s underlayers. Once off, give the sleeve a gentle shake to dislodge loose dirt, dust, and debris. This initial brush with gravity reduces the amount of scrubbing needed later and minimizes the risk of grinding grit into fibers. If you must leave the cover on the car for a quick refresh, use a light spray of water and a soft microfiber cloth, working from the top down in a single, unhurried pass. The aim is not to soak but to lift surface grime and prevent it from migrating to seams or stitched areas.
For sleeves that are only lightly soiled—dust and a touch of surface grime—the method is straightforward and gentle. A low-pressure rinse with a hose or garden sprinkler is ideal to flush away loose dirt. High-pressure jets are a common temptation for speed, but they can force water beneath the fabric, especially around seams, and may push dirt into crevices that harden into stubborn stains. After rinsing, wipe with a clean, damp microfiber cloth, moving steadily from the top toward the bottom to avoid streaks. Then allow the cover to air-dry while laid flat or draped in a shaded area. Thirty minutes is a practical minimum to prevent creasing; longer is often better if the weather cooperates. The key is to let nature take its course without exposing the fabric to direct sun, which can fade colors or weaken fibers over time.
When heavier soil invades the sleeve—bird droppings, tree sap, heavy grime, or oil stains—the approach must be more deliberate. Start by removing the cover and laying it on a clean, soft surface. Treat stains with care. For non-greasy residues like bird droppings or sap, applying a small amount of warm water and letting it sit for five to ten minutes can soften the deposits and make them easier to lift. For greasy spots, a cotton swab dipped in isopropyl alcohol (high-purity, near 99%) can be effective, but always test on an inconspicuous corner first to ensure the dye or coating doesn’t react poorly. If a stain remains stubborn, consider a specialized cleaner designed for car covers or a targeted bug-and-tar remover; however, avoid products with strong acids or harsh solvents that can degrade fibers.
With the stain softened or broken up, switch to a soft-bristled brush or a sponge to gently scrub in a mild solution. A neutral detergent—think a mild dish soap or a car-specific cleaner—mixed with water works well for most fabrics. The emphasis is on light, circular motions rather than hard scrubbing. Each section should be treated as a separate zone to prevent cross-contamination and to reduce the chance of abrading one area more than another. Once cleaned, rinse thoroughly. Residue left behind can erode waterproofing and accelerate wear, so ensure the fabric is fully flushed with clean water. As you rinse, keep the cloths and brushes clean and free of grit that could be ground into the fibers.
Drying is the final frontier and, mismanaged, a drying error can undo hours of careful cleaning. The long-standing rule remains: never dry a car sleeve in direct sunlight. UV exposure can fade fabrics, cause uneven drying, and promote premature aging. Instead, hang the sleeve on a clothesline, drape it over a clean surface, or lay it flat in a cool, shaded, well-ventilated area. If moisture remains, blot with a clean, dry towel rather than wringing or twisting, which can distort shape or stretch seams. Proper drying not only preserves aesthetics but also helps maintain the sleeve’s fit around the car.
Two crucial cautions should guide every cleaning endeavor. First, never resort to bleach, ammonia, or harsh chemical solvents. These agents can break down fibers and coatings, diminishing both the sleeve’s protective value and the underlying fabric’s integrity. Second, avoid heat. A dryer or direct sunlight can warp, shrink, or weaken the fabric and can also affect any coatings designed to shed water. These cautions apply across fabric types and are especially important for sleeves that host any reflective or coated finishes.
The topic shifts somewhat when the sleeve is actually a clear protective film rather than a fabric. Clear protective films, often applied directly to the car’s surface, require distinct care. They respond best to neutral pH wash solutions and cleaners specifically designed for films. Dilution is essential; manufacturers often recommend a solution in the range of 1:50 to 1:100 cleaner to water. The goal is a gentle, non-abrasive wash that won’t lift edges or dull the film’s gloss. High-pressure washing should be avoided near edges or seams, as a jet can peel or lift the film, especially over time. Filings in coastal or polluted environments may demand more frequent maintenance, sometimes weekly washing in challenging conditions, to prevent staining and deterioration of the protective layer. When a film is newly applied, many installers advise waiting at least a week before washing and avoiding contact with corrosive substances in the first 24 hours. For deeper upkeep, routine professional maintenance every six to twelve months helps ensure the film remains bonded securely to the paint and continues to resist environmental assault.
A practical way to integrate these practices into a single routine is to adopt a simple, repeatable cadence. Clean every one to two months, depending on climate and exposure. Store the sleeve in a dry, cool, and dark place, not in a hot garage or trunk where heat and moisture can promote mold or fabric breakdown. A breathable storage bag is ideal because it prevents mold and mildew while allowing moisture to escape. Periodic inspection is also wise; look for tears, fraying, or weakened stitching, and address minor issues promptly to extend the cover’s life.
In the everyday workflow, certain do’s and don’ts quietly steer outcomes toward success. Do use neutral detergents or car-specific cleaners and rinse thoroughly after cleaning to preserve waterproofing and coating integrity. Do not apply bleach, ammonia, or strong solvents to the sleeve. Do test cleaners on hidden spots first to avoid surprises. Do let the cover air-dry in shade rather than direct sun. Don’t scrub aggressively with hard brushes or rely on high-pressure water jets near seams or edges, especially with films. Do reapply a fabric protector if the manufacturer recommends it, roughly every six to twelve months depending on use and environment. Don’t leave soap residues that could degrade waterproofing or coatings over time. These guidelines create a sustainable cycle of care that protects both the sleeve and the vehicle beneath it.
If you ever feel uncertain about the material—whether the fabric is durable enough for a given cleaner, or whether a stubborn stain might have compromised the coating—professional help is a prudent choice. A car detailing shop or a specialist service can assess the fabric’s integrity, recommend a safe cleaner program, and perform deeper cleaning without risking damage. A professional assessment is especially valuable for sleeves that accompany high-value finishes or that have protective films requiring precise handling.
To keep this journey from becoming a scavenger hunt of trial and error, consider tapping into broader car-care knowledge as you refine your technique. A practical resource that complements these steps is the broader guidance on routine maintenance for car sleeves and related protections. For a broader view on routine car-care and sleeve upkeep, see the guide on car maintenance skills: https://itw-autosleeve.com/blog/car-maintenance-skills/. This internal reference can help you weave sleeve care into a larger habit of vehicle care, ensuring consistency across seasons and conditions.
As you integrate cleaning into your regular routine, you’ll notice the value of a calm, methodical approach. The aim is to preserve the sleeve’s form and protective performance while ensuring the car beneath it remains visually pristine. The preservation of the vehicle’s paint and clear finish is not a separate chore but a continuum of care started the moment you choose the sleeve and maintained through every cleaning cycle. When done well, this practice yields durable fabrics, intact coatings, and a vehicle that looks cared for, even when it’s covered.
For readers seeking additional, research-backed guidance, a deeper dive into car cover maintenance and cleaning can be found in external resources such as the detailed care guides offered by industry-focused publications. These sources reinforce the principles described here and provide practical checks against common pitfalls. You can explore a detailed reference to professional methods and product-safe practices at: https://www.caranddriver.com/cars/a40893578/how-to-clean-a-car-cover/.
In short, cleaning dirty car sleeves is less about brute scrubbing and more about a respectful dialogue between fabric, coating, and climate. The sleeve acts as a quiet guardian for the car’s gloss, color, and form. Treat it with patience, use the right solution for the material, rinse thoroughly, and dry away from heat and direct sun. By integrating careful preparation, gentle cleaning, mindful drying, and informed storage, you protect both the sleeve and the vehicle it shelters for years to come. The road to a pristine, protected car starts with the sleeve you choose and ends with the routine you maintain, day after day, season after season.
Final thoughts
Effective cleaning and maintenance of car sleeves are vital to preserving their protective qualities and extending their useful life. By carefully assessing the material and soiling level, applying appropriate cleaning methods, and recognizing when the expertise of a professional is necessary, vehicle owners and automotive professionals can safeguard both their investments and the vehicles they protect. Special care for clear protective films ensures that delicate layers remain intact and efficient. Consistent maintenance routines and proper storage further enhance durability and performance. Whether managing a personal motorcycle cover or maintaining an inventory for an auto parts distribution or repair shop, following these guidelines offers practical, reliable solutions that uphold quality and vehicle aesthetics over time.