When upgrading your car stereo, understanding how to remove a mounting sleeve is crucial for a smooth installation. This seemingly simple task can often present unexpected challenges, especially for motorcycle and auto owners who may not have extensive experience with vehicle electronics. One common issue faced during installation is dealing with mounting sleeves that can be stubborn or improperly fitted, leading to frustrations and delays. Additionally, many owners might not anticipate the specific tools required to successfully remove the sleeve without damaging the stereo or dashboard. This guide aims to break down the process, providing clear steps and helpful tips, so you can confidently tackle this task yourself. Not only will this enhance your understanding of your vehicle’s audio system, but it will also empower you to perform future installations or replacements with ease. For related insights on essential car maintenance skills, learn more here. Furthermore, understanding the right tools and techniques can save you time and money, allowing you to focus on enjoying your upgraded sound experience instead of worrying about installation mishaps.
How to Remove the Mounting Sleeve from a Car Stereo: A Step-by-Step Guide
Removing the mounting sleeve from a car stereo can seem tricky, but with this detailed, step-by-step guide, you’ll find it much more manageable. Whether you’re replacing an old stereo or troubleshooting issues, understanding how to successfully detach the mounting sleeve is essential. This guide is designed for motorcycle owners, auto owners, auto parts distributors, wholesalers, and auto repair shops.
Tools You’ll Need
- Flathead or Phillips screwdriver: Depending on your stereo screws.
- Trim removal tool: Often plastic, to avoid damaging trim panels.
- Safety glasses: For eye protection while working.
Step 1: Prepare Your Vehicle
- Turn off the Car: Ensure your vehicle is completely off to prevent electrical issues.
- Disconnect the Battery: Open your vehicle’s hood and disconnect the negative battery terminal to avoid electrical shocks.
Tip: Always wait about 10 minutes after disconnecting the battery to allow any residual current to dissipate.
Step 2: Remove the Trim Panel
- Locate the Trim Panel: Identify which parts of the dashboard need to be removed to access the stereo. The trim panel often surrounds the stereo and includes any knobs or buttons.
- Use the Trim Removal Tool: Carefully insert the plastic trim removal tool into the gaps of the trim panel and gently pry it away from the dashboard. Take your time to avoid cracking or breaking the plastic.
- Set Aside the Trim Pieces: Once removed, place the trim pieces in a safe location to avoid losing them or causing damage.
Step 3: Unscrew the Stereo Unit
- Identify Mounting Screws: Check the stereo for screws that secure it in place. Commonly, there are at least four screws, two on either side of the stereo unit.
- Remove the Screws: Using the appropriate screwdriver, remove the screws carefully. Keep these screws safe, as you will need them for reinstallation.
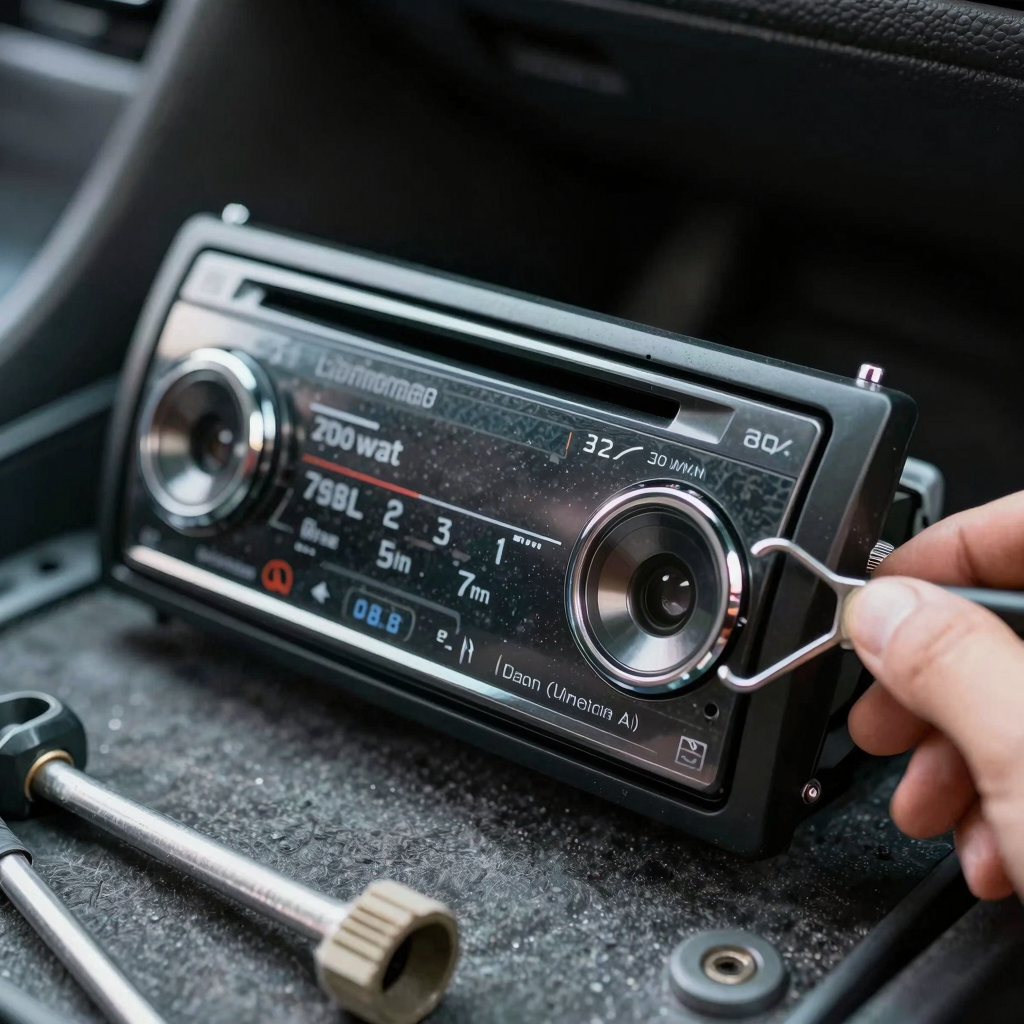
Step 4: Detach the Mounting Sleeve
- Gently Pull the Stereo and Sleeve Forward: Once all mounting screws are removed, carefully pull the stereo forward. If you encounter resistance, verify that all screws were removed and check for any hidden clips or fasteners still securing it in place.
- Disconnect Wiring Harness: Before fully removing the stereo, disconnect the wiring harness at the back by pushing on the tab and pulling the connector out. Ensure you support the stereo while doing this to avoid damage.
- Remove the Mounting Sleeve: The mounting sleeve should easily pull away from the dash once the stereo is removed. If it is stuck, check for any additional fasteners or clips that may be holding it in place. For certain models, you might need to push tabs on the side of the sleeve to release it from the dashboard.
Note: Different car models may have variations in the mounting sleeves. For instance, aftermarket stereos sometimes include sleeves that don’t fit perfectly due to incorrect dimensions or materials, which can lead to issues like rattling or audio distortion. Learn more about stereo mounting sleeve issues.
Step 5: Clean Up and Check for Issues
- Inspect the Area: Look for any damage or debris that might have accumulated during the removal process.
- Check Electrical Connections: Inspect the wiring harness for damage; it’s important to ensure clean connections for audio quality.
- Prepare for Reinstallation: If you’re replacing the stereo, ensure the new unit’s mounting sleeve is compatible and fits correctly to avoid future problems.
Conclusion
Removing the mounting sleeve from a car stereo doesn’t have to be difficult. By following these steps carefully, you can easily detach the sleeve without damaging any components.
Next time you’re upgrading or replacing your audio system, remember these tips. For further automotive guides and resources tailored to car maintenance, consider exploring essential car maintenance skills.
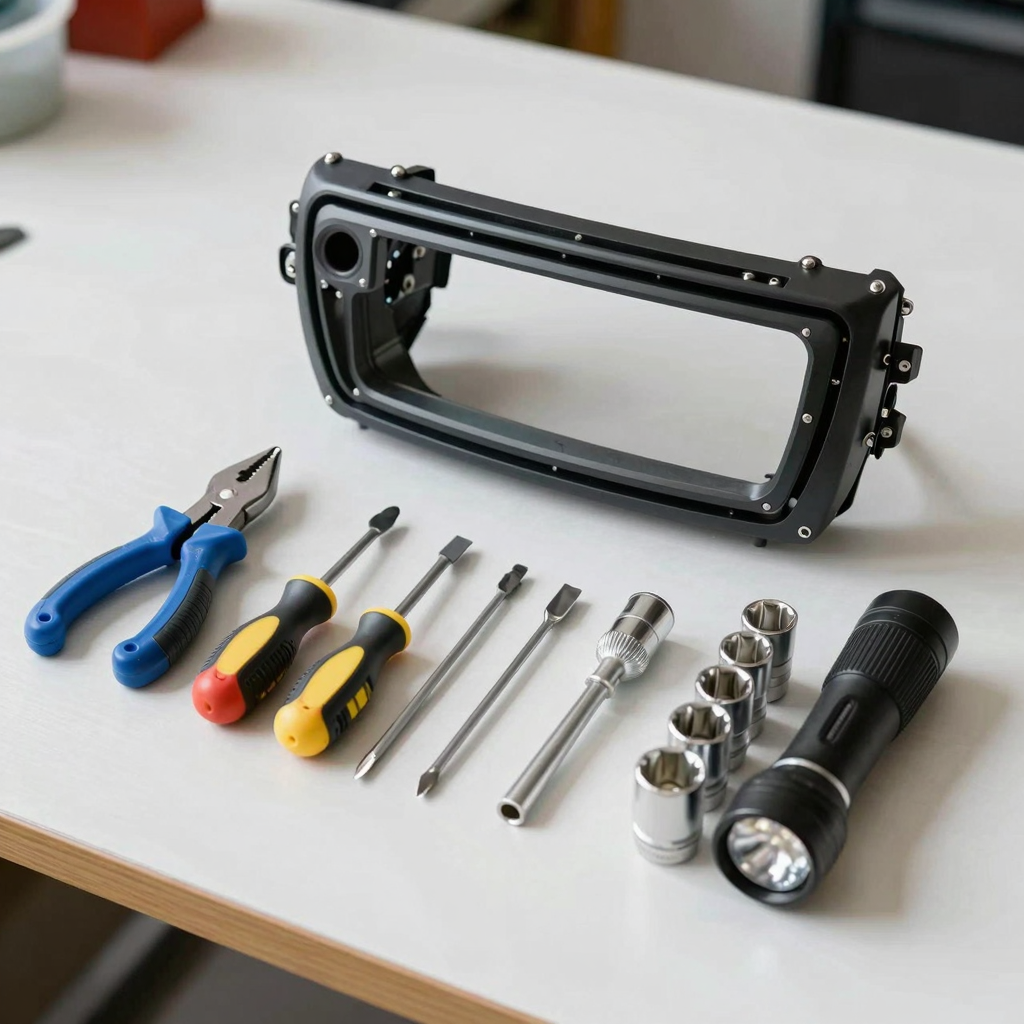
Tools Required to Remove the Mounting Sleeve from a Car Stereo
Removing the mounting sleeve from a car stereo involves some essential tools. Here’s a comprehensive list of the tools you’ll need:
-
Plastic Trim Removal Tool
A plastic trim removal tool is crucial to prevent damage to the dashboard and avoid scratches while prying off the stereo faceplate. -
Screwdrivers
- Phillips Screwdriver: Commonly needed for screws securing the stereo or mounting sleeve.
- Flathead Screwdriver: Useful for any flat screws or for gently prying parts away.
-
Socket Wrench Set
If the mounting sleeve has bolts, an 8mm or 10mm socket will often be necessary to remove them. -
Flashlight
Provide additional light to inspect tight spaces behind the stereo and ensure all screws and connectors are accessible. -
Pliers
Sometimes, a pair of pliers can help to grip and pull off tight connectors or sleeves. -
Safety Goggles
Protect your eyes from debris while working under the dashboard.
These tools will ensure a safe and efficient removal process, minimizing the risk of damaging your vehicle’s interior. For more tips on car maintenance, check out this guide.
Safety Tips for Working with Car Stereo Systems
When it comes to installing or working on car stereo systems, safety should always come first. Here are essential safety precautions to take to avoid electrical hazards and ensure proper handling of tools:
-
Disconnect the Battery: Before starting any work, disconnect the negative terminal of the car battery. This simple step helps prevent electrical shorts or shocks. It’s crucial to wait at least 10 minutes after disconnection to allow any capacitors to discharge.
-
Use Insulated Tools: Utilizing insulated tools with rubber grips is essential. These tools protect you from accidental contact with live wires, significantly reducing the risk of electrical shock.
-
Check for Voltage: Use a multimeter to verify that no voltage remains in the system before you start handling any wires. This precaution is vital, as even low voltage can pose risks if circuit integrity is compromised.
-
Inspect Wiring: Always check for damaged or frayed wires before installation. Replacing unsafe wiring is necessary to prevent short circuits and other electrical failures.
-
Secure Connections: Ensure that all connections are secure and insulated using wire nuts or heat shrink tubing. Loose connections can create sparks or lead to fire hazards.
-
Avoid Working on Live Circuits: Even if you’re only using low voltage, avoid working on live circuits. They can still cause sparks that may ignite combustible materials.
-
Organize Your Workspace: Work in a well-lit and organized area to reduce the chances of accidents. Keep tools secure and out of high-voltage areas, and always handle delicate components like amplifiers and head units with care.
Following these safety tips will help you protect yourself and your vehicle while working on your car stereo system. For more detailed information on car maintenance, consider checking out our car maintenance skills guide.
Incorporating these precautions into your installation process can create a safer environment for both novice and experienced mechanics.
| Mounting Sleeve Type | Dimensions (L x W x H) | Material | Compatibility | Notes |
|---|---|---|---|---|
| Universal Double DIN Mounting Bracket | 3.15 x 1.88 x 0.94 inches | Metal | Most car dashboards | Durable design, includes screws for installation. Amazon Listing |
| Universal Double DIN Cage Mounting Kit | 110mm height | Silver Metal | Standard double DIN dash openings | Includes a 1-year warranty, suitable for retrofitting. Amazon Listing |
| Toyota Vitz Standard Frame | 180mm x 110mm | Plastic/Metal | Toyota Vitz models | Supports both single and double DIN units; standard screw hole patterns available. Tech Insight Automotive |
| Pioneer Stereo Mounting Sleeve | 110mm height, 180mm width | Mixed (plastic and rubber) | Pioneer head units | Supports up to 80mm depth, includes rubber gaskets for vibration reduction. AutoTech Review |
Common Issues When Removing Mounting Sleeves from Car Stereos
Removing mounting sleeves from car stereos can be a tricky process, often resulting in various issues for users. Here are some common problems one might face, along with practical solutions for each.
1. Misalignment and Resistance
Misalignment occurs when the mounting sleeve does not slide out smoothly from the dashboard. This can be caused by:
- Dust and debris: Over time, dirt can accumulate, creating friction and causing resistance.
- Corrosion: Metal parts can corrode, leading to a tight fit.
- Improper alignment: If the sleeve was not installed correctly initially, it may require more effort to remove.
Solutions:
- Use a plastic trim tool: This allows you to gently pry the sleeve without scratching or damaging the dashboard. A tool specifically designed for this purpose can help avoid more significant issues (e.g., learn more about car maintenance skills).
- Application of heat: If the sleeve is resistant due to adhesive, gently applying heat with a hair dryer can soften the glue and make removal easier. Be cautious not to overheat to avoid melting plastic components.
2. Damage to Hidden Clips or Tabs
Many vehicles have concealed clips or tabs that secure the mounting sleeve. These can easily be broken or damaged during removal.
Solutions:
- Take your time: Carefully examine the surrounding area and locate all clips before attempting removal. Using a flashlight can help you spot hidden fasteners.
- Use the right tools: Utilize a plastic pry bar to disengage these clips without applying excessive force. This helps to preserve the integrity of the interior panels and clips.
3. Losing Small Parts
During the removal process, it is common to lose small screws or retaining clips, complicating the reinstallation process.
Solutions:
- Organize your workspace: As you remove components, place screws and clips in a designated container. Keeping them organized can facilitate a smoother reinstallation.
- Document the process: Taking pictures or notes of how everything is positioned can help ensure correct reconnection.
4. Electrical Shorts
Failing to disconnect the vehicle’s battery before starting the removal can lead to electrical shorts or damage to sensitive electronics.
Solutions:
- Disconnect the battery: Always start by removing the negative battery cable to prevent any potential electrical issues. This is critical for any work involving your car’s electronics (e.g., learn more about essential car maintenance skills).
Summary
By understanding these common issues and implementing preventative measures and solutions, you can enhance your experience when removing a car stereo mounting sleeve. Remember to work patiently and use the proper tools to avoid damaging your vehicle’s interior or electronic components.
If you’re interested in further enhancing your understanding of automotive repair, consider exploring additional topics related to brake maintenance tips for further tips and tricks.
Frequently Asked Questions (FAQ)
1. What are mounting sleeves in car stereos?
Mounting sleeves are metal or plastic frames that hold the stereo securely in place within the dashboard of your vehicle. They ensure that the unit does not shift or vibrate while driving, which can affect the audio quality.
2. How do I remove a mounting sleeve from my car stereo?
To remove a mounting sleeve, you’ll need to:
- Disconnect the stereo unit from the power source.
- Use a small flat tool to pry apart the sleeve from the dashboard or the stereo. Be careful not to damage the dashboard during this process.
- Pull the stereo slightly out to access any clips holding the sleeve in place. Gently push or disengage these clips to fully remove the sleeve.
3. What tools do I need to install a new stereo?
For a successful stereo installation, you typically need:
- A flathead screwdriver or pliers to handle screws and clips.
- Wire strippers and connectors for wiring.
- A dash kit or adapter if required to fit the new stereo into your vehicle’s dashboard.
- Multimeter to verify electrical connections.
4. Why won’t my stereo power on after installation?
If your stereo won’t power on:
- Check if the battery is disconnected.
- Ensure all wiring connections are secure, particularly the ground and power cables.
- Verify that the stereo is compatible with your vehicle’s electrical system.
5. How can I troubleshoot if I experience sound issues?
Common audio issues after installation can usually be resolved by:
- Inspecting your ground connection for solid contact.
- Checking for any interference from nearby wires or components.
- Ensuring that all cables are properly routed and shielded. For more detailed solutions, check this guide on common car stereo installation problems.
“Using the right removal tools, such as plastic pry bars instead of screwdrivers, is crucial to preventing dashboard damage.” – Experienced car audio technician
This advice underscores the significance of employing appropriate techniques in maintaining the integrity of your vehicle’s stereo system. For more information on car maintenance skills, you can learn more about car maintenance here.
Conclusion and Call to Action
In summary, understanding how to remove the mounting sleeve from your car stereo is crucial for maintaining and upgrading your vehicle’s audio system. Throughout this guide, we’ve explored various methods to effectively tackle this task, emphasizing the importance of precision and care to avoid any damage to your vehicle’s components. Furthermore, we highlighted the significance of utilizing premium fairings for motorcycles and vehicles, as these accessories not only enhance aesthetic appeal but also provide essential functional benefits like improved fuel economy, reduced wind noise, and enhanced stability at high speeds.
As you ponder your next upgrade, consider investing in premium fairings to elevate your riding experience to new heights. Our specially designed fairings are crafted with superior materials that withstand the rigors of the road and the elements, helping you ride with both style and confidence. Check out our selection of high-quality fairings at ITW Auto Sleeve. Embrace the road ahead with confidence and style; explore our products today!
Benefits of Premium Fairings
| Benefit | Description | Source |
|---|---|---|
| Fuel Economy Improvement | Premium motorcycle fairings optimize airflow around the bike, reducing aerodynamic drag and improving fuel efficiency. | Motorcycle Faring: Types, Properties, and How It Enhances Industrial Performance |
| Wind Noise Reduction | High-quality fairings are designed to streamline airflow over the rider and cockpit area, significantly reducing wind turbulence and noise at high speeds. | Motorcycle Faring: Types, Properties, and How It Enhances Industrial Performance |
| Enhanced Stability at High Speeds | Premium fairings improve aerodynamic balance by managing airflow over the front and rear of the motorcycle. | Motorcycle Faring: Types, Properties, and How It Enhances Industrial Performance |