
For vehicle enthusiasts, installing a car stereo sleeve can significantly elevate the audio experience. Whether you’re riding a motorcycle or driving a car, a new stereo system can enhance sound quality, allowing you to enjoy your favorite tracks. This guide addresses motorcycle owners, auto enthusiasts, auto parts distributors, and repair shops, ensuring an accessible approach to stereo installation. Each chapter systematically covers preparation, panel removal, wiring connections, and final testing, creating a complete roadmap for anyone looking to improve their ride’s audio system.
Laying the Groundwork: Thorough Preparation for a Flawless Car Stereo Sleeve Install
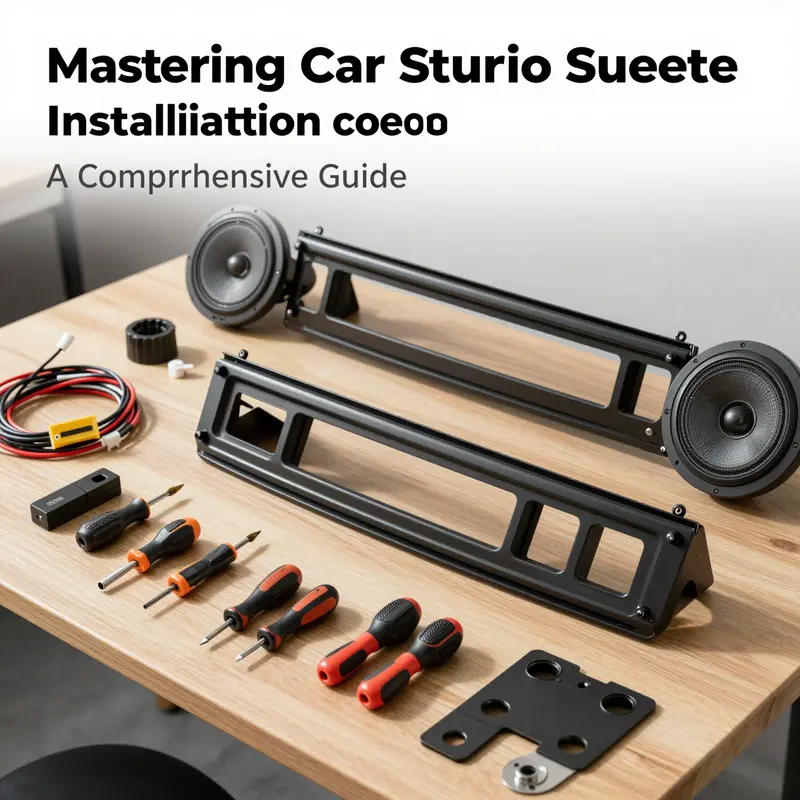
Every successful car stereo sleeve installation begins not with the first wrench turn, but with deliberate preparation. The sleeve itself is more than a decorative housing; it is the gateway to cleaner electrical connections, precise mounting, and a sound that remains faithful to your music through hot days, cold mornings, and long drives. In this chapter, we follow a steady path from gathering the right tools to envisioning the finished dash, weaving practical steps into a narrative that helps you translate intention into a smooth, safe, and durable install. The preparation phase is your roadmap, and its clarity can determine whether the job unfolds with confidence or devolves into frustration. You start by recognizing that a sleeve installation sits at the intersection of electrical work, mechanical fit, and acoustic planning. It is not merely about dropping a new faceplate into the dash; it is about ensuring the entire signal chain—from power to ground to speaker outputs—remains clean and coherent. The goal is to minimize future rattles, prevent moisture ingress, and guarantee long-term reliability. With this mindset, the prep work becomes less of a chore and more of a strategic investment in sound quality and vehicle integrity. The work begins with a careful inventory of what you have and what you need, and it ends with a clear mental map of the steps you will take, each aligned with the constraints of your specific vehicle model. A well-prepared installation reduces surprises and gives you a language to communicate with the car’s interior architecture. It also keeps you focused on safety, which is not optional but foundational. When you approach the task with a plan, you turn a potentially daunting project into a sequence of manageable actions that respect your dashboard, your wiring, and your ears. In practice, preparation unfolds along three broad threads: assembling the right tools and materials, safeguarding the electrical system, and assessing the fit and accessibility of the new sleeve within the dash opening. Start with a precise checklist. Gather screwdrivers in both flathead and Phillips formats, a trim removal tool to minimize panel damage, needle-nose pliers for securing tight connections, and a roll of electrical tape or heat shrink tubing for reliable insulation. A drill may be necessary if mounting points don’t align with the new sleeve, or if you must create new holes for brackets or mounts. The replacement stereo sleeve itself should be designed for your vehicle’s dash cutout, ideally with the correct template so the face sits flush and the mounting holes align without modification. If you’re working with a package that includes a mounting sleeve, verify that it is compatible with your head unit and the vehicle’s wiring harness. Keeping a clean workspace is part of preparation. A clear bench or table helps you avoid losing screws or mixing up connectors. Wipe away dust from the dash cavity as you work so you don’t push grime into the electronics. With the tools lined up and the area cleared, you move to the electrical backbone of the project. The battery is not a mere safety ritual; disconnecting it is a shield against accidental short circuits, arcing, or a spark that could fuse a wire nut to the metal of the dash. Remove the negative terminal first, then proceed with caution to avoid touching metal parts with any tool that could bridge the circuit. The car’s manual is a wise companion here, guiding you on safe disconnect procedures and any model-specific precautions. In the realm of preparation, there is a quiet art to organization. Label every wire as you disconnect it from the old stereo so that you can reassemble with confidence. A simple label such as “Left Front Speaker,” “Right Rear Power,” or “Ground” makes reconnection fast and accurate. If you don’t have labels handy, take a quick photo from multiple angles. A staged approach to removing panels also pays dividends. Use the trim tool gently to release clips and prongs, but resist the urge to yank. A single misplaced clip can create wind fluttering noises or rattles that undermine the entire install. You’ll want to preserve the dash panels for a pristine return to service. While you inspect the mounting area, evaluate the cavity for any sharp edges, rust, or protruding wiring harnesses that could snag the sleeve or cause future damage. If you spot any rough edges, address them with careful smoothing and, if needed, a little primer and paint to prevent corrosion. This stage—prepping the installation area—is not merely a cosmetic concern. It is a preemptive measure that eliminates a host of issues later on, from misalignment to moisture intrusion. A key part of this pre-assembly is verifying fit. Before you even think about wiring, you should test the sleeve’s dimensions against the dash cutout. The sleeve should nestle into the opening with minimal gap and sit flush when secured. If you notice misalignment, re-check that you have the correct sleeve for your vehicle’s make and model. A mismatch here can lead to the need for modifications that compromise the dashboard’s structural integrity and aesthetic. The familiar rhythm of a successful installation rests on understanding the new unit. Sitting with the manual, you map out the wiring scheme—the power, ground, accessory, and speaker wires—and you picture how the harness will integrate with your vehicle’s existing ecosystem. This is where you avoid common missteps that create noise or distortion. A calm review of the manual’s diagrams helps you anticipate whether you’re connecting to a factory amplifier, whether a line-level signal might be needed, or if you’ll rely on a conventional harness with color-coded wires. If your sleeve kit includes a crossover network for a multi-driver arrangement, plan its path to prevent cross-talk. The plan should extend to the harness’s routing behind the dash. The most important moment in preparation is imagining the finished installation and how each step supports that vision: a clean, secure fit; solid electrical connections; and a listening experience that aligns with your preferences. Beyond the tangible tools and steps, preparation also includes a mindset. It invites patience, meticulous labeling, and a willingness to pause if a step seems unsure. The dash is a shared space—one that houses delicate electronics and your personal sound signature. Treat it with respect, and you will protect both the vehicle and the enjoyment that follows. If you value a broader sense of readiness, recognize that maintenance habits around electrical work matter. The discipline you bring to this job—shutting off power, labeling wires, testing each connection—translates to safer, more reliable car ownership. For readers who want to carry this skill beyond the sleeve, there is a broader ecosystem of knowledge. In practice, the art of preparation informs every future upgrade, from replacing a head unit to integrating amplifiers or custom speakers. It is the quiet foundation that supports sustained performance and future flexibility. If you want to extend your preparation into a wider skill set, consider dipping into general car maintenance practices that keep you confident during more ambitious projects. For instance, a growing base of knowledge about electrical systems and dash components can be reinforced by learning from resources focused on car maintenance skills, which cover topics like wiring safety, component testing, and proper tool handling. You can explore that body of knowledge here: car maintenance skills. As you proceed with the installation, remember that a well-prepared start reduces the likelihood of rework and improves the odds of achieving the precise imaging and clarity you expect from a properly installed sleeve. The preparation phase, done right, makes the rest of the process smoother and more predictable. It protects your dash from unnecessary damage, preserves the integrity of the vehicle’s electrical system, and gives you a reliable baseline from which to measure success. When you finally slide the sleeve into the dash, you do so with the confidence that every earlier step has prepared the way. Then comes the actual wiring—laid out with care, tested for polarity, and organized to minimize interference. You will have planned for this moment, and the moment will feel less daunting because it was anticipated. The result is not only a successful physical fit but also a clean, dependable electrical backbone that powers the music you want, without drama. For those who seek a practical touchstone, keep a small, clearly labeled toolkit dedicated to stereo work. A dedicated set of pliers, a multimeter for quick voltage checks, and a roll of heat shrink tubing can be a game changer when you face the moment of truth: does the sleeve seat cleanly, does the harness align, and do the wires behave when you apply power? In the broader arc of your project, preparation becomes a mindset that extends beyond the dash. It teaches you to pause, verify, and proceed with intention. It minimizes risk, maximizes safety, and lays the groundwork for a listening environment that reflects your taste and your vehicle. As you move from preparation to execution, you will carry with you not only a better-sound system but also a renewed sense of control over your car’s interior architecture. External resource: https://www.crutchfield.com/learn/learningcenter/audio/car-audio-installation.html
Behind the Trim: Precision Panel Removal for a Clean Car Stereo Sleeve Install

Removing panels to reach the car’s stereo isn’t flashy, but it defines the success of the whole sleeve installation. The goal is access without damage, a clear working space, and a wiring path that stays organized for the next steps. When you approach panel removal with patience, you set up the rest of the project for efficiency and quality. Begin with the mindset that the interior trim is a precisely engineered shell, not a disposable cover. The trim is designed to be removed and reattached, but it relies on gentle, methodical technique. A calm, steady pace helps you feel the exact point where a clip gives way or a screw releases its hold. Even a small mistake can create gaps, rattles, or scrape marks that shout of shortcuts. The moment you commit to a careful approach, you start to see the path to a flawless sleeve install unfold before you. You’ll have better access to mounting points, clearer visibility for wiring routes, and the confidence to reassemble with the finish that factory aesthetics demand. This chapter focuses on removal as a practical, skill-building step, one that threads through the entire sleeve installation with purpose and care.\n\nThe procedure begins with a quick survey of where the panel is anchored. Most vehicles secure door trims, center consoles, and dash panels with a mix of screws and plastic fasteners. Visibly, you might locate screws along the edges or near access points like the armrest, door handle, or cup holder openings. It helps to have a small magnetic tray or labeled containers so tiny hardware doesn’t vanish into the depths of the cavity. As soon as you locate a screw, set it aside in a consistent order so you can mirror your path during reassembly. This simple habit saves time, reduces confusion, and minimizes the risk of mismatched fasteners that could cause misalignment or rattling later on. The first impression you want to leave is that you controlled the environment and respected the panel’s role in the vehicle’s interior design.\n\nWith the screws removed, the next move is to introduce a plastic trim removal tool. A plastic tool is essential: it distributes force, reduces the chance of marring the surface, and helps you feel the subtle give of a clip as it releases. Insert the tool into the seam between the panel and the surrounding structure, and apply steady, even pressure along the edge. Work slowly, and keep your movements deliberate rather than sweeping with brute force. The goal is to release clips one by one, rather than prying a large section free at once. As you proceed, listen for the little click of a clip giving way. That audible cue, paired with a gentle lift, confirms you’re on the right track. If a stubborn edge resists, return to that area with a slightly different angle, but never force the tool or the panel outward. For some panels, the clips hold tight at first but loosen with a little patience and the right angle. The result is a panel that lifts away with a controlled ease instead of a sudden pop that could crack the finish or bend a fragile tab.\n\nWhile you work, it’s wise to stay attentive to hidden fasteners that aren’t obvious from the outside. Some vehicles tuck additional screws behind speaker grilles, ashtrays, or small access doors. If you can’t locate a fastener that seems to be part of the attachment, pause and consult the vehicle’s repair manual or a trusted installation guide for that model. The reminder here is simple: a panel is often held in more places than meet the eye. If you’re unsure, pause, verify, and proceed only when you’re confident you’ve found all the anchors. This approach avoids an abrupt panel release that could crack a plastic clip or bend the housing. The moment you confirm there are no remaining fasteners, you can carefully lift the panel away. When the panel separates, you’ll see the hidden channels behind it—areas where wiring harnesses and connectors for the stereo and climate controls pass through. This is where labeling becomes not just helpful but indispensable. If you didn’t label the wires when you removed the old set, do so now in a way that won’t smear or fade with handling. A simple system—like marking each connector with a short descriptor on painter’s tape—can save hours later when you’re reconnecting the harnesses and the new sleeve.\n\nSafety considerations should be threaded through every step. Before you touch any electrical components, disconnect the negative battery terminal. This precaution minimizes the risk of short circuits, arcing, or accidental deployment of airbags during the disassembly. It’s not an overstatement to say that patience here is as important as skill. The interior’s plastic surfaces are forgiving, but they’re not invincible. A trim tool pressed too aggressively could gouge a finish, while a too-wide flick of the wrist could snap a clip or bend a support bracket. Take time to inspect once the panel is free. Look for torn clips, damaged mounting points, or obvious wear that might reappear once you reinstall the panel. If a clip is damaged, consider replacing it before you reassemble. Small repairs made now pay off in a quieter ride and a panel that sits flush against the surrounding surfaces.\n\nOrganization is not glamorous, but it is crucial. Place every screw, clip, and fastener in its own compartment or on a labeled tray. As panels come away, you’ll gain a better sense of the system’s geometry and the path your wiring must take for the sleeve installation. With the panel off, vacuum any debris and wipe down the mounting surface. A clean area is essential when you mount the sleeve, and it reduces the risk of rattles caused by dust and grit pressing against the speaker frame. While you’re at this stage, take a few minutes to plan your wiring route. The sleeves and speakers need a direct line that won’t snag on moving parts or rub against edges. A tidy, unobstructed path helps preserve electrical integrity and minimizes wear on the wires over time.\n\nThe process of panel removal also benefits from a few tactical cautions. Never pry near painted surfaces with a bare tool; use a cloth-wrapped edge if you must push against a painted area. Keep the area well lit so you can see subtle clips and the exact points where the harnesses pass. If you encounter a stubborn harness connector, do not yank. Release any lock tabs gently with a small flat tool, then separate the halves with a careful pull. The goal is clean separation without distorting the connector housing, which could cause poor contact or intermittent audio issues later on. If you’re unsure about a particular connector, it’s better to pause and consult a diagram or guide rather than risk a brittle latch. Small misunderstandings here can shadow the entire installation with intermittent failures that are hard to diagnose.\n\nAs you free the panel, you’ll notice how the interior geometry affects your mounting plan for the sleeve. The space behind the panel is a puzzle of channels, brackets, and sometimes moisture barriers. This is the moment to assess the feasibility of your planned sleeve location, the clearance around the speaker basket, and the path your wiring will take to avoid heat sources or moving parts. It’s helpful to imagine the panel returning in its final position and ensuring that no wire nests behind or between the clips. A minor misalignment now could lead to a rattling panel later, a persistent buzz at certain engine speeds, or a misfit that forces you to redesign your mounting approach.\n\nIf you want to build broader DIY confidence as you work, consider cross-training on general car maintenance skills. A solid foundation in handling trims, harnesses, and connectors pays dividends across many tasks. You can explore resources that focus on the broader skill set of car maintenance to sharpen your ability to navigate future installs with the same calm, methodical approach. The idea is to internalize a system of careful checking, labeling, and confirming steps before moving forward, a habit that serves every kind of upgrade or repair.\n\nWith the panel detached and the access confirmed, you’re ready to proceed to the next phase: preparing the mounting area for the sleeve and setting up the wiring path with the cleanest possible integration. The removal itself may not feel dramatic, but it is the gatekeeper to a clean install. If you respect the process, your sleeve will sit square, your wires will run without friction, and your audio path will emerge unimpeded by clutter or misalignment. Reassembly happens in the same spirit. When you’re ready to reinstall, return each clip to its original seat, press firmly to hear that decisive fully seated click, and reinsert screws in their proper order. Don’t rush this step; a slow, deliberate tightening ensures the panel sits evenly and maintains the vehicle’s interior contours. After everything is tightened and the wiring harnesses are reconnected, the panel should look as though it never left its place, except for the improved access to the new sleeve and a more organized, robust pathway for the speaker wiring.\n\nThe panel removal phase also introduces a practical awareness of the environment around the speaker location. Moisture barriers, insulation, and door seals all influence how well the sleeve will perform once installed. You may choose to extend your focus to sealing and damping at this stage, knowing that the panel has to meet the door frame cleanly for a flush seal. While waterproofing and damping are typically discussed in later stages of the sleeve install, mindful preparation during removal reduces the risk of moisture intrusion and unwanted resonance. The more thorough your initial pass, the less likely you are to be surprised by moisture creeping into the speaker cavity or by vibrations that degrade sound clarity. This attention to detail is the kind of practical care that separates a competent build from a professional-grade result.\n\nFinally, the reassembly should be approached with the same care and respect you offered the removal. Confirm that all clips snap into place, that panels align with surrounding surfaces, and that no exposed wires sit in high-friction zones. Reattach the battery terminal, restore power, and test basic functionality with no heavy audio load. At this stage, you’re not yet listening to the final audio, but you’re validating that the electrical system remains intact and that the panel’s return has not altered any of the seating or door alignment. The chapter on installing a car stereo sleeve continues from here, with mounting hardware secured, wiring grounded, and a thoughtful route laid out for the tweeter and woofer connections. As you move forward, you’ll appreciate the quiet confidence that comes from a panel removal done with intention and precision.\n\nFor those who want to explore further, model-specific guidance on panel removal and retrofit approaches can be found in manufacturer-centered, retrofit-focused resources. This external reference can provide deeper diagrams and model nuances that complement the general approach described here.
null

null
Final Checks and Fine-Tuning: Perfecting Your Car Stereo Sleeve Installation

The moment of truth in any car stereo sleeve installation arrives after the last screw is torqued and the door panel snaps back into place. This final phase focuses on testing and finalizing the system as a single, cohesive process rather than a collection of separate tasks. When you reach this stage, you are not merely confirming that the system powers on; you are validating that every connection is secure, every component is properly mounted, and the sound you hear is faithful to the music you love. The aim is clarity, imaging, and durability under real driving conditions, not just in a quiet workshop. As you proceed, keep the vehicle off, reconnect the battery only when you’re ready to verify, and keep your workspace organized so nothing snaps or drops during final adjustments. The careful attention you invest at this stage pays dividends in longevity and listening satisfaction, layers of quality that begin with precise wiring and end with musical confidence you can feel every time you turn the key.
The first focus in final testing is verification of connections. Revisit power, ground, and speaker leads to confirm they are tight and correctly routed. Loose power or ground can introduce electrical noise, while loose speaker leads invite intermittent crackling or dropouts. Polarity checks remain essential here; even when wiring harnesses are labeled, a quick check helps prevent subtle phase issues that cloud imaging. If you suspect polarity problems, a simple polarity test can reveal miswiring before you broaden the test to more demanding tracks. You may already labeled the wires during the disassembly, but a second pass with a magnifier or a careful visual check can catch a forgotten tether or a misrouted sleeve. Ensure the speakers are firmly mounted and free of vibrations. A rattling door or a loose mounting bracket can masquerade as a sound issue, masking real acoustic problems and confusing subsequent tuning efforts.
With the hardware secured, the audio testing begins. Start with high-quality test material—tracks engineered to probe the full spectrum of frequency content. Classical orchestral passages, dynamic vocal performances, and complex symphonic arrangements are excellent because they demand accurate timing, clean highs, present mids, and solid bass. Set the head unit at a moderate level, then gradually increase the volume to the point of subtle distortion, and back off slightly. This approach helps reveal any early indicators of clipping or impedance mismatches that might become more pronounced at higher listening levels. While you test, verify that both left and right channels carry equal energy and that the stereo image remains centered when you narrate a scene or a singer moves across the stage. A quick check for hiss or a hum can signal grounding issues or shielding needs that weren’t obvious during installation. The goal is not to hear every note loudly, but to hear every note cleanly across the frequency range.
Environment plays a measurable role in perceived sound quality, so conduct tests with the engine off and the cabin temperature stabilized around 25°C, give or take a couple of degrees. This replication of typical conditions helps ensure that the DSP, the equalization, and the amplifier gain respond predictably in daily use. Ask the listener—whether yourself or a passenger—to sit in the driver’s seat, doors closed, with comfortable seating position and sightlines adjusted. Realistic seating and door conditions influence how sound energy interacts with the interior panels, reflecting, absorbing, and sometimes coloring the perceived bass and midrange. Such realism matters for imaging: you want the liveness of a live performance to translate into your car, not a studio silence in a far corner of the room that never truly translates to your listening position.
A broad test plan includes multiple sources and genres. Test with a CD player, a USB drive, and a wireless source to confirm that switching sources yields no delays, crackles, or level jumps. The system should smoothly adapt to each input without requiring manual recalibration after every source change. Follow this by adjusting the tone controls judiciously; the objective is not to maximize bass but to preserve musical coherence. If your system includes an external processor or a digital signal processor (DSP), use it to set a clean, linear baseline before exploring more personalized EQ curves. The guidance here is to avoid over-tuning; the best settings usually feel almost invisible—your music sounds almost like it was recorded in your car rather than engineered for it.
If your installation includes an amplifier, gain adjustment is one of the most critical steps in the final phase. Begin with both the head unit and the amplifier gains at their minimums. Then, slowly raise the head unit volume until you detect a faint distortion or the onset of clipping, and back off slightly. This creates a safe margin for the amplifier to operate without stressing the circuitry. Next, fine-tune the amplifier gain to a level that achieves the desired loudness while preserving clarity. The aim is to maximize dynamic range and headroom without introducing distortion under peak musical moments. This process prevents the common pitfall of setting a loud system that only reveals its flaws at higher volumes when the music becomes more challenging to reproduce. It also helps to listen for a coherent bass response that aligns with the rest of the spectrum; if the bass seems detached or muddy, revisit the crossover settings and confirm they connect to the correct drivers.
Phase alignment is a subtle but decisive factor in achieving a cohesive, powerful soundstage. A straightforward phase check can confirm that all drivers contribute constructively to the bass. Play a low-frequency tone and reverse the polarity on one speaker. If the bass becomes noticeably weaker when the polarity is flipped, you’ve identified a phase mismatch that needs correction. Correcting phase ensures the woofer and any subwoofers align with the midrange and tweeters, producing a unified energy that enhances imaging and depth. If the system uses multiple woofers or a sub, ensure their crossovers are set so they share the load without stepping on each other’s frequency ranges. When phase is correct, the sound feels more piston-like, with less gap between the driver’s motion and the listener’s perception of the music’s rhythm.
As you near finalization, you should also look at cable management and final connections. Tidy up loose cables with zip ties or cable clips to prevent chafing, snagging, or rattles that would undermine the listening after a long drive. Re-check every connector and ensure there is no strand exposure on stripped wires. A small safety precaution is to confirm ground points are clean and free of paint or corrosion; a poor ground can produce ongoing noise that frustrates even the most patient listener. You may also test the system’s full control set: volume, balance, fade, and any seat-memory or DSP presets. Make sure each control brings a predictable, smooth response across the dial and that navigating between different listening modes remains intuitive in practice, not just on paper.
The final stages of finishing are not merely cosmetic but functional. Reassemble the door panels or panels surrounding the speakers with due care to avoid pinching any wiring in the process. Confirm that the panel’s original clips engage properly and that there is no gap between the speaker frame and the panel surface, which could alter the acoustic seal you carefully established during sealing and damping. In many builds, the seal around the speaker edge and the dampening material inside the panel contribute more to perceived quality than a single component change. If moisture exposure remains a concern in your climate, revisit the silicone sealant or gaskets around the speaker edge to prevent water intrusion that could corrode connections over time. Remember, a well-sealed and well-damped installation protects both performance and reliability and reduces the risk of rattles that taint the listening experience.
When you finally listen to a range of material, there should be a sense of effortless control rather than forced loudness. You will notice clean highs, strong, controlled bass, and a cohesive midrange that keeps voices intelligible without sounding aggressive or forward. If you detect glare in the high end or a hollow feel in the midrange, revisit the EQ, the crossover, or the microphone-free phase alignment. The goal is transparent, balanced sound that translates well from studio recording to the car environment, with the engine running or idling in traffic. The process of testing and finalizing is inherently iterative; one small adjustment—an attenuator setting, a minor crossover tweak, a better anchored ground—can unlock a more accurate sonic picture across driving conditions. This is why the final check is less about achieving a single perfect setting and more about establishing a reliable baseline that performs consistently as you drive through city streets, highways, and rural routes.
If you want a broader perspective on installation and testing practices beyond your workshop, consider consulting established automotive resources that summarize proven approaches and diagrams. For broader safety and maintenance practices, see the car-maintenance-skills guide. This resource can reinforce the habit of planning and verification that underpins successful installs and ongoing reliability. In the end, finishing a car stereo sleeve installation is about translating careful preparation into faithful listening experiences while protecting your investment through robust mounting, sealing, and wiring discipline. This synthesis of technique and listening nuance is what separates a quick fix from a durable, high-fidelity automotive audio system.
Final thoughts
Successfully installing a car stereo sleeve enhances your vehicle’s audio experience and enjoyment. By following a structured approach—from preparation through final testing—you can achieve a professional-grade result that stands the test of time. Remember to double-check connections and tailor your sound settings post-installation for the best performance. Embrace the journey of making your ride uniquely yours while enriching your listening experience on the road.