
Upgrading a car stereo is a popular enhancement for both auto and motorcycle owners, providing improved sound quality and modern functionality. Understanding how to install a double DIN car stereo is pivotal for achieving the best performance from your audio setup. This guide offers a detailed breakdown of essential techniques, including the safe removal of the radio bezel, utilizing a double DIN installation sleeve, and ensuring a seamless installing process. We’ll also cover safety precautions as well as common mistakes made during installation to help you avoid pitfalls. By the end of this guide, you will be equipped with the knowledge to confidently install your new stereo, and appreciate the sound upgrade it brings.
Bezel Breakthrough: Navigating Top-or-Bottom Bezel Removal for a Clean Double-DIN Car Stereo Install

Removing the bezel around a factory radio is the kind of task that looks simple on video tutorials but requires a steady hand and a calm plan in a real dash. The bezel, that trim frame surrounding the stereo, is designed to be unobtrusive yet stubborn enough to hold its position through years of daily use. When you decide to upgrade to a double-DIN system, the bezel becomes the gateway to a secure, professional-looking installation. Whether you start at the top or the bottom, the goal remains the same: glide a trim tool between the bezel and the dash, ease the clips away, and free the frame without bending the panels. The choice of starting point—top or bottom—doesn’t meaningfully change the outcome, but it does impact your moment-to-moment maneuvering. The trick is to move in slow, deliberate increments, gradually releasing each clip around the perimeter until the whole unit releases with a clean, almost quiet pop rather than a sharp crack that you hear from the next room.
Safety is the constant guardrail here. Before you even think about prying, ensure the ignition is off and the battery is disconnected. Electrical shorts are a real risk when you introduce metal tools into the dash area, and the battery disconnect minimizes the chance of sparks if a stray wire brushes a live connection. This precaution also protects sensitive electronic modules that share ground paths with the dashboard electronics. With power out of the way, the environment becomes a controlled workspace where you can focus on tension-free motion rather than forceful, reactive moves.
Tools matter as much as technique. A plastic trim removal tool is preferred because it slides between surfaces with minimal resistance, reducing the chance of scuffing plastic or cracking paint. A thin flat screwdriver can work in a pinch, but it should be used with care and ideally wrapped with a rag to create a broader, gentler edge. Have a small flashlight handy to illuminate the tricky corners behind air vents or near stubborn clips. A magnetic parts tray helps keep small screws from disappearing into the crevices of the dash. With the right tools, the process becomes a choreography rather than a tug-of-war.
Begin by locating any visible screws that secure the bezel. In many vehicles, screws are tucked behind tiny covers or etched into the corners of the frame. These screws usually secure the upper or lower edge of the bezel. Gently pry away the small covers to reveal the screws, then remove them with a screwdriver. Once the fasteners are out of the way, the actual work begins: releasing the plastic clips that anchor the bezel to the dash. These clips are designed to flex and rebound; you want to coax them out, not yank them free. Start at the area where you can access a clip without fighting with the radio body, then slide the tool along the edge to unseat adjacent clips. Working your way around the perimeter in a controlled, sequential manner reduces the risk of stressing or bending the trim.
As you approach each corner, you’ll feel a subtle resistance as the clips give way. If a clip feels stubborn, try a tiny adjustment—lift slightly higher with the trim tool or shift the tool to an adjacent area so you aren’t levering on a single point for too long. The bezel, flush with the dash most of its life, will begin to loosen as each clip releases. When the last clip releases, you should be able to lift the bezel with modest effort. If you encounter resistance, pause and recheck for any remaining fasteners or clips that may still be engaged behind an accessory, such as a blank switch plate or a decorative cap.
Once the bezel is free, the underlying mounting screws or brackets that hold the original radio in place come into view. This is where the installation begins to move from removing to replacing. With the bezel out of the way, you can clearly see how the radio is mounted and what hardware must be removed to free the unit. It is tempting to rush this phase, especially if you’re anxious to get your new double-DIN unit in place. Resist the impulse. Take a moment to inspect the wiring harnesses and the antenna connector. A quick photo of the connections can serve as a helpful reference if you need to re-create the exact wiring arrangement for the new stereo. If the harnesses are clipped into a harness adaptor or a plug-and-play module, ensure you have that accessory ready for the installation phase that follows the removal.
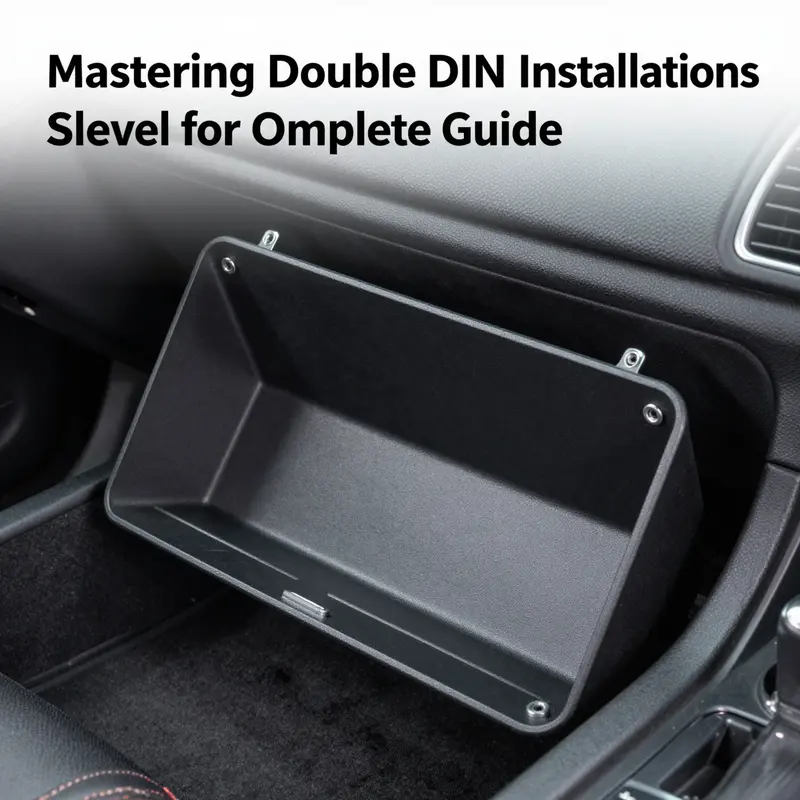
With the original radio unfastened, you’ll be able to slide it out and set it aside. At this stage, the dash opening is naked, and you can assess any gaps or rough edges around the cutout. If the edges show burrs or uneven plastic, you may want to gently deburr with a plastic scraper or a small file designed for interior trim to prevent future chafing or improper fitment of the new sleeve. The double-DIN installation sleeve, sometimes called a mounting bracket or a cage, is designed to slide into the dash opening and provide a uniform mounting surface for your new unit. This sleeve effectively bridges any size discrepancies between the opening and the dimensions of a modern double-DIN radio. It gives the installer a stable, square frame to anchor the stereo and keep it aligned with the curvature of the dash. The key with the sleeve is to ensure it sits flush against the dash with no light gaps that could collect dust or moisture, and that the mounting screws you use secure the sleeve to the dash in a way that won’t loosen with vibration over time.
When you’re selecting a sleeve, the aim is a universal fit that ties neatly into the dash profile without forcing you to trim the cutout beyond what’s necessary. A robust steel or alloy frame offers more rigidity than a lighter plastic option, which matters for long-term durability and a sleek appearance. The installation kit should include appropriate screws and perhaps a set of spacers to accommodate minor differences in the depth of the dash. Once the sleeve is in place, the new stereo can be aligned to the bezel openings and mounted securely. The alignment step is not cosmetic—it ensures the radio faceplate sits perfectly square with the surrounding trim, so the overall look is cohesive and professional rather than misaligned or tilted.
Power comes back into play at this point, and the safety mindset should persist. Before you connect any wires, confirm that the battery remains disconnected. Then, follow the vehicle’s wiring protocol: harnesses typically require an ignition-switched power feed, a constant power feed for memory, a ground, and speaker wires routed to the corresponding channels. A harness adapter can simplify this process and preserve factory settings, but only if it matches your vehicle’s connector layout and the stereo’s power requirements. Attach the antenna lead to the radio, and ensure that any steering-wheel control interfaces are compatible with the new head unit if your install includes those features. With the sleeve secured in the dash and the harness properly connected, slide the stereo into the sleeve, verifying that all clips and brackets engage as designed. The goal is a clean, flush face that doesn’t interfere with the bezel’s seating or the surrounding trim.
The reassembly phase is where many installers experience a small moment of triumph mixed with a careful sense of responsibility. Reattach the bezel with the same measured care you used to remove it. Check that it lines up with the dash seams and that the top and bottom edges mirror the vehicle’s contours. A misaligned bezel is not only visually jarring but can also create gaps that let dust infiltrate the interior. When the bezel sits securely, reinstall any center console panels or air-vent assemblies that may have been removed to gain access to hidden fasteners. Take a final check: the radio should sit firmly in the mounting sleeve without any side-to-side play, and the bezel should sit flush with the surrounding trim without buckling at any point along its length.
Testing completes the circle. Reconnect the vehicle battery, turn on the ignition, and perform a functional check of the new unit. Verify that the power comes on reliably, that the display is clear, and that the audio pathways are correct for the left and right channels. If your harness interface supports factory features like memory presets or steering-wheel controls, confirm that those functions respond as expected. While you test, listen for any unusual rattle or vibration that might indicate the radio is not fully seated or that the sleeve is not perfectly aligned. If you hear any unusual noises, power down, recheck the mounting screws, and reseat the sleeve before continuing.
This sequence—careful bezel release, secure mounting, precise sleeve alignment, and thorough testing—creates the foundation for a professional-looking, durable installation. A correctly installed double-DIN unit not only enhances the vehicle’s audio capabilities but also preserves, and in some cases improves, the dash’s aesthetic integrity. It’s tempting to gloss over the bezel phase as a mere opening chore, but treating bezel removal as the critical entry point to a clean install helps ensure that the final result is both functional and visually seamless. In this light, the top-versus-bottom decision becomes less about a rule and more about a mindful approach: select the path that feels most controllable for your hands and your dash, and proceed with deliberate, patient movements that respect the trim’s longevity.
For readers who want a broader perspective on safe car maintenance practices that inform every step of this process, consider our guide on car maintenance skills. It emphasizes safety habits, tool selection, and careful planning that make hands-on work like bezel removal less hazardous and more predictable. This integration of maintenance mindset with installation technique helps you move from uncertainty to confidence as you advance through the steps of a double-DIN upgrade. In a broader sense, the discipline you cultivate here translates to other interior upgrades, from dash trimming to wiring refinements, where the same attention to fit, finish, and electrical safety pays dividends over time.
When model-specific quirks appear, and they certainly will, remember that documentation from the vehicle’s repair manual or trusted online communities can illuminate uncommon fasteners, hidden clips, or specialized removal sequences. Some dashboards require detaching the center console or removing adjacent air-vent panels to release stubborn fasteners. The principle remains constant: work slowly, verify every attachment, and avoid forcing parts that do not yield to gentle pressure. The bezel’s fragility is not a sign of weakness but a reminder that success hinges on a careful, measured touch.
In this sense, the bezel is more than a simple frame. It is the threshold to a cleaner installation, a better aesthetic integration, and a more reliable mounting for the modern, feature-rich head unit. The top-or-bottom choice becomes part of a larger philosophy: approach the dash with respect, plan your moves, and let the hardware reveal its proper position through steady, incremental progress. As you prepare to slide the new double-DIN radio into place, you’ll understand that the bezel is not just protection; it is the first step toward a secure, enduring upgrade. This is how a careful approach to a seemingly minor task sets the foundation for a professional result that looks as good as it sounds.
Internal link reference for further independent maintenance insights: car maintenance skills guide.
External resource for model-specific guidance: https://www.crutchfield.com/
Precision Fit: Mastering the Double DIN Sleeve for a Seamless Dash Install
When you replace a factory radio with a double DIN unit, the goal isn’t just to drop in a larger screen and hope for a snug finish. It’s about creating a seamless, vibration-free mount that looks like it came from the factory. The double DIN installation sleeve is the unsung hero in that process. After you’ve removed the bezel and exposed the original mounting points, the sleeve becomes the bridge between a perfectly sized unit and a dash that may not have been built with modern infotainment in mind. The sleeve’s job is simple in theory: hold the stereo steady, align it precisely, and fill any gaps that would otherwise betray a DIY install. In practice, the sleeve accomplishes much more. It provides a rugged, stable channel that keeps the new head unit straight, evenly spaced, and firmly anchored so you don’t hear a chorus of rattles every time you hit a pothole or a highway dip.
A good sleeve is designed specifically for the dimensions of a Double DIN unit, which is roughly 7 inches wide by 4 inches tall. The inside cavity may be slightly larger to accommodate tolerances in dashboards and aftermarket radios, but the goal remains the same: a snug, vibration-proof fit. A high-quality sleeve is constructed from metal with a careful mold, so it resists flexing or bending and keeps the unit aligned as you drive. This is particularly important if the original frame around the radio is damaged or missing. In such cases, the sleeve isn’t merely cosmetic; it becomes the structural anchor that stabilizes the installation and preserves the vehicle’s interior aesthetics.
Beyond raw strength, a sleeve offers practical advantages for modern multimedia receivers. For drivers who demand a larger touchscreen, some sleeves are paired with integrated brackets or mounting frames that lock the radio in upright, level orientation and provide a secure mounting point for screws. This combination reduces the risk of misalignment from a dash that isn’t perfectly square, which is a common reality in older vehicles. A sleeve with an integrated bracket also simplifies the process of securing the unit, because you’re working with a single, coherent assembly rather than a bare opening and a loose radio bouncing around behind the dash. It’s a forward-looking solution that respects the dash’s original lines while accommodating the expanded footprint of contemporary receivers.
Safety and durability sit at the core of sleeve design. The most reputable sleeves meet or exceed industry standards such as CE, RoHS, and ISO. These certifications aren’t mere markings; they reflect a commitment to materials that resist corrosion, keep electrical contacts clean, and withstand the heat and vibration engineers anticipate in a vehicle interior. For the installer, that means peace of mind: a sleeve that won’t crack under temperature swings or loosen its grip after a few thousand miles. It also translates into longevity for the head unit itself, as a stable mount minimizes the wear on mounting screws, brackets, and radio chassis.
Choosing the right sleeve begins with matching its inside dimensions to your unit. A universal double DIN sleeve is designed to accommodate the common pocket that underpins most aftermarket radios. If your dash opening is deeper than the unit, or if the frame around the opening has been damaged, a sleeve with precise inner measurements acts as a corrector. In many dashboards, the original cutout is not perfectly square, and the mounting points may sit a touch off from level. The sleeve, with its rigid sides and standardized inner cavity, guides the radio into a true, flush position. In some setups, you’ll also find sleeves that include a metal mounting frame; this frame provides a rock-solid anchor for screws and helps align the unit even when the outer dash shell has been compromised.
To get the best possible result, confirm that the sleeve you choose aligns with the unit’s exact width, height, and depth. For instance, the universal double DIN mounting sleeve commonly features an inside width close to the standard 7 inches and a depth that supports the common 3.5 to 4.0 inch backplate of most radios. If the unit you’re installing has a slightly larger back, you may need a sleeve with a slightly larger internal depth or a bracket that can be adjusted to bring the radio’s faceplate forward to meet the dash surface. The goal is a flush, gap-free appearance with the faceplate sitting just proud of the bezel, not recessed or overhanging. A well-chosen sleeve makes this possible even when the dash cutout isn’t perfect, because it provides a stable, uniform interior space that the unit can occupy without wobble.
The installation flow, while straightforward, benefits from a calm, measured approach. Start by disconnecting the vehicle battery to prevent any accidental short circuits during harness connections or metal-to-metal contacts. With the bezel removed and the original mounting hardware uncovered, test-fit the sleeve into the opening to confirm it slides in smoothly and sits squarely. If you encounter resistance, don’t force it. Check for any protruding clips or misaligned dash edges that may be catching on the sleeve’s edges. Once the sleeve sits squarely, align it with the dash’s mounting points and begin securing it with the screws included in the installation kit. Some sleeves come with a dedicated mounting bracket that doubles as a guide, helping you keep the sleeve level while you tighten.
As you secure the sleeve, think about the long-term stability of the installation. The sleeve’s rigid walls should contact the dash evenly along the sides, distributing any load from the head unit and preventing point loading on a single screw. If your dash is particularly unforgiving—perhaps kerfed edges or a warped surface—the sleeve’s tolerance becomes even more important. In those cases, a sleeve with a slightly larger internal cavity or a bracket system that bridges minor misalignments can be a lifesaver, delivering a clean, professional finish rather than a gap-riddled look that screams “DIY.”
The final act of the setup is to slide the radio into the mounted sleeve, connect the vehicle’s wiring harness and antenna, and check clearances with the dash surround. A good sleeve keeps the radio aligned so that the faceplate sits flush against the bezel, and it ensures the screws grip the metal frame securely without-too-tight torques that could crack the dash or deform the unit’s chassis. After securing the radio, reattach the rest of the dash components and perform a test for fit and function. Power up the system, verify the display is level and readable, confirm the audio wiring is correct, and test the connectivity ports—USB, HDMI, Bluetooth, or whatever your unit supports. A quiet, confident click of the screws and a solid, vibration-free stance are the signs of a well-executed install.
In the broader context of car maintenance and upgrades, the sleeve is more than a component; it is a bridge between legacy dashboards and modern digital receivers. Its value grows as you consider future upgrades. If you decide to move to a larger screen or add a multimedia interface with more features, the sleeve’s rigid, universal design often accommodates the change without forcing a complete dash replacement. That is the essence of a clean, durable upgrade: a mounting system that respects the original vehicle aesthetics while giving you a robust foundation for tomorrow’s technology. For those who regularly tackle upgrades or repairs, developing a little intersection of practical car maintenance skills with the art of dash installation pays dividends in time savings and a superior result. car maintenance skills—a reminder that the careful, methodical approach you bring to brake checks or tire rotations translates just as well to the interior of your car when you’re upgrading the entertainment system.
In sum, a well-chosen double DIN sleeve acts as the backbone of a professional dash installation. It handles the dimensional realities of the dashboard, provides a stable anchor for the radio, and protects the investment you’ve made in a modern head unit. Its rugged construction, alignment precision, and adherence to recognized safety and durability standards give installers and casual enthusiasts alike confidence that the new system will stay put through countless miles of highway and back-road driving. When you take the time to select the right sleeve, verify its inner dimensions, and follow a careful mounting sequence, the result is not merely functional; it is aesthetically integrated, vibration-free, and ready for the next wave of digital capabilities. For a concrete example of how these sleeves are presented in the marketplace and to compare options, you can review a representative retailer listing that demonstrates the practical dimensions and mounting approach referenced here. External resource: https://www.amazon.com/dp/B0XXXXXXX
null

null
null
null
Top-Down Precision: A Cohesive Playbook for Installing a Double DIN Sleeve in Your Car Stereo

Upgrading a factory radio with a double DIN sleeve is as much a test of patience as it is a test of planning. The bezel around the stereo is not merely decorative; it is a shielded field of clips, harnesses, and hidden screws. The goal is not just to drop in a larger unit but to create a clean, flush finish that preserves the dashboard’s lines and keeps sensitive electronics protected. The double DIN sleeve, a universal frame that anchors the new head unit in a larger opening, is the backbone of the installation. When you understand its purpose, the process becomes less about force and more about alignment, restraint, and respect for the dash and its wiring. The driving quality of a successful installation rests on subtle choices: where to start prying the bezel, how to shield wires from the steering column, and how to verify that the new unit will sit perfectly without gaps that catch dust, moisture, or hands during driving. In this light, the method you choose—whether you begin at the top or the bottom of the bezel—becomes less about a rigid rule and more about a measured rhythm that minimizes risk while maximising fit.
The practical journey begins with a single, quiet prerequisite: ensure the vehicle’s power is off. A battery disconnected, especially the negative terminal, is the unsung guardian of electronics and your own safety. This step prevents accidental shorts when you loosen connectors, slide the sleeve into the dash, or more importantly, when the harness and antenna lines are routed. With ignition off and keys out, you can approach the task with a calm focus. It’s not a dramatic moment, but it is foundational. Then comes the bezel, the conductor in a symphony of plastics and metal. Most dashboards rely on a network of clips to secure the radio bezel. Some vehicles have a handful; others rely on a more complex lattice of fasteners hidden beneath removable panels. The key is to create a small, deliberate opening with a nylon trim tool and work outward from that point, gently prying between the bezel and the dashboard. The tool acts as a non-abrasive wedge, reducing the likelihood of micro-scratches or gouges that would bloom into visible defects once the sleeve is installed. This is not about forcing a stubborn piece to yield but about releasing each clip with measured leverage. As you move around the edges, imagine the bezel as a fragile shell rather than a rigid plate. Release each clip in a controlled manner, listening for the telltale pop as a fastener yields. When the bezel finally comes free, you’ll see the mounting screws or brackets that hold the original radio. This moment reveals the backbone of the install: the framework you must adapt to accommodate the new head unit.
A crucial decision in this phase is the choice of the sleeve. A double DIN installation sleeve provides a stable, universal fit for a new radio, ensuring that the dash opening remains clean and secure even if the original cutout is slightly different in size. A well-made sleeve acts as a bridge between the dash and the new unit, aligning with fixed mounting points and distributing load evenly so that strain on any single point is minimized. It’s the quiet workhorse of the installation. The sleeve’s universal design helps to accommodate minor discrepancies in the opening, but it does not replace careful measurement. Take a moment to confirm that the sleeve can be anchored securely at all mounting points without twisting or binding. If the dashboard cutout is irregular, the sleeve should still seat squarely, and the gaps around it should be minimal. If you see a large gap at any corner, pause and reassess rather than forcing the piece into place.
The core mistake many installers make is underestimating the importance of compatibility. Dashboards differ widely in shape and thickness, and a sleeve that looks like it should fit can still create misalignments once you place the bezel back into position. Before you even purchase a sleeve, verify the exact dimensions of your dash opening and the mounting requirements of your chosen sleeve. The measurement discipline pays dividends later, when you slide the new head unit into the sleeve and realize it sits at an angle or interferes with the climate controls or airbags. The second common misstep is neglecting the battery disconnection. It is astonishing how often this safe precaution is overlooked, with consequences ranging from minor fuse faults to more serious electrical shorts that can damage the infotainment system or nearby circuits. Make it a ritual: ignition off, key out, negative terminal detached, then test equipment in a non-live state before you begin wiring.
Wiring is where patience reveals its value. A rushed wiring phase invites misconnects between power, ground, and antenna lines, and a misstep here can prevent the unit from powering on, or worse, cause erratic behavior that is difficult to diagnose after the dash is closed. The wiring diagram that accompanies the sleeve—whether it comes with the installation kit or is printed in the vehicle’s service manual—becomes your map. Follow it step by step, and do not improvise by guessing which wire is which. Use appropriate connectors, and if a harness adapter is required, ensure it matches your vehicle’s signaling standards. Secure all loose wires with zip ties or Velcro strips, avoiding the steering column, airbag lines, or seat belt mechanisms. Loose wires can vibrate, rub, or snag, which over time wears insulation and creates a potential hazard. A neat, organized loom around the back of the sleeve not only looks professional but reduces the risk of interference with the vehicle’s moving parts.
The bezel removal and sleeve installation also demand a sense of flow. There is a rhythm to freeing the old radio and seating the new one. Start by removing the factory radio first, so you can see how the mounting brackets align with the dash. When the old unit is out, you can comfortably test the opening for any debris or rough edges that might cause the new sleeve to sit unevenly. If needed, deburr the edges gently with a plastic edge tool or sandpaper wrapped in a cloth to avoid marks. Then, with the sleeve in hand, slide it into the opening and align the mounting points with the dash’s supports. Do not force it; the sleeve should glide into place, even if the opening is not perfectly square. If resistance is felt, step back, recheck alignment, and adjust the sleeve’s orientation. The goal is to establish a level, stable base before you secure it with screws and brackets. Once secured, you can reattach the bezel. The process of reinstalling the bezel becomes a test of fit: a good bezel sits flush and uniform against the dash with even lighting all around. Any visible gaps are a sign that something is not aligned properly and should be addressed before final assembly.
As you near the end of the mechanical aspects, the focus shifts to function. A crucial phase in any installation is testing. Before reassembling the dash completely, power the system and verify every function of the new unit. Check power and ground continuity with a multimeter if available, confirm the head unit powers on, and ensure the display responds to touch or control inputs. Confirm the audio path by playing a test track and verifying the left and right channels, as well as the subwoofer if your system includes one. Test Bluetooth pairing, if applicable, and ensure the unit’s touchscreen responds smoothly without lag. If the unit employs a reverse camera or other auxiliary features, verify those connections in advance of a final reassembly. This step acts as a final diagnostic and offers a last opportunity to correct any missteps without the dashboard assembled and closed. The aim is to conclude with a clean, professional finish: the double DIN sleeve seated securely, the bezel aligned with the dash, and every function operating as designed.
In discussing the hinge between top and bottom, it is useful to recognize that the approach often champions a practical parity. Starting at the top or the bottom is not a sacred rule; it is a strategy to reveal clips gradually and to protect the surrounding trim. The top-first approach can ease the release of upper clips that are sometimes stubborn, while bottom-first can help you manage lower clips that might catch the edge of the dash. What matters most is maintaining steady pressure, a clear view of what you are releasing, and a willingness to step back if something resists. By adopting a measured, patient rhythm, you ensure that the dash’s paint and plastics remain pristine and that the new system remains secure for years of confident use.
As a closing note, consider the installation as part of broader vehicle care rather than a one-off replacement. Keeping tools organized, planning each step, and testing after each major milestone will yield a neat, durable result. If you want more context on vehicle maintenance skills that support this kind of work, see Car Maintenance Skills. This reference can help you map the broader maintenance mindset to the specifics of an in-dash upgrade. For those who like to cross-check deeper into technical guidelines, an extensive external resource is available that expands on the double DIN installation process and related pitfalls. External reference: https://www.caraudio.com/install-double-din-stereo/
In sum, a successful double DIN sleeve installation is less about brute force and more about measured preparation, careful bezel handling, precise sleeve alignment, and thoughtful wiring. The dash is a living system that thrives on clean connections and secure mountings. By treating the bezel as a carefully managed transition between the old and new and by stewarding the sleeve as the anchor that keeps the new stereo stable, you can realize a finished look that feels not temporary or improvised, but deliberate and professional. The result is a dash that looks as if it was designed to house the new unit from the factory, with a seamless transition that harmonizes form and function. And while the process invites patience, the payoff—crisp sound, reliable connectivity, and a cockpit that remains visually cohesive—makes every moment spent worthwhile.
Final thoughts
Successfully installing a double DIN stereo not only enhances your car’s audio experience but can also add value to your vehicle. By following the outlined steps—removing the bezel, using an effective installation sleeve, and adhering to safety guidelines—you can ensure a hassle-free and effective installation process. Avoiding common mistakes further contributes to a smooth experience, making your upgraded stereo a rewarding addition. Equip yourself with these insights to transform your vehicle’s audio setup and enjoy your favorite tunes with clarity and power.