
For vehicle owners and mechanics alike, the connections made to a car battery are crucial for optimal performance. Among the often-overlooked details is the proper tightening of the screw-in post sleeve on the battery. Not only does this affect the electrical connection, but it can also prevent corrosion and starting issues. This article will delve into the specifications for tightening the post sleeve, the importance of a secure connection, the dangers of over-tightening, and best practices to follow. By the end, you’ll be well-equipped to ensure that your battery performs at its best, with every chapter contributing to a holistic understanding of this key maintenance task.
Securing the Connection: Mastering Torque for Screw-In Post Sleeves on Automotive Batteries

A car battery is more than a simple power source; it is a critical junction where chemistry, metal, and motion meet in a heartbeat of electrical demand. The screw-in post sleeve is a small component with outsized consequences, and the tightness of that one fastener can determine whether your engine cranks on the first turn or sits in the driveway with a hesitant click. Proper torque translates into a stable, low-resistance connection, reduced corrosion, and longer battery life. In automotive maintenance, tightening a screw-in post sleeve with the correct torque is a practical, repeatable craft that pays dividends in reliability and safety. The difference between a solid connection and a marginal one is measured not just in volts and amps, but in a vehicle starting reliably when it matters most and in a battery compartment that remains clean and heat-free under load. This chapter walks through why torque matters and how to apply it correctly, anchored by widely recognized guidelines and practical hands-on steps.\n\nThe first step is recognizing that terminals come in different designs. Conventional automotive terminals may use exposed nuts and bolts or clamps, with torque expectations that are straightforward but easy to misjudge. The screw-in post sleeve is designed to bite into the post and sleeve through threads that must withstand vibration, thermal cycling, and occasional high current. The torque specification needs enough rotational force to compress the clamp firmly onto the post, providing a low-resistance path for current, but not so much that it cracks the plastic or deforms the post. In many sources, the practical range for screw-in post sleeves sits around 70 to 100 in-lb, which translates to about 5.8 to 8.3 ft-lb. This range covers a broad set of battery designs, but it is essential to note that each battery model may have its own precise specification. High-demand vehicles or start-stop systems may push the requirement toward the higher end, and some designs may require a specific sequence if multiple sleeves are involved. The safe rule is to consult the service manual or the battery manufacturer’s documentation for the exact figure. The bottom line is simple: the connection should be tight enough to be secure but not so tight that it damages the sleeve, post, or insulating housing.\n\nPreparing to tighten begins with a clean slate. Inspect the terminal area for corrosion, the arch-nemesis of a healthy electrical connection. Corrosion can form a high-resistance film that raises heat under load and invites arcing as current demands peak. Clean with care: remove white or greenish crust from the post and sleeve using a soft brush or a cleaner recommended for battery terminals, avoiding aggressive abrading tools. After cleaning, dry the area and ensure the sleeve sits squarely on the post. An improper seating angle can create micro-gaps that defeat even a snug clamp. The goal is to present a clean, true surface so that the torque you apply translates directly into clamping force.\n\nThe process of tightening centers on accurate measurement and the right tool. For screw-in post sleeves in the 70–100 in-lb band, a torque wrench with inch-pound scale is often the most convenient choice. Use a socket or driver that engages the fastener precisely to minimize the risk of slipping or rounding edges. Start with a midrange setting within the specified window and tighten slowly, paying attention to the feel of resistance. When you reach a snug feel, apply the final, precise torque to secure the connection without deforming metal. The goal is steady, even resistance rather than a forced or abrupt stop.\n\nUnderstanding under-tightening versus over-tightening helps frame best practices. Under-tightening can allow micro-movements under vibration, raising resistance and heat and potentially causing arcing or corrosion. Over-tightening risks damaging the sleeve, post, or insulating housing, and in extreme cases can crack the sleeve or distort threads. Adhering to the manufacturer-specified torque, rather than relying on hand-tight “by feel,” protects the component and the broader electrical system. The repeatability of the process matters because repetitive engine starts and thermal cycles test the integrity of the clamp. A correctly torqued sleeve remains snug through vibration and temperature swings, maintaining a stable contact over the battery’s life.\n\nGuidelines extend beyond a single tightening. Many modern batteries, especially those in high-demand or start-stop configurations, require a torque value at the higher end of the range or a particular tightening sequence when multiple sleeves or clamps are involved. A practical approach is to hand-tighten to firm resistance, then apply torque in one controlled pass. If the design allows, a brief re-check after a few minutes of operation can confirm nothing has settled. Consider a thin, uniform layer of anti-corrosion compound or dielectric grease on threads and under the head where appropriate, so long as it does not interfere with metal-to-metal contact. Excess paste should be avoided, as it can trap moisture and dirt over time.\n\nThe overarching principle is to follow the exact instructions for the specific battery and vehicle combination. There is no universal one-size-fits-all value, even within the general 70–100 in-lb band, because sleeve design, post diameter, material, and contact geometry can shift the ideal torque by a few inch-pounds. For those who want to go deeper, Battery Council International’s technical guidance provides standardized practices for installation and maintenance, helping align personal practice with industry expectations. Reading the official technical guide can illuminate the rationale behind torque recommendations and safe handling of battery terminals. If you suspect prior damage from over-tightening or corrosion, replacement is safer than re-torquing.\n\nPractical heuristics can complement precise torque. In the absence of a precise figure, experienced technicians may rely on the feel of the clamp and the absence of slack as indicators of a good connection, but calibrated torque remains the most reliable method. The modern battery environment emphasizes planning for worst-case electrical load at the worst possible moment, and tightening to a specification that ensures reliability without compromising hardware. When you prepare, clean, and torque with care, you protect not just one component but the entire electrical system, from alternator output to starter engagement to the electronics that rely on a stable power path.\n\nAs you move from theory to practice, integrate a compact maintenance routine into routine checks. Inspect the battery terminals during every service interval to prevent small faults from becoming major breakdowns. The life of a post sleeve is measured not only by initial tightness but by how consistently that tightness is preserved through hundreds of engine starts and thermal cycles. For readers seeking deeper grounding or cross-checking their practice, refer to official guidelines that govern battery installation and maintenance. An external resource you may consult is Battery Council International technical guidance, which offers standardized practices for installation and maintenance. External resource: Battery Council International technical guidance offers standardized practices for installation and maintenance. https://www.bci.org
Crucial Contact: Mastering the Tightening of the Post Sleeve Screw for Reliable Car Battery Connections
The post sleeve of a car battery is easy to overlook, yet it sits at the heart of a vehicle’s electrical reliability. It is the small, stubborn thread of metal that carries the life of the car’s starting system and keeps the myriad electronics that modern cars rely upon operating without a hitch. The act of tightening the screw in that post sleeve is not a cosmetic detail or a mere maintenance checkbox; it is a decisive step that can determine whether a vehicle starts smoothly, whether the lights stay bright, and whether the onboard computers remain responsive. The guidance that puts this simple act into a reliable frame is pragmatic and targeted: tighten to the manufacturer’s torque specification, which for most standard automotive battery terminals sits in a relatively modest range of 7 to 15 lb-in (0.8 to 1.7 Nm). Yet the precise value is not a universal audible bell that rings the same for every car; it is a target that must be matched to the design of the post sleeve, the size of the terminal clamp, and the condition of the threads. Used correctly, this torque creates a robust, low-resistance electrical bond. Used carelessly, it invites a cascade of faults that begin with heat and corrosion and end in frustrating electrical gremlins or worse, a fire risk due to arcing.
The consequences of a poorly tightened post sleeve screw are rarely dramatic in one moment but accumulate over time. A loose connection increases electrical resistance at the contact point. Even a small resistance, multiplied across the high current drawn by the starter and alternator, translates into heat and voltage drop. The battery may appear healthy on a quick voltage check, yet under load the system could sag, causing sluggish starts or intermittent dimming of lights. In modern vehicles, where electronics regulate and monitor almost every function, a wobbly connection can manifest as unpredictable sensor readings, misfires, or a stall that refuses to reset itself without a sharp, decisive turn of the key. In extreme cases, the risk is not merely a rough day at the garage; it is a spark that could ignite a flammable environment if other corrosive vapors are present or if exposed metal scrapes against a conductive path. This underlines a piercing point: the integrity of the post sleeve screw is not a small comfort but a factor of safety.
The flip side is not a heroic tale of torque triumph, but the reality that over-tightening can be as damaging as under-tightening. In practice, many people discover the danger only after a crack or a seep appears in the post or the terminal housing. The threads can be damaged, the clamp can deform, and the battery post itself may suffer micro-cracks that propagate over time. A split terminal or a damaged post creates a poor seal against moisture and a high likelihood of corrosion, which again raises resistance and heat. In the worst cases, an over-tightened clamp can bite into the delicate metal architecture of the battery post, deforming the post sleeve or warping the terminal area enough to loosen the entire assembly. The essential lesson is simple: there is a precise, delicate balance between a snug, conductive connection and a force that harms the very component that must carry current.
To respect that balance, a practical framework for tightening is valuable. Begin by ensuring you have the right tool for the job—the correct size wrench or socket that fits the terminal nut snugly. This is not a test you win by improvising with pliers or an adjustable wrench that can slip; slippage invites uneven force distribution and cross-threading. A good approach is to apply a steady, controlled torque until the clamp seat feels secure. The target range—7 to 15 lb-in—serves as a guide, but you should also pay attention to how the connection feels. You want a firm resistance that you can feel but not hear as a harsh creak. If your hand can tighten the screw with only a faint torsional resistance after the initial snug fit, you are most likely within the safe zone. If you feel the bolt begin to bind or you notice the nut turning without the clamp seating, you should back off a little and re-seat the components. The goal is a tight, clean contact that remains stable under vibration and heat.
A simple, repeatable method can help ensure consistency. First, inspect and clean the post and the clamp. Remove any oxidation, corrosion, or grime that could interfere with metal-to-metal contact. A clean surface reduces the need for excessive torque to squeeze through contaminants, thereby protecting the threads from abrasion and galling. Before tightening, verify that the clamp seats evenly around the post and that no part of the conductor or insulation is pinched or misaligned. Then place the clamp over the post sleeve and tighten in a controlled manner. If your battery uses a clamp with multiple bolts—such as a broader clamp across a large terminal—tighten in a crisscross pattern. This approach distributes pressure evenly, avoiding deformation of the terminal and promoting uniform contact along the entire interface. A uniform seat reduces micro-mobility that can occur with a one- or two-point clamp, a scenario that often leads to loosening under vibration and temperature fluctuations.
There is also a broader maintenance logic that matters beyond the moment of tightening. After any battery service, it is wise to recheck the tightening after a short drive. The heat generated by the initial use can slightly alter the final seating, and the vibrations of the road can gradually loosen a connection that was once snug. If you hear a faint metallic ping or notice a minor crackling or sparking when reconnecting the battery cables, that is a sign you must stop and inspect. In such cases, re-clean the posts, confirm the clamp is properly seated, and reapply the torque within spec. This diligence is not about micromanagement; it is about preventing a small oversight from evolving into a bigger electrical problem later in the day or week.
The psychology of tightening is worth noting as well. Many drivers approach the battery with a mindset of minimal effort, assuming that the first snug is enough. Others compensate with crude force, believing more is better. Neither stance serves the system well. The torque specification is not a flexible target but a design parameter that aligns with the hardware’s tolerances. A post sleeve designed to tolerate a light to moderate torque is not a license to force the clamp into shape. The objective is to achieve a secure, stable electrical bond that resists loosening from vibration. If you routinely service your vehicle, you can build a habit that begins with a visual check for corrosion and seating, followed by a measured tightening, and concludes with a quick functional test. For those who want to connect maintenance to a broader routine, a quick read on car maintenance skills offers a helpful framework for integrating these small but important checks into a regular schedule. car maintenance skills
The discussion about tightening is not merely about hardware; it touches the fundamentals of electrical integrity. A clean, well-seated, properly torqued post sleeve reduces contact resistance, which translates into less heat generation and less energy lost to the environment. That translates into a clearer, more reliable supply of power to the starter and the vehicle’s electronics. It also minimizes the risk of corrosion, which can be a self-perpetuating problem: corrosion increases resistance, which makes the contact warmer, which accelerates further corrosion. Keeping the terminal posts clean and dry is part of a virtuous loop. If a battery is new or recently replaced, you should still expect to re-check the tightening after a few days of service to confirm that settling has occurred or that any protective coatings have not altered the clamp’s interface. The act of tightening, while seemingly simple, is a moment of truth in maintaining the energy system of the car.
The practical value of proper torque is echoed by the experience of technicians and seasoned hobbyists alike. A number of forums and maintenance guides have highlighted the problem of loose negative terminal screws as a frequent cause of electrical gremlins. While a single loose screw may not seem consequential, it can be the root of a chain of issues that manifest as intermittent faults—from the simplest no-start condition to more perplexing sensor misreads. This is why a disciplined approach—disconnecting the negative lead, cleaning the surface, seating the clamp evenly, and tightening to spec with the right tool—is more than professional etiquette. It is a safeguard against cascading faults that can leave a driver stranded and a shop with a long to-do list. It is also a reminder that some of the most consequential improvements in a car’s reliability stem from the smallest, most routine maintenance tasks—and that the posture we adopt toward those tasks shapes the performance of the entire electrical system.
The broader context of these practices is the way we think about maintenance as an integrated habit rather than a sequence of isolated tasks. The post sleeve is one node in a web of connections that includes ground points, main battery cables, and the distribution network that powers every system in the car. When we talk about the importance of tightening, we are talking about aligning the negative and positive circuits with a durable, low-resistance path. In that sense, torque is not merely a number; it is a proxy for the health of the system—the physical expression of a well-run electrical backbone. The simple act of turning a screw to spec embodies a philosophy of care: treat minor components with respect because they govern major outcomes. And in a world where electrical reliability is a prerequisite for safety, comfort, and performance, the post sleeve screw becomes a quiet guardian of the car’s ability to function when it matters most.
For those who want to place this practice in a broader framework of care, consider how a routine check fits into an overall maintenance cycle. It is easy to overlook the batttery’s terminals when inspecting hoses, belts, and filters, yet the connections are the gatekeepers of energy transfer. To reinforce the habit, you can incorporate a brief set of checks into your regular driving routine: inspect for corrosion around both terminals, ensure metal-to-metal contact is clean and unobstructed, confirm the clamp seats evenly around the post sleeve, and confirm that you can tighten by hand with only a modest amount of resistance before applying torque. Each step reduces the likelihood of a troublesome failure and increases the chance of a smooth, reliable start. The cumulative effect is something many drivers notice only after a period of careful attention—a more consistent engine start, fewer erratic electrical signals, and fewer trips to the road for a jump-start.
In discussing the science and practice of tightening, we are also reminded of the value of credible sources and the cautions that come with DIY work. While a forum thread or anecdote can illuminate a common pitfall, they do not substitute for manufacturer guidance or engineering standards. When in doubt about the exact torque specification for a given vehicle, consult the owner’s manual or the battery manufacturer’s guidelines. The torque range provided here—7 to 15 lb-in (0.8 to 1.7 Nm)—serves as a general frame, but the exact figure can depend on the design of the terminal nut, the size of the clamp, and the overall architecture of the battery system. Adhering to the recommended torque is a prudent way to honor the engineering choices made by the vehicle designer and to protect the integrity of the battery and its surrounding components.
External reference for further reading on the importance of proper terminal connections and torque is available here: https://www.batteryspecialist.com.au/blog/why-your-car-battery-terminal-connections-matter
Torque on the Post Sleeve: Getting the Battery Connection Right Without Overdoing It

The moment a car turns over and the engine coughs to life, a chain of tiny, disciplined decisions quietly carries the vehicle forward. Among them, the simple act of tightening the post sleeve on a car battery may seem almost ceremonial, but it sits at the center of a robust electrical system. The two poles of a battery are more than metal and acid; they are the gateway to your vehicle’s ability to start, power lights, and run the myriad accessories that modern drivers depend on. Tightening the terminal connection is not a cosmetic step. It is a fundamental maintenance move that, done correctly, preserves conductivity, reduces corrosion, and minimizes the chance of a cranking no-start situation. Do it too loosely, and you invite a loose connection that saps voltage and invites intermittent failures. Do it too aggressively, and you fracture the very hardware you rely on to powers the car. The balance is delicate, and the stakes are real.
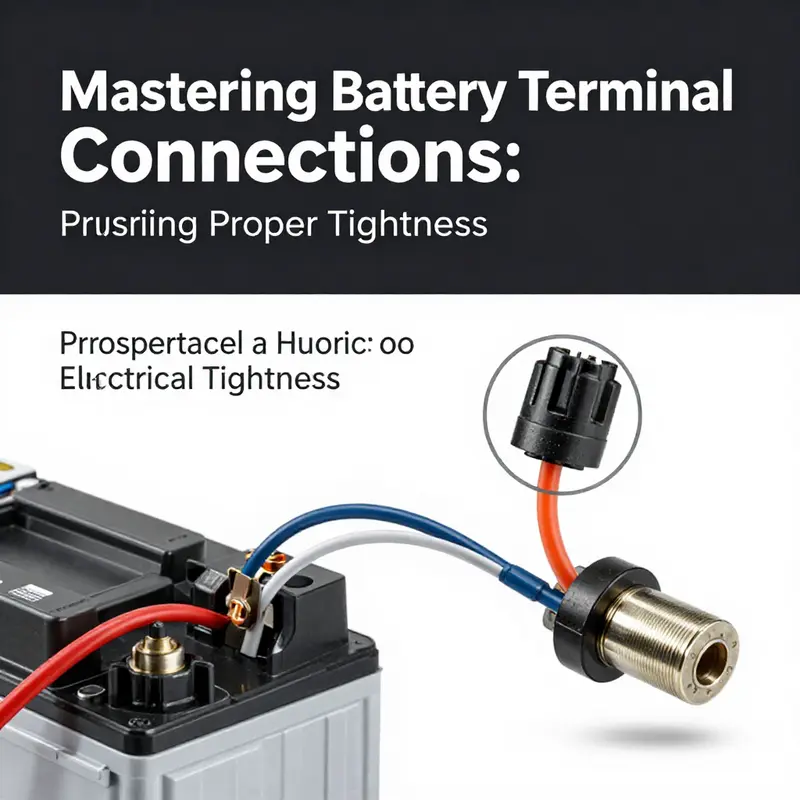
First, it helps to picture what the post sleeve is and why torque matters. The post sleeve is the metal enclosure that surrounds the terminal post, through which the clamping bolt or nut secures the cable clamp to the battery post. The electrical path from the battery to the starter, alternator, and the whole electrical network runs through this point. If the sleeve or its bolt is not gripping the post securely, the path can intermittently open and close. Debris or corrosion at the interface compounds the problem, raising resistance and heat. The result is not merely a lag in response when you twist the key; it can manifest as slow cranking, erratic voltage readings, or, in the worst case, a complete failure to start.
A straightforward way to approach tightening is to think in terms of “just enough” force. This concept transcends the specifics of the tool or the vehicle. It is about matching the clamp’s bite to the hardware and material you are working with, avoiding a hollow feel when you try to turn the nut, and resisting the temptation to push beyond the point where the sleeve and bolt simply seat the copper or lead terminals against the battery post. The precise specification of that “just enough” torque can vary by model and design, and that is where the guidance from manufacturers becomes crucial. Some references describe a range that can be observed in many standard automotive terminals, while others indicate a different, sometimes higher, torque requirement depending on the sleeve geometry and post size. What connects these sources is a shared permission to tighten with care and to verify what the battery and vehicle maker prescribes for your specific battery. In practice, this means consulting the owner’s manual or the battery manufacturer’s technical documentation whenever possible, and using a torque wrench when the design calls for one.
Tightening with proper torque is not about vanity or convenience. It is about a durable, reliable electrical connection. A connection that is too loose is an open invitation to vibration, corrosion, and resistance. When the clamp is not gripping firmly, micro-movements occur as you drive over bumps. Those small motions grind against the post and clamp, whisking away protective oxide layers and inviting moisture-laden air to react with the metal. The resulting corrosion builds an insulating layer that further raises resistance, which makes your alternator work harder to supply the same amount of current. The cycle can create a self-reinforcing problem: as resistance rises, heat builds, which accelerates corrosion and can eventually lead to a failure to start. The simpler, more common outcome, however, is a stubbornly wimpy voltage reading and a dim or flickering set of lights when you turn the key.
On the flip side, the risk of over-tightening is equally real, though it tends to show up differently. When the bolt or nut is driven beyond the point where the metal can yield gracefully, you begin to deform the terminal post or the sleeve itself. The post is engineered to be strong, but not indestructible. A deformed post can hinder even distribution of current, create poor contact surfaces, or hamper the clamp’s ability to maintain a secure grip under normal driving vibrations. In plastic-encased batteries, excessive force can also introduce stresses that propagate through the casing. Over time, these stresses may contribute to micro-cracks in the case, which, in the presence of battery acid, become dangerous pathways for leakage and corrosion. A crack may be invisible at first, but it can compromise safety and shorten the life of the battery. The internal structure can also suffer when the clamp clamps too tightly, potentially causing internal misalignment or even suboptimal contact with the active materials inside the cell—conditions that reduce capacity and shorten service life.
Given the divergent advice that sometimes circulates around torque numbers, it becomes tempting to adopt a single, universal target. Yet the best practice is to align your approach with the source that directly governs your hardware. In the detailed guidance often cited by service literature, the recommended torque for a post sleeve can be expressed as a range that reflects the variation in battery designs. For many automotive batteries, the specification lands in a region around eight to eleven Newton-meters, which corresponds to roughly seventy to one hundred inch-pounds. That range represents the balance point where the clamp’s grip is firm enough to resist vibrational loosening, while still preserving the integrity of the terminal post and surrounding plastic components. It is not a universal law carved in stone for every battery, but it is a practical baseline that aligns with a broad spectrum of conventional automotive designs. This is why the practice of torquing with a calibrated tool becomes valuable. A torque wrench provides a repeatable measure that helps you avoid the extremes that lead to damage or to poor contact.
To translate this into feel for your own work, begin with the obvious steps that prepare you for a reliable connection. Before you tighten, clean any corrosion from the terminal clamp and the post. A wire brush or a small implement used carefully can remove the white or greenish buildup that acts like a miniature insulator. Wipe away any moisture and inspect the clamp for cracks or wear. If you see pitting or deformation, or if the clamp does not sit flat against the post, you should not force it—consider replacing the terminal assembly rather than risking a compromised connection. Once you have a clean surface, position the clamp squarely on the post and hand-tighten the bolt or nut until the clamp seats and there is gentle resistance when you try to turn it with your fingers. This initial “hand-tight” stage ensures you have alignment and that the clamp is not cross-threaded. It is the moment when you switch from manual control to a measured, instrument-assisted tightening.
The decisive step is the torque check. If you have access to a torque wrench, set it to the manufacturer-recommended range. If you’re unsure of the exact specification for your battery model, the conservative approach is to work within the eight to eleven Newton-meters band, and adjust downward if you notice any sign of post deformation, unusual heat buildup during cranking, or continued loosening after a short drive. If you operate in a setting where torque specifications are not readily available, you should default to the most critical principle: avoid both looseness and overtightening, and re-check after a short drive. The metal interfaces may settle a little as the heat of the system reaches equilibrium, and a quick re-tighten might be necessary. In any case, the aim is to secure a solid, snug fit rather than to “crank it down” to a rock-hard finish. There is a tacit wisdom in this: you are not treating the battery like a rusted, stubborn bolt that demands brute force; you are seeking a resilient, dependable electrical contact that remains stable across temperature swings and road vibrations.
A close companion to the torque itself is the habit of post-installation inspection. After you tighten, give the cable a gentle tug to confirm there is no play in the clamp. Visually inspect for any gap between the clamp and the post; if you see movement, there is a sign you haven’t achieved proper contact. Check for any cracking or deformation around the terminal housing. A small crack in the plastic housing near the clamp can be cured only by replacement, not by more tightening. If you detect any deformation or cracking, replace the terminal or the entire battery assembly. It may seem like overkill, but it is cheaper than battling a no-start condition in a no-fun morning commute. In addition, keep an eye on moisture accumulation around the terminals. Water and electrolytes are not friendly to metal connections, and moisture can accelerate corrosion at the same interface you are trying to protect. If you notice a persistent, unusual buildup, address it promptly and re-check the torque after the system has cooled.
All of these steps come with a broader sense of safety that should govern any battery work. Battery terminals contain acidic solutions that can burn skin and eyes, and metal components may heat up during cranking if contact is poor. There is also an electrical risk from sparks near the battery. The small precaution of wearing eye protection, gloves, and working in a well-ventilated space cannot be overstated. The idea is to perform a careful, controlled tightening that creates a secure path for current without inviting mechanical damage or chemical exposure. The result of such care is not merely a longer-lasting battery connection; it is a smoother, more reliable starting experience and a reduction in the possibility of electrical gremlins popping up at the worst possible times.
In the broader conversation about car maintenance, the act of tightening the post sleeve illustrates a larger principle: practical maintenance is about building a consistent habit around the tiny details that preserve reliability. It is not enough to replace parts when symptoms appear; it is about anticipating and preventing the conditions that lead to those symptoms. A simple torque check, performed with attention to the specific design and the manufacturer’s guidance, is one of the most cost-effective upgrades you can perform in a weekend routine. If you are curious to explore how this approach fits into a broader skill set, you can deepen your understanding of car maintenance skills in general, which emphasizes careful, methodical checks that keep systems in balance. car maintenance skills
Beyond the nuts and bolts of torque, a thoughtful maintenance routine for the battery area includes addressing the surrounding environment. If your vehicle operates in regions with high humidity, salt, or significant temperature variation, prepare for faster corrosion at the clamp interface. A light coating of an appropriate battery terminal Protector or anti-corrosion material at the contact points can help extend the life of the connection, provided you follow the product’s directions for use. However, always ensure the product you apply does not insulate the contact area to the point where it reduces the metal-to-metal connection—hydrophobic agents should not be used in places where they will hinder the electrical conduction. Regular inspections are essential here: recheck the clamps after a few weeks of seasonal changes, not just after installation. If you drive in harsh conditions, consider more frequent checks as part of your seasonal maintenance calendar.
The guidance you apply should also reflect a respect for the specific equipment you own. Battery design varies, and the way a sleeve grips a post depends on the geometry of the clamp and the profile of the terminal post. In some cases, the approach to tightening may appear straightforward, but a detail such as a curved clamp surface or a recessed post can influence the torque needed to achieve a secure bite. The principle remains the same: a well-secured terminal must translate to a stable, low-resistance electrical path. And that is what you want when you turn the key on a cold morning or when the alternator is working to feed a full spectrum of electrical loads while you are driving down the highway. By treating the post sleeve as a critical connection, you acknowledge the battery as a system component rather than a single part of the car’s engine bay. The health of the entire electrical system begins here, at the junction of metal and metal, threaded fastener and clamp, and the careful optimization of torque.
For those who prefer a consolidated reference, consider the technical guides that summarize terminal torque for modern automotive batteries. While the specifics vary, the core idea is consistent: use a torque within a safe range, verify by feel and a controlled measure, and re-check after an initial drive. This practice protects both the battery and the vehicle’s electrical system and helps prevent the unpredictable failures that can cascade into more expensive repairs. External reference materials provide more granular specs, but the practical takeaways are universal: clean the contact area, seat the clamp properly, apply the recommended torque, verify, and monitor over time. The discipline of this approach applies whether you are a seasoned DIYer or a professional technician, and it reinforces the through-line of reliability that runs through every vehicle maintenance chapter.
External resource for deeper technical context: https://www.batteries.com/technical-guides/car-battery-terminal-torque-specifications
The Tight Connection: Precision, Safety, and Longevity in Securing Car Battery Post Sleeves
A car’s electrical system speaks through a single, stubbornly quiet signal: a solid, clean connection at the battery terminals. The post sleeves that guard and host those connections are not glamorous parts of the vehicle, but they are essential. When you hear a click of certainty from a well-secured post sleeve, it is not magic; it is physics and practice working in concert. The work of tightening the screw in a post sleeve on a car battery is deceptively simple on the surface, yet it hinges on a balance between sufficient clamping force, proper alignment, and careful maintenance to prevent corrosion and damage over time. The goal is not merely to stop the cable from wobbling. It is to ensure a robust, low-resistance electrical path that stands up to heat, vibration, and the chemical realities of combustion byproducts swirling near the battery case. In this chapter, we explore what that balance looks like in practical terms, how to execute it without courting trouble, and why attention to a handful of details—torque ranges, tool fit, cleanliness, and post-tightening checks—can save you a roadside panic or a costly repair later on.
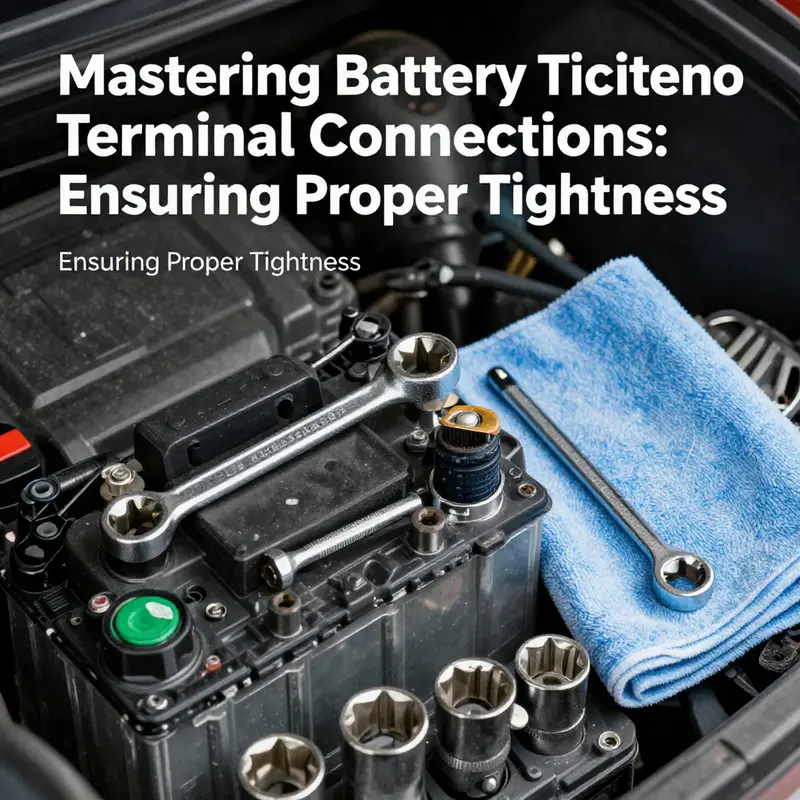
Begin with the simplest, most fundamental precaution: power down and protect yourself. Before you touch the battery, turn off the engine, remove the key, and wait for a moment as the electrical system dissipates its residual energy. This is not mere ritual; it reduces the immediate risk of a short circuit if a tool slips or if metal meets metal in the wrong moment. It also minimizes the chance of arcing, which can occur when a live circuit is disturbed. Wear gloves to shield your skin from battery acid and wear eye protection to guard against splashes or accidental sprays of cleaning solution. In a sense, the post sleeve is a small fortress, and its integrity depends on the security with which you approach it. A careful start sets the tone for what follows.
The next anchor is choosing the right tool and fitting it to the post sleeve itself. The component you tighten—often a nut or a bolt as part of the terminal assembly—comes in specific sizes. For most standard automotive battery terminals, the correct wrench or socket is typically in the 10mm to 13mm range. The danger of an ill-fitting tool is not merely a stubborn bolt. It is the risk of rounding off the bolt head, marring the metal, or stripping threads that will haunt you for months if you must revisit the task. A snug, clean engagement between tool and fastener reduces the temptation to wrench with brute force. You want to feel the fastener move with resistance, not crash through with excessive torque. This is where precision becomes a virtue. The common guideline across many vehicles is to tighten the post sleeve just enough to secure the cable but not so tightly as to deform the terminal or crack the battery post. The line between secure and damaged is narrow, and it is a line you should respect with a steady hand rather than a zealous twist.
A precise tightening requires a sense of the right clamping force. The standard torque specification for many automotive terminals sits in a narrow band: roughly 7 to 15 pound-inches, which translates to about 0.8 to 1.7 Newton-meters. This range exists because every battery and terminal design has its own tolerances. Some terminals have a little more play due to the material used in the sleeve, some are stiffer, and some are designed to resist corrosion better than others. The best practice is to aim for a snug feel that you can replicate on a similar vehicle, and to check the manufacturer’s guidance when available. If you have access to a torque wrench, use it to confirm that you are within the expected range. If not, rely on a tactile sense: the connection should resist further tightening with noticeable but not brutal effort. You should be able to tighten until you feel resistance, and then stop. This measured approach helps keep the post sleeve from suffering microcracks or thread damage that a “just a little more” habit can cause.
Even as you apply the correct torque, you must ensure that the terminal and post are clean and free from corrosion or buildup. A little corrosion—often seen as a pale greenish or whitish crust around the terminal—can dramatically raise contact resistance. That means the same bolt may require more torque to seat and still fail to deliver a clean connection. Before you tighten, inspect both the post sleeve and the cable end. If you notice corrosion, clean it carefully. A simple paste made from baking soda and water is a traditional and effective remedy. Apply it to the corroded areas, gently work it with a non-metallic brush or an old toothbrush, and then rinse with clean water and dry thoroughly. It is essential to ensure complete dryness because moisture in combination with metal can accelerate corrosion and, in some cases, lead to further electrical issues. If the corrosion is stubborn or extensive, you may need to repeat the cleaning and drying steps until the surfaces show a clean, dull metal appearance rather than a gnarly buildup.
Once the area is clean, you must ensure proper alignment. The battery cable must seat onto the post sleeve in a way that the conductor strands relax naturally into the clamp with no kinks or misalignment. Misalignment creates poor contact, which can lead to heat buildup and intermittent disconnections. The simplest check is to look along the axis of the post and the clamp; the cable should lie flat and aligned with its terminal. If you notice that the cable’s insulation is puckering or that its ferrule is not seated squarely, stop and readjust before you apply torque. A crooked connection invites loosening under vibration or arching under load, both of which spell trouble for the electrical system. It is equally important to verify that the positive and negative cables are on the correct posts. A reversed connection is not merely a cosmetic error; it can disrupt the entire circuit and potentially damage sensitive electronics. You want to feel confident that the path from the battery to the starter, to the alternator, and back is coherent and physically secure.
For vehicles with multiple hold-down or clamping points, you may find that a uniform tightening pattern yields the best outcome. In such cases, a diagonal or crisscross sequence can help distribute pressure evenly across the battery case and the terminals, reducing the risk of warping the case or developing localized stress. If your battery setup includes a frame clamp or a set of hold-down bolts, the practice of tightening in a diagonal sequence—front-left, back-right, front-right, back-left, for example—helps ensure that the entire assembly seats evenly. The objective is not to over-tighten one bolt while neglecting another; rather, it is to maintain an even, moderate clamping force across the whole assembly. This is another layer of safety that is often overlooked but can pay dividends in long-term reliability.
After you secure the post sleeve, the next phase is to test the connection in a functional sense rather than just in isolation. Reconnect the battery, turn the ignition to the run position (not starting the engine yet), and observe the behavior of the electrical systems. A healthy connection should yield stable voltage readings at the terminals and smooth operation of the vehicle’s electronics. If you notice dim lights, a blinking dashboard, or a slow crank, you may be dealing with a marginal contact rather than a completely failed one. In such cases, you can repeat the inspection steps, re-clean the terminals if necessary, and re-tighten within the safe torque range. Do not be tempted to over-tighten in a fear-driven attempt to fix a hapless symptom; often, the root cause is poor contact rather than simply insufficient clamping force. If the problem persists after re-seating the connection and cleaning the posts, a more thorough electrical diagnosis may be warranted, including checking the entire cable harness, the battery’s health, and the alternator’s charging performance.
The life of a post sleeve is also tied to how you treat the surface once the tight connection is achieved. A common, practical tip is to apply a thin layer of dielectric grease or corrosion-preventive compound to the terminal and the post surfaces after cleaning. This is not a substitute for proper tightening or cleaning but a preventive measure that helps minimize the early formation of corrosion, particularly in climates with high humidity or where road salt is a factor. The grease forms a barrier against moisture while still allowing electrical contact to be maintained. It is essential to use only the recommended type of protectant for battery terminals; some compounds can become sticky or attract dust, while others stay slippery and attract less grime. A light, even coat is all that is needed. You should also ensure that the area around the post sleeve remains free of moisture, dirt, and organic debris that could trap moisture and promote corrosion. Over the life of a battery, small environmental changes can take a toll, and a small, well-maintained sleeve can help you avoid the kind of trouble that prompts a jump-start or a battery replacement.
The professional cadence of maintenance and inspection is what ultimately distinguishes a robust, durable electrical connection from a temporary fix. Car owners who routinely inspect and maintain their battery terminals can catch a developing issue long before it becomes a roadside interruption. A practical habit is to recheck the tightness after a few minutes of operation and again after a short drive. The heat generated by engine operation can cause materials to expand slightly, and vibration can loosen clamps over time. A quick torque recheck after a drive helps confirm that the connection is still within the safe range and that the cable remains properly seated. The habit of rechecking is not a burden; it is a straightforward safeguard that complements good initial tightening. It also mirrors the larger principle of preventive maintenance that governs most successful automotive care: small, consistent actions lead to resilient performance.
In the broader context of vehicle care, the practice of precisely tightening the post sleeve aligns with the basics of electrical reliability. Loose connections create resistance, which can lead to heat generation and accelerated corrosion, while overly aggressive tightening risks mechanical damage. The sweet spot is a snug, clean connection that can sustain normal operation without undue stress on the terminals or the battery case. When you master this balance, you gain more than a reliable start; you gain confidence in the vehicle’s reliability, especially in challenging conditions such as cold starts in winter or the demands of a high-electrical-load environment, where the system’s demand for clean, solid connections increases. A well-executed post sleeve tightening also reduces the likelihood of voltage drops that can affect sensitive electronics, including modern engine-control modules and safety systems. The value of careful terminal maintenance extends beyond one season; it reinforces the resilience of the entire electrical architecture.
As with any mechanical task in a vehicle, context matters. If you are working on an older vehicle or a model with nonstandard hardware, do not assume the 7–15 lb-in range applies identically. Instead, consult the owner’s manual or the terminal manufacturer’s guidelines for the exact torque specification. The manual will often provide specifics that reflect the exact build and materials of your particular battery system. In the absence of explicit instructions, begin with the conservative end of the common range and adjust based on the feel of the connection, the cleanliness of the contact surfaces, and the stability of the assembly under light movement. A cautious, informed approach reduces the risk of inflicting costly damage while still delivering the reliability you expect from a well-maintained battery.
Finally, it is helpful to recognize that this task lives at the intersection of practical hands-on skill and ongoing maintenance philosophy. The act of tightening a post sleeve is not merely a single moment of effort; it is part of a larger discipline of care that keeps a vehicle’s electrical system intact through seasons of use and under varying driving conditions. The routine you adopt—turning off the vehicle, selecting the right tool, cleaning away corrosion, aligning the cable, applying a measured torque, rechecking after a drive, and protecting the contact surfaces—provides a repeatable, dependable process you can rely on. When done well, the process preserves power delivery, protects sensitive electronics, and extends the life of both battery and cables. In that sense, the post sleeve is a tiny hinge on which the whole performance of the car’s electrical system swings; with patience and precision, we keep that hinge smooth and responsive.
For readers seeking a broader, expert overview of battery terminal practices, the following external resource offers a comprehensive set of best-practice considerations that complement the approach outlined here: Best-practices for battery terminal tightening. And for a practical, experience-driven angle on related maintenance skills, see car maintenance skills to strengthen your overall toolkit as you work through tasks like post sleeve tightening. These connections to broader automotive maintenance insights can help you build a resilient maintenance habit that supports reliable starts and steady electrical performance across the life of the vehicle.
In closing, tightening a screw in the post sleeve is a deceptively simple task that embodies a wider truth about automotive care: precision, cleanliness, and measured action yield durable results. The chain from a clean contact to a stable electrical system runs through careful preparation, proper tool selection, clean surfaces, correct alignment, and a torque that respects the limits of the hardware. When you conduct this sequence with attention, you protect not only the battery and its cables but the broader network that powers the vehicle’s performance, comfort, and safety. The next time you encounter a stubborn starting issue, consider revisiting the most basic, most reliable place to begin—the post sleeve—and approach it with the same patient rigor you would bring to any critical maintenance task.
Final thoughts
In summary, understanding the correct procedures for tightening the screw-in post sleeve on a car battery is essential for vehicle maintenance. Proper torque specifications not only ensure reliable electrical connections but also protect against costly damages from over-tightening. By following the outlined best practices, vehicle owners and mechanics can contribute to the longevity and performance of the battery and, by extension, the vehicle itself. Implementing these insights into routine checks can prevent surprises down the road and provide peace of mind during every journey.