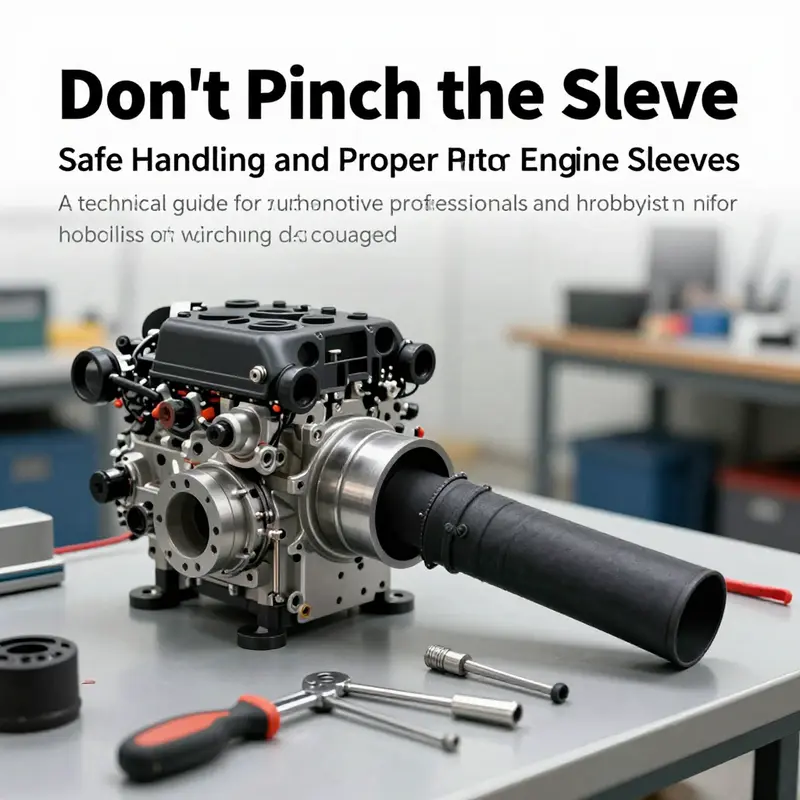
Nitro engine sleeves sit at the heart of small displacement power, bearing the load between the piston and the engine block. In both motorcycle-adjacent performance views and RC-powered workflows found in auto shops and repair bays, there is a misconception that pinching or squeezing a sleeve can quickly reveal fit or compression. In reality, pinching is a risky, unreliable habit that can damage the sleeve, the bore, and the piston, leading to degraded compression, hot spots, or even engine failure. This article targets professionals and enthusiasts across motorcycle owners, auto owners, auto parts distributors and wholesalers, and auto repair shops who may encounter nitro sleeves in hobbyist applications, test rigs, or small-scale engines. The content is organized into four interconnected chapters: a conceptual overview that explains the risks of pinching, proper removal techniques with the right tools, correct installation methods to ensure longevity, and practical precautions plus official guidance to keep operations safe and compliant. By aligning with manufacturer recommendations and industry best practices, technicians can minimize downtime, avoid costly damage, and ensure sleeves perform consistently in real-world use cases.
null
null
When ‘Pinch’ Is the Wrong Word: Safe Removal and Replacement of a Nitro Engine Sleeve
The phrase “pinch a nitro engine sleeve” suggests compression or squeezing, but that is not a safe or accurate action when working on a nitro RC engine. What you likely want is guidance on removing, inspecting, and replacing a worn cylinder sleeve—sometimes called a liner—without causing further damage. This chapter walks through the reasoning, the right tools, and the controlled steps that achieve the goal the term implies, while avoiding the risks behind the misleading word “pinch.”
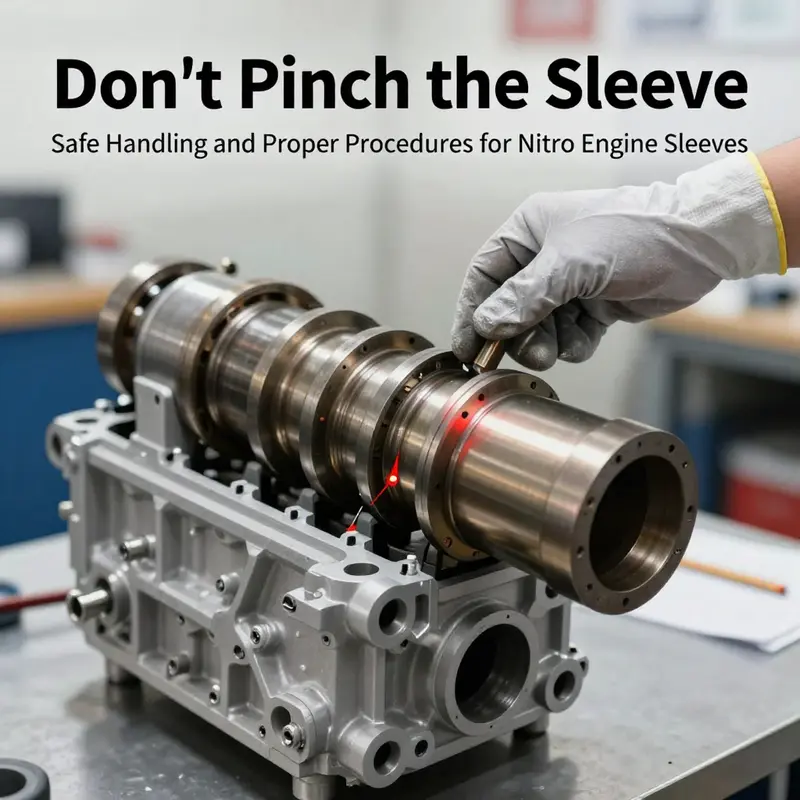
A nitro engine sleeve sits tightly in an aluminum block and forms the bore that the piston travels in. It endures intense heat, friction, and chemical exposure from fuel and exhaust. Over time the sleeve wears, scores, or becomes distorted. Replacing it restores compression and performance, but removal and installation are precision processes. The key idea is to avoid force and focus on controlled, even extraction and insertion. Force leads to cracked blocks, warped sleeves, and ruined engines. Precision and patience prevent those outcomes.
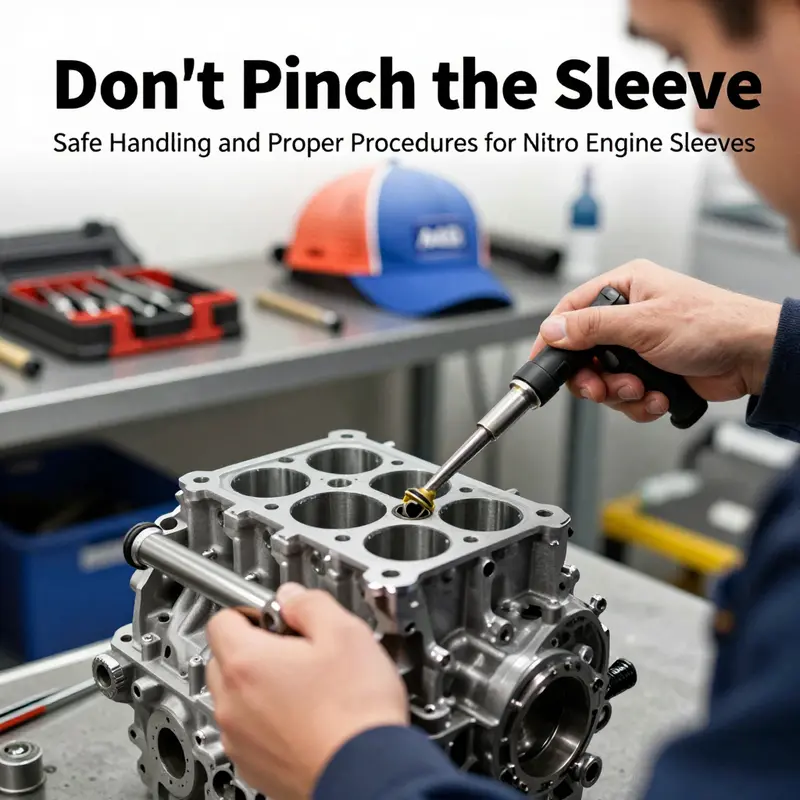
Start by preparing the workspace and the engine. Work on a clean, level bench with good lighting. Keep a tray for fasteners and small parts so nothing goes missing. Always make sure the engine is completely cool. Residual heat can hide distortions and can make lubricants thin, changing how parts behave. Remove the crankcase and any accessories that block access to the sleeve. Keep a record of fastener locations and torque values if available. Clean away grime and fuel residue around the top and base of the sleeve; a clean surface reduces the risk of contaminants entering the engine during the procedure.
Use the right tools. The single most valuable investment for safe sleeve removal is a dedicated sleeve puller sized for small nitro engines. These pullers grip the sleeve internally and apply even axial force. A puller reduces the chance of bending the sleeve or chipping the block. If you do not have a puller, avoid makeshift options such as wedging screwdrivers or hammering tools against the sleeve. Those improvisations transfer uneven forces to thin aluminum and cause permanent damage. A bench-mounted arbor press and a proper sleeve installer block are the correct tools for fitting a new liner. A press allows slow, straight motion that seats the sleeve evenly.
Before you apply a puller, inspect the sleeve for obvious issues. Look for scoring, visible cracks, or corrosion at the base. If the sleeve is only lightly stuck, some penetrating fluid applied judiciously around the base can help. Allow time for the fluid to work; do not heat the block with an open flame to loosen the sleeve. Heating aluminum unevenly warps the block and changes clearances. If the sleeve has frozen due to corrosion, professional shop processes such as controlled thermal cycling or a hydraulic press may be required.
When using the puller, center it carefully. The jaws or collets must contact the sleeve squarely. Begin applying force slowly and evenly. If the sleeve resists at first, reverse the direction slightly and reapply to seat the puller more securely. Small, steady increments of force prevent sudden fractures. As the liner begins to move, watch for any binding or asymmetric movement. If the sleeve heels, stop and re-center the puller. Never use shock force to finish extraction; sudden releases can send parts flying and can damage the block face.
Once the sleeve is removed, resist the temptation to immediately drop it on the bench. Support it and rotate it while inspecting the bore. Measure internal diameters and check for taper with a caliper and a straight-edge. Look for high spots, pitting, or embedded debris. Also inspect the mating surface inside the block. The block bore must be round and free of burrs. Any gouges in the block may require honing, re-boring, or professional machining. A light honing can remove minor imperfections and restore a uniform surface for the new sleeve, but over-honing risks changing the block’s geometry.
When you prepare a new sleeve for installation, cleanliness and lubrication are essential. A thin film of light oil on the sleeve’s outer surface eases the press-fit process and helps prevent galling. Do not use heavy greases or contaminants that can trap particulates. Verify the sleeve is the correct size for the block and piston. Sleeves are manufactured in precise tolerances; a mismatched sleeve will either not seat or will distort when forced.
Using an arbor press or a sleeve installer, seat the new liner slowly and squarely. Apply even pressure and watch for any tilt. The sleeve should enter the block in a straight line. If you feel a sudden resistance change, stop and verify alignment. Small alignment errors lead to out-of-square sleeves that cause rapid piston and ring wear. A proper installer block provides a flat, broad contact area that prevents the sleeve from cocking during insertion.
After installing the sleeve, re-measure the bore. Check roundness and taper at several depths with a telescoping gauge or inside micrometer. Ensure the sleeve’s top face sits flush with the block or at the intended specification. Some engines require the sleeve to protrude slightly; others require it to be flush. Follow manufacturer specifications for installed height and any sealing methods. If the sleeve uses sealant or an O-ring, apply the specified material in the correct amount. Excess sealant can squeeze into the bore and score components.
Once the sleeve is installed and verified, it is wise to perform a light break-in procedure for the new liner. Fit the piston and rings, then turn the engine by hand to feel for smoothness. Start the engine with a conservative needle setting and run for short intervals while monitoring temperature and compression. New sleeves and rings bed together during early running. Gentle break-in extends life and ensures consistent performance.
Throughout removal and installation, document what you do. Photographs of step positions, torque values, and measurement readings help if you later need to explain or revisit choices. If a sleeve binds, cracks, or the block shows damage at any point, stop and seek professional advice. Attempting advanced fixes without the right equipment can make repairs impossible.
Safety cannot be overstated. Wear safety glasses when extracting a sleeve and when using a press. Small metal chips or fragments can be generated during removal, especially if the sleeve breaks. Gloves are helpful for handling hot or sharp parts. Keep solvents and penetrating oils away from ignition sources. Work in a ventilated area to avoid inhaling fumes.
If you are unsure at any stage, consult manufacturer guidance or experienced hobbyists. Community resources and specialist forums contain practical threads and photos that show exact techniques for specific engines. One useful walkthrough on safe sleeve extraction and professional tips can be found in a detailed community discussion on proper techniques; it explains the puller method and common pitfalls for RC engines. That external resource offers practical examples that complement these principles.
For broader engine sleeve fundamentals—including when sleeves are used and how they differ across engine types—there is a concise primer that covers sleeve construction and removal techniques. This internal resource, which focuses on engine sleeve basics and removal methods, aligns with the procedures described here and offers additional diagrams and explanations that help visualize the process: how to remove engine sleeves.
Replacing a nitro engine sleeve is a restoration task that returns lost compression and performance. It demands respect for materials, a measured approach, and the right tools. Avoid the notion of “pinching” as a technique; think instead of controlled extraction, precise measurement, and even, slow installation. When these elements come together, you preserve the cylinder block, protect the piston assembly, and extend the life of your nitro engine.
External reference: For a community-based step-by-step discussion of nitro sleeve removal techniques and tool recommendations, see the practical thread at RCUniverse: https://www.rcuniverse.com/forum/t-1798308/
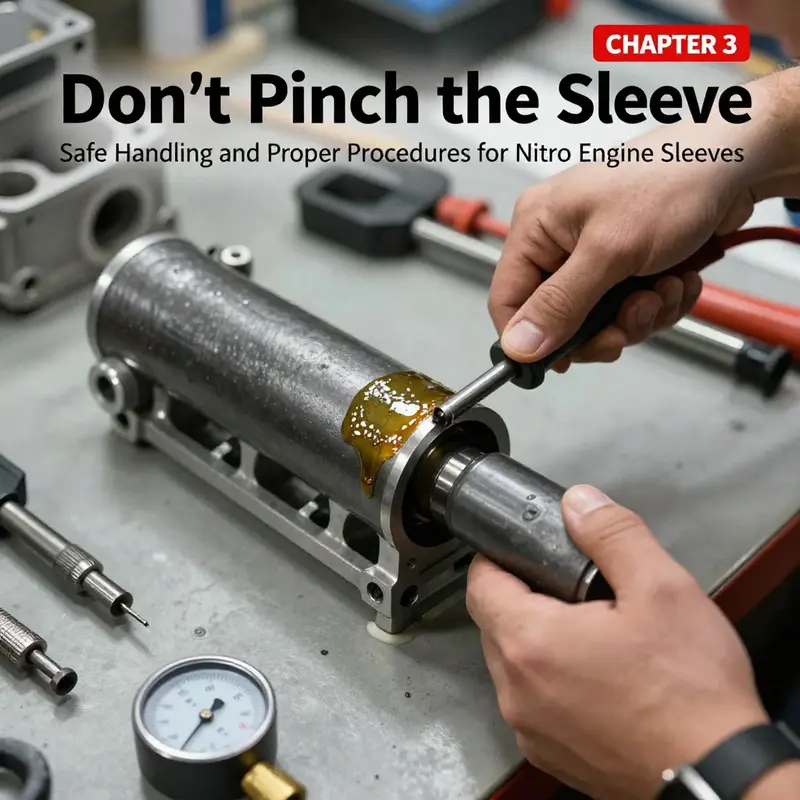
Pinch Not: Correct Installation and Seating of a Nitro Engine Sleeve for True Longevity
When enthusiasts first encounter the idea of pinching a nitro engine sleeve, the mind naturally jumps to dramatic, forceful actions in the workshop. Yet the phrase often travels with a misleading baggage: pinching a sleeve is not a sanctioned or beneficial technique in RC nitro engine work. In fact, attempting to crimp, squeeze, or forcibly compress a cylinder sleeve into the engine block can invite a cascade of failures—from a distorted bore and misaligned porting to seizure of the piston and accelerated wear that shortens the engine’s life. The path to longevity in these tiny powerplants runs counter to brute force. It lies instead in precise seating, careful alignment, and the disciplined use of the right tools and procedures. This chapter explores what that means in practice, weaving together the core ideas of installation, seating, and long-term reliability into a coherent approach that holds true across the many variations of nitro RC engines.
First, it helps to ground the discussion in what a sleeve actually does within a nitro engine. The cylinder sleeve, or liner, creates a stable, wear-resistant surface for the piston to move within. Its job is to maintain concentricity with the crankshaft axis, to resist the heat and pressure generated during combustion, and to provide a surface that won’t gall or seize as temperatures swing with fuel mixture, air density, and load. When a sleeve is in good condition and properly seated, the piston travels smoothly, compression remains consistent, and the engine maintains reliable performance over time. When a sleeve is forced into place or misaligned, the very geometry that makes the engine predictable starts to degrade. That is the essence of the problem behind the term pinch: any attempt to squeeze or crimp the sleeve into place disrupts the delicate tolerances that matter most for longevity.
The correct installation sequence is less glamorous than the dramatic image of pinching might imply, but it is fundamentally mechanical and repeatable. A sleeve must be handled with care, cooled to the proper temperature, and guided straight into the bore using the appropriate installation tools. In most cases this means a dedicated sleeve installer or a press setup designed to apply uniform, axial force without introducing lateral stress. The goal is not to force the sleeve past a barrier but to seat it squarely and evenly so that its inner surface aligns perfectly with the piston’s motion and with the engine block’s bore. The work environment matters too. A clean, well-lit workspace free of dust and stray fibers reduces the risk of introducing burrs or debris that could snag the sleeve during seating. Even the air you breathe in and the lubrication you apply matter because microscopic contaminants can become learning points for wear over hundreds of hours of running.
In practice, the path to a proper seating begins with inspection. Before any insert or removal, you inspect the bore for scoring, burrs, or any distortion that would prevent true seating. A sleeve that is already warped or out of round should not be coaxed into place; it should be replaced with a sleeve that meets the engine’s specified tolerances. The next step is cleanliness: wipe the bore and the sleeve, removing any oil residue, metal shavings, or dust. A light coating of compatible lubricant on the sleeve’s exterior can aid seating, but it must be a film, not a pool, because excess lubricant can mask resistance that signals misalignment or a foreign particle. The key is not lubrication as a substitute for fit, but lubrication as an aid to seating and to minimize friction during the alignment process.
The act of seating is where the difference between correct technique and risk becomes most apparent. A sleeve should slide into the bore with minimal resistance when aligned properly. If resistance feels unusual or markedly uneven, something is misaligned, and you should stop to reassess. Here the preferred tools come into play. A sleeve puller is used to gently extract a sleeve if it is not seating correctly or needs to be realigned. For installation, a sleeve installer tool or an arbor press can deliver controlled, uniform pressure. The hallmark of good seating is even contact along the entire circumference of the sleeve as it enters the bore, with no pockets of misfit where the sleeve leans or tilts. You test this by rotating the setup gently and listening for any unusual binding or grinding; you should feel a uniform, frictionless motion as the sleeve approaches its final position.
A common pitfall is to over-torque or over-press the sleeve during seating in an effort to compensate for minor misalignment. This is precisely where pinch-like behavior can first appear in miniature form: a misguided impulse to force a part into place rather than correcting the underlying misfit. The correct approach emphasizes patience and incremental pressure. If you encounter stiff resistance that does not disappear with a minor readjustment, you stop, recheck alignment, and re-measure the bore with appropriate gauges. Precision, not speed, is the ally of longevity here. And because the tolerances are tight, even a fraction of a millimeter can be meaningful. A misaligned sleeve will translate into nonuniform piston travel, uneven compression, and stress concentrations that manifest as heat hotspots, scoring, or ring/liner wear when the engine runs under load.
The theme of alignment threads through every step, including the preparation of environment and tools. Tools must be clean and calibrated to the engine’s specifications. A cool, dry surface for assembly helps keep heat from introducing thermal expansion that could obscure fit during seating. The engine should be at room temperature or slightly cooler when you begin; heating a sleeve before seating might reduce friction, but it also risks introducing thermal gradients that can warp the bore or distort the sleeve as it cools. Likewise, cooling the engine block rather than heating the sleeve can be a safer route to reduce the risk of binding. The aim is a stable interface, not a temporary reduction in friction that hides misalignment until the engine heats up in flight or on the test stand.
A crucial part of the narrative is acknowledging what not to do. The management of sleeves is not a domain for improvisation or trial-and-error hacks. Prizing a sleeve with a screwdriver, hammering with improvised tools, or tapping the sleeve in with force are missteps that invite marginal gains at the cost of catastrophic failure. The forensic logic is straightforward: if you read resistance into the seating process, you must stop and re-evaluate. A clean bore, a straight sleeve, and the use of proper, purpose-built tools should make the seating nearly frictionless. The moment you suspect a burr, a misalignment, or a foreign particle, you pause. You don’t chase a five-percent improvement at the risk of a hundred-percent failure in the middle of a race event.
To supplement the hands-on discipline, a broader understanding of the sleeve’s role informs better decisions. If you and your track mates explore the topic, you may encounter explanations of why sleeves exist in the first place, how different sleeve materials interact with the engine block, and what the seated surface must achieve to sustain high thermal loads. An inline explainer on engine sleeves can be a useful companion reference, and you can review a concise overview that clarifies the concept of sleeves in engines in general by visiting resources that distill the theory and the practice into a readable format. For readers curious about the foundational ideas behind sleeves, an accessible explainer is available here: engine sleeves explained. This reference helps connect the hands-on work with the conceptual underpinnings and shows how those ideas translate into better maintenance habits and longer engine life.
Throughout the process, the principle of consistent test checks helps translate theory into durable results. After seating, you re-check the bore for roundness and concentricity. A light pass with a bore gauge or a calibrated micrometer can confirm that the bore is within tolerance and that the sleeve sits squarely. Then you proceed to a cautious initial rotation test: manually rotate the piston through several cycles while monitoring for any rough spots, binding, or changes in resistance. The goal is to confirm an even, smooth motion and a consistent compression feel. If you notice sudden changes in resistance or any deviation in the motion, you stop and reassess. Even when the mechanical fit feels fine, you should consider a preliminary running test cycle in a controlled environment to observe heat behavior, throttle response, and compression stability. The aim is to catch any seating anomalies before they become field failures.
Lubrication plays a supporting role, not a substitute for fit. A thin, even film of appropriate lubricant on the exterior sleeve helps seating by reducing friction and preventing galling during installation. It also establishes a moisture barrier that helps prevent corrosion the first time the engine experiences dynamic loads. But the lubrication won’t compensate for misalignment or a sleeve that is undersized or oversized for the bore. The installer’s job is to ensure the sleeve’s outer surface and the bore share a clean, consistent interface, and then to let the precision of the fit do the heavy lifting over the engine’s lifetime. In the end, longevity is as much about the micro-level contact geometry as it is about the macro-level performance. When the sleeve is seated correctly, the engine runs with consistent compression, stable temperatures, and predictable power output that can be sustained across many hours of operation.
In a broader sense, the discipline around sleeve seating reflects a larger truth about maintaining nitro RC engines: every part is a constraint, but every constraint is negotiable through careful technique and a respect for precision. It is tempting to chase quick wins, especially when a race is looming or a build is behind schedule. Yet the cost of shortcutting the seating process tends to show up later as reduced compression, uneven wear, or even a seized cylinder during a heat cycle under load. The responsible path is to invest time in correct seating now, to verify alignment, to use the right tools, and to document the process so that future maintenance can be performed with the same rigor. In this way, the practice of seating becomes part of a reliable maintenance culture rather than a one-off ritual that yields only temporary gains.
As this chapter draws together the threads of installation, seating, and longevity, it also links to broader guidance on engine sleeves and their role in RC powerplants. For readers seeking a concise, general overview of what engine sleeves are and why they matter, a targeted explainer provides a helpful foundation that complements the hands-on work described here. You can explore that explanation at this resource: engine sleeves explained. This link offers a complementary view that helps connect the practical steps you take in the workshop with the broader engineering context that underpins sleeve design and performance. Remember, the point is not to chase a single trick but to cultivate a repeatable, reliable approach that protects compression, minimizes wear, and maximizes the time between costly repairs.
Finally, the broader practice of sleeve care and installation sits within a landscape of engine maintenance that includes choice of fuel, tuning practices, cooling, and routine inspection. While this chapter focused on the sleeve itself and the seating process, the life of a nitro RC engine rests on an integrated habit of care. Regular checks for bore condition, clean fuel lines that don’t introduce contaminants, and a disciplined cooling approach all contribute to a stable operating envelope. In that sense, proper seating is a cornerstone, but longevity depends on consistent, holistic maintenance. When the sleeve sits true and the engine breathes cleanly, you often see the payoff in smoother starts, steadier idle, and the kind of dependable throttle response that makes the difference in a race or a casual run around the pits.
For enthusiasts who want to extend their learning beyond the practical, remember that the mechanics of sleeves intersect with many other engine features—port timing, piston geometry, and the specific bore-to-stroke relationship that defines a given model’s compression dynamics. The precise fit you achieve during seating is a foundation, not a destination. As you gain experience with your particular engine family, you’ll recognize subtle cues in how the sleeve settles and how the engine behaves under load. Those cues become a personal guide to when an engine is truly healthy and when it’s signaling a wear pattern that warrants attention. In that way, the act of seating a nitro engine sleeve becomes less of a one-time procedure and more of a continual discipline, integrated into every rebuild, inspection, and field test.
Internal link reference: engine sleeves explained. This resource helps frame the practical steps described above within the broader context of sleeve design and function, so you can see why precise seating matters as much as the seating itself. Internal and external resources aside, your best guide is the engine you’re rebuilding: a sleeve that is truly seated will reward you with reliable compression, consistent performance, and a longer, more predictable operating life. External guidance is helpful, but the hands-on, measured approach described here is what translates into real-world longevity for nitro RC engines. External resource: https://www.hpiracing.com/support
Rethinking the Pinch: Safe Handling and Official Guidance for Nitro Engine Sleeves
Confusion around the term pinch often surfaces when hobbyists talk about nitro-powered engines. The idea of pinching a sleeve implies a forceful squeeze or compression, a maneuver that sounds technical but is not a sanctioned or safe technique for nitro RC engines. The reality is that attempting to pinch or squeeze a nitro engine sleeve can nick, burr, or distort the bore, and it can damage the sleeve, the block, or the piston. The consequences ripple through performance and reliability, sometimes ending a session with a seized piston or a ruined cylinder. This chapter does not advocate any pinch-related method. Instead, it builds a careful, practical understanding of sleeves, their function, and the correct procedures for removal and installation. It also points to the official guidance that governs maintenance work, so readers can approach nitro sleeves with confidence, precision, and respect for the engine’s tolerances and materials.
To begin, it helps to picture what a sleeve is in a nitro engine. In these powerplants, the sleeve is the cylinder wall, a precisely machined bore that interacts with the piston as it travels up and down within the block. Unlike automotive engines, where sleeves are sometimes described in broader terms of wear and replacement, model nitro engines rely on a compact, high-precision interface between the bore, piston, and rings. The sleeve must seat squarely within the engine block, align perfectly with the crankshaft axis, and tolerate the heat and pressure generated during running. Any misalignment or unintended deformation can translate into scoring, leakage, or reduced compression. This is why proper installation and removal demand calm hands, the right tools, and a respect for tolerances that are far tighter than most casual projects.
The idea of pinching as a technique often arises from a misguided notion of control. Some readers might imagine pinching as a way to seat the sleeve more firmly or to reduce play. In truth, sleeves are designed to be installed with a precise press fit or with a controlled, measured seating process. The risk of pinching lies in small, almost invisible distortions that ripen into larger problems when the engine warms up. The sleeve can become slightly ovalized, or its mating surface can pick up burrs from contact with an improper tool. Even tiny deviations can alter the seal against the head or affect the piston’s stroke. The upshot is that what some might call “getting it to bite” with a pinch is more likely to degrade performance than to improve it. The responsible approach is to use the recommended removal and installation methods and to consult the official manuals for the exact fits, tolerances, and procedures specific to a given engine family.
In practical terms, sleeve maintenance in nitro engines hinges on two complementary activities: removing an old or damaged sleeve and installing a new one with care. Removal, in particular, requires a tool designed for the task. A sleeve puller, used correctly, can grip the sleeve’s outer surface without marring the bore or the block. Forcing a sleeve out with improvised tools—screwdrivers, pliers, or other blunt instruments—introduces the very risks pinching seeks to avoid. The puller is designed to distribute load evenly around the circumference, avoiding concentrated pressure that could crack or deform the bore. When the sleeve is ready to release, light taps with a soft mallet are sometimes used in combination with a gradual back-and-forth action, always under careful observation to ensure the sleeve is moving freely and not binding.
Installing a new sleeve is equally delicate. The sleeve must drop into the block with core alignment and seating accuracy. A misaligned sleeve can create an eccentric bore, which leads to uneven piston movement, loss of compression, or poor lubrication. The installation process typically involves a controlled press or a sleeve installer tool that supports the sleeve’s outer diameter without deforming the inner bore. Many technicians apply a light coat of compatible oil or a lubricating agent to assist seating, but they avoid any thick lubricants that could contaminate the combustion chamber. The key principle is simple: the sleeve should fit snugly, but it should not be forced. A snug fit is the result of precise manufacturing tolerances and proper handling, not of brute force.
A seasoned approach to sleeve work always begins with a clean, cool engine. Working on a hot engine invites expansion and deformation at the very margins where tolerances live. That is why the first precaution is to allow the engine to cool completely before attempting any sleeve work. It is also essential to gather the right tools before you start—pullers designed for sleeves, a small press or installer kit, soft mallets, appropriate lubricants, and clean, lint-free rags. Precision is a virtue here, and so is patience. The moment you sense resistance when inserting a sleeve, you pause, realign, and reassess rather than forcing the part into place. Inspection becomes a form of ongoing troubleshooting: look for burrs, scoring, misalignment marks, or any surface imperfections on both the sleeve and the bore. Any sign of damage should trigger a halt and a consult with official guidance or manufacturer manuals before proceeding.
In many ways, the sleeve’s health is a barometer of the engine’s overall condition. A sleeve that is worn, corroded, or nicked will usually reveal itself through symptoms as the engine runs. Poor compression is the most common red flag. If the sleeve has worn away the tight seal with the piston crown, the engine will lose pressure on compression strokes. Overheating can also accompany sleeve issues; a compromised bore can disrupt airflow, fuel distribution, and heat transfer. Conversely, if the sleeve is misseated, the piston may rub against unexpected parts, producing unusual wear patterns, friction, and eventually heat. The troubleshooting path is methodical: confirm the sleeve’s compatibility with the engine model, verify proper bore and stroke dimensions, and ensure the sleeve and bore are clean and free of foreign matter. A simple misstep in cleaning or alignment can create mismatched surfaces that mimic more complex failures.
Central to navigating these situations is a commitment to official guidance. The manuals published by engine manufacturers and the maintenance guides produced by RC community experts are the most trustworthy sources. They lay out the exact steps, the correct tools, and the precise tolerances required to keep the engine operating in its intended performance envelope. Following these resources reduces guesswork and the temptation to improvise with improvised fixtures or homegrown tricks. It also frames your work within a safety and reliability context—two priorities that often take a back seat in haste. The manuals typically describe not only how to remove and install sleeves but also how to inspect, measure, and test after service. They remind the technician to check the alignment, confirm the bore’s roundness, and verify that the sleeve seats properly against the block face. They also specify what lubricants are appropriate, what residues must be cleaned away, and how to test the engine after assembly to confirm proper operation under load.
The more you learn about sleeves, the more you realize that most of the work is preventive and diagnostic rather than exotic repair work. Good maintenance habits—gentle handling, clean tools, and strict adherence to torque and press-fit recommendations—mean that sleeves last longer, and when they do need attention, the process is predictable rather than improvisational. One way to internalize this is to visualize the sleeve as a critical interface that must stay true to its geometry. Any deviation can ripple through the engine’s breathing cycle, affecting fuel-air mixing, ignition timing, and cooling. The dialogue between sleeve and piston is delicate; it is a dialogue written in microns and precise fits rather than in brute force.
For readers who want to connect theory to practice without crossing into risky territory, a practical path is to examine how an experienced technician approaches the task. They begin with a visual inspection of the engine’s exterior and remove any covers to access the sleeve assembly. They then verify tool compatibility and prepare a clean workspace. When removing a sleeve, they work slowly, ensuring the sleeve moves freely and does not bind in the bore. When installing, they focus on line-up: aligning the sleeve’s bore with the engine’s centerline and verifying the seating surface with the block face. If resistance is encountered, they stop, assess burrs, verify alignment, and check for debris that could cause misalignment. This is not a sequence of ad hoc steps but a disciplined routine that honors the engine’s design specifications. In this way, the chapter reframes the concept of “pinching” as a cautionary footnote, not a technique to be learned or practiced.
Readers who want to deepen their understanding of sleeves beyond the practical steps can benefit from exploring targeted resources that discuss what sleeves are, whether all engines use sleeves, and how different sleeve configurations affect performance. This broader context helps clarify why the recommended approaches exist and why improvised manipulation is discouraged. For readers who seek more direct guidance on sleeve removal, a concise guide on how to remove engine sleeves can be a reliable starting point. The internal resource linked here provides a careful, procedure-driven look at sleeves and their removal, reinforcing the idea that proper tools and method trump any attempt at forceful adjustment. how to remove engine sleeves
As this chapter moves toward a close, the emphasis remains steady: do not improvise with pinch-like techniques. When faced with sleeve-related issues, the best path is to consult the official manuals and to reach out to experienced RC hobbyists or technicians who have navigated similar challenges. The goal is not merely to fix a problem but to preserve the engine’s reliability, performance, and longevity. If you suspect your nitro engine’s sleeve is compromised—whether through loss of compression, overheating, or unusual wear—the safest course is to pause, verify compatibility, and follow the manufacturer’s recommended procedures for inspection, removal, and replacement. This approach minimizes risk and ensures that any maintenance work aligns with the engine’s designed tolerances and materials.
In closing, the conversation about pinching a nitro engine sleeve serves as a reminder of the broader discipline of model-engine maintenance. The sleeve is a small, highly engineered component that plays a pivotal role in the engine’s breathing and sealing. The responsible path is to treat sleeve work as precise mechanical work, governed by documented procedures rather than improvised methods. By embracing proper tools, careful handling, and official guidance, hobbyists can sustain the performance that makes nitro power exciting while avoiding the pitfalls that come from forceful, ill-advised maneuvers. The chapter thus invites readers to shift from a mindset of quick fixes to a mindset of precise, documented practice that honors the integrity of the engine and the enjoyment of the hobby. For further perspectives and broader discussion on maintenance practices, consider engaging with community resources that house experience-driven guidance and troubleshooting discussions.
External resource for broader guidance: https://www.rcgroups.com/forums/
Final thoughts
Pinching a nitro engine sleeve is a misguided shortcut that can undermine the integrity of the engine’s bore, sleeve, and piston. The recommended path is to rely on purpose-built tools—sleeve pullers for removal and installers or presses for seating—paired with proper lubrication and alignment. This disciplined approach reduces the risk of nicking, scoring, or misalignment, and it supports consistent compression and longevity under real-world operating conditions. For automotive professionals and RC hobby shops alike, the investment in the right tools and adherence to official guidelines translates to improved reliability, reduced downtime, and safer, more predictable performance across fleets and repair bays. The key takeaway is clear: controlled, tool-assisted handling of nitro engine sleeves outperforms improvisation, protecting both engines and the technicians who service them.